blood_raven_240 Posted November 17, 2008 Share Posted November 17, 2008 Cheers for the comments so far, with any luck they'll start pouring in now as my Asmodai is making some progress... Dude, you can bet there's going to be a ton of comments pouring in, cause that Asmodai is totally rockin awesome, man! Cant wait to see how he turns out in the end... this is one of the most epic projects I think I've seen yet... scratchbuilt asmodai... whoa... just whoa... ;) Link to comment Share on other sites More sharing options...
Captain Mick Posted November 17, 2008 Share Posted November 17, 2008 I really like them again :) good job!! Link to comment Share on other sites More sharing options...
Asmodeus' Swordhand Posted November 17, 2008 Share Posted November 17, 2008 He looks great. Have you seen this tutorial? Link to comment Share on other sites More sharing options...
Alys Dwr Posted November 17, 2008 Author Share Posted November 17, 2008 Cheers all. I have indeed seen that tutorial (but not for a while), it's the one that started my robe GSing over a year ago and i'd like to think i've come a long way since then. I'll try to dig up a pic of my first attempt to share. The face on my HUGE Asmodai is my first attempt at actually sculpring anything as detailed hence why i took it so slow. The bottom jaw bit took umpteen attempts and i would have destroyed the teeth-grill if it hadn't cured. I'm quite impressed though, as a reward i might go and buy one of the GW sculpting tools. Al +EDIT+ meant to ask what people think for the weapons? Obviously i'm very very very tempted to go with the crozius & powersword combination even though it isn't legal. I guess that means interchangable power sword/shooty weapon for his right arm then? With all the awesome combi flamers floating around at the moment i might have a go for one of those. +/EDIT+ Link to comment Share on other sites More sharing options...
Alys Dwr Posted November 20, 2008 Author Share Posted November 20, 2008 All this double posting isn't good for my health. Regardless, here is a scale shot of Asmodai with some mock-up blutac arms so that i have an idea of the correct size for them. I've started on the backpack, need to do a load more rivets on it though and i'm not sure how i'll manage the skeleton draped across the back. I've also GSed the chains holding the icon and a length down his right thigh for Rosarius attachment later and got cracking with the shoulder pads. Once the rims are finished i'll be GSing the icons on. http://i92.photobucket.com/albums/l39/bonsai-al/100_1150.jpg C+C welcomed. Al Link to comment Share on other sites More sharing options...
Asmodeus' Swordhand Posted November 20, 2008 Share Posted November 20, 2008 I like it a lot. :P Link to comment Share on other sites More sharing options...
Snozz Posted November 20, 2008 Share Posted November 20, 2008 Wows, that is one nice model there, I'm very impressed with the robes. :lol: Link to comment Share on other sites More sharing options...
Captain Mick Posted November 20, 2008 Share Posted November 20, 2008 He looks great very nice robe good job! :lol: Link to comment Share on other sites More sharing options...
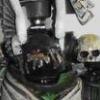
chaplainmikey Posted November 20, 2008 Share Posted November 20, 2008 The asmodai sculpt is really great,the robes are looking great and have a lot of depth to them. I'm also really glad you've done him truescale,makes him look intimidating and important. Can we get a better shot of his helmet and the details? Looking forward to seeing what you do next. Link to comment Share on other sites More sharing options...
Alys Dwr Posted November 21, 2008 Author Share Posted November 21, 2008 Cheers folks (again in some cases:) but no less welcomed). chaplainmikey, I've tried getting a close up shot of the face but can't get the lighting right. I've been using vaseline on my tools to stop them sticking (as suggested by Doghouse) and although the model isn't greasy it makes the GS quite shiny. I'll be sure to get some better shots once it's primed as i think that will allow you to see the details. Sculpting robes is quite easy and hides a multitude of sins. One problem i've had with true/actual scale models it that the chest and waist never looked right to me, building them up to just be a pile of cloth has eliminated that problem for me. Next time i update it should be a good one with some of the veterans finished and *fingers crossed* at least one arm attempt for Asmodai Al p.s - rivet on the backpack are done and the pads are almost finished. I'll save the pics until the next update. Link to comment Share on other sites More sharing options...
Alys Dwr Posted December 15, 2008 Author Share Posted December 15, 2008 oooo, double post and a bit of thredcromancy but it (should have been) worth it! Well, i've finished the command squad, i'm very pleased with the sargeant. The dreadnought is finished now and Asmodai has everything bar hands and weapons. I'm waiting until i find something of the correct gauge for the crozius haft before i sculpt the hand around it. I also got into a bit of a terrain frenzy and have built two barricade sections and an objective marker involving a crashed bike. Nothing fancy there, i got hold of some old plastic bikes a while ago and they were in a right state. 2 were salvagable but this one was doomed. so i crashed it into a pile of sand+super glue and called it an objective. Anyways, i was ready to post, had set up my photo booth and was about to take the pics when... no camera. I poped home last weekend and must have left it behind :(. So i thought i'd post a verbal update and apologise that the pics will be up early in the new year. Al Link to comment Share on other sites More sharing options...
Master Toddius Posted December 15, 2008 Share Posted December 15, 2008 They're coming along great man. Thats a very daring sculpt and you seem to be pulling it off. Can't wait to see more :D Link to comment Share on other sites More sharing options...
Alys Dwr Posted January 12, 2009 Author Share Posted January 12, 2009 Well, the sculpting has taken a bit of a back seat as i've managed to kill my GS and need to buy some more. Librarium Painting Challengeto the rescue! I've vowed to do a 5 man terminator squad, a dread and to finish the 10 man tac squad i failed to complete for last years challenge. First the dread. I'm converting the AoBR dread into a venerable and it's coming along nicely (IMO). Conversion is almost done but i need to do something to make the melta more interesting. I've got the paintjob laid out in my head and will share once i get going! http://i92.photobucket.com/albums/l39/bonsai-al/100_1193.jpg And here's the state of the terminators at the moment. They're standard AoBR dudes. The one on the left is 95% finished and the other two are up to their first messy coat of bleached bone. The heavy weapon chap and sargeant are yet to go, i think the sarge needs some minor conversion work. http://i92.photobucket.com/albums/l39/bonsai-al/100_1196.jpg My projects are all over the place at the moment, i have too many on the go now and far too much revision to do! Al Link to comment Share on other sites More sharing options...
Alys Dwr Posted January 13, 2009 Author Share Posted January 13, 2009 And here's another update. I think i've finished building the dread now. I want to paint murals/borders on the armour plates so i haven't added raised borders, but for fear of it looking a bit flat i've added some purity seals. GS sculpted chain holds the ceremonial knife at his side and an iron halo from a plastic servitor is the cherry on top. Hopefully i'll have him primed and base coated tomorrow. http://i92.photobucket.com/albums/l39/bonsai-al/100_1198.jpg No further progress on the terminators yet. Al Link to comment Share on other sites More sharing options...
bluewolf74727 Posted January 13, 2009 Share Posted January 13, 2009 nice work with the robe. Am really impressed with the dreadnought looking forward to seeing it painted (you should be thankful for the praise as i'm am a Space Wolf nut) anyway keep up the good work BlueWolf74727 Link to comment Share on other sites More sharing options...
Avarris Posted January 13, 2009 Share Posted January 13, 2009 Man that is a nice Looking dred, wish i had the modeling and GS skills you do! :D Ive kinda put my DA (got 3k points worth at last count) on hold while I do some work on my Chaos Marine army. Link to comment Share on other sites More sharing options...
Alys Dwr Posted January 18, 2009 Author Share Posted January 18, 2009 cheers for the positive comments both, puppy praise is high indeed and sculpting comes with practice! I don't consider myself overly good but i'm methodical and take my time and it seems to be working! No pictures tonight as my light set up is a bit broken at the moment. Verbal update though: Terminators - no further painting. One of the unpainted chaps has had a simple arm swap for the DA assault cannon. The sarge torso has been used on a spare AoBR termi body and the shoulder shield has been replaced with one from the DA upgrade sprue; the sarge body with halo is being reserved for a future Belial conversion. Oh, and i've constructed a chainfist out of a powerfist arm and chainsword (what else!:)) Dreadnought - metals all boltgun and the main bone colour of the armour is finished. I've gone for a gritty, venerable look. I've decided to post the recipe tonight to see if you can visualise it until the pictures are ready. 1: base coat black 2: thin coat of white leaving streaky patches 3: very dilute wash of bestial brown 4: 5 or so thin coats of bleached bone 5: wash of graveyard earth to shade, leaving streaks here and there on the armour plates 6: 1 more thin coat of bleached bone where neccessary 7: moderate drybrush of skull white Boltgun metal was applied over a black base and washed with watered down chaos black. Not sure how far i want to highlight it yet though. Al Link to comment Share on other sites More sharing options...
Alys Dwr Posted January 18, 2009 Author Share Posted January 18, 2009 Righty, heres a pic of the dread. Still haven't got the lighting situation sorted so i used the flash on my camera. Naturally, this washed out all the colours etc but i had a play around with the editing options on photobucket and managed to make the picture tollerable. Only the metals on the melta have had the wash treatment and it's come out nice and dark; i like the contrast against the pale colour of the armour. http://i92.photobucket.com/albums/l39/bonsai-al/100_1207.jpg Al Link to comment Share on other sites More sharing options...
bluewolf74727 Posted January 18, 2009 Share Posted January 18, 2009 looking sexy Link to comment Share on other sites More sharing options...
Alys Dwr Posted February 6, 2009 Author Share Posted February 6, 2009 Ok, I've had a slight disaster. I recently re-discovered my old metal deathwing and have been sculpting some scaled up details to put on my plastic terminators for the LPC. Deathwing is about more than just bleached bone! Anyways, the disaster. I sculpted a cracking ceremonial dagger to GS cast and make for the whole squad. In the process i've got an air bubble in the mold and destroyed the master in the process! Argghh. Damage control is in effect and i think it'll work out in the end. Not much else has happened, just thought i'd share my frustration. Al Link to comment Share on other sites More sharing options...
paulson games Posted February 6, 2009 Share Posted February 6, 2009 That chest piece on the dreadnought is looking pretty killer, very nice work. You also did a greta job on the robes so far, are you using pins for the rivets/bolts on the backpack? Link to comment Share on other sites More sharing options...
Alys Dwr Posted February 6, 2009 Author Share Posted February 6, 2009 The chest piece on the dreadnought looks good, but it does stick out forward quite far. If i did it again i would remove more of the sarcophagus to that it sits further back between the shoulders. I have been toying (behind the scenes) with moving the arms forward slightly to compensate and it doesn't look too bad, but then his rear end sticks out!<_< The rivets are made from a thin sausage of greenstuff. And spare bits i have after modelling i roll out, trying to get it the same thickness. When cured, it's easy to cut through with a modelling knife and sticks on with a dab of superglue. Al Link to comment Share on other sites More sharing options...
plaugedpanda Posted February 6, 2009 Share Posted February 6, 2009 that dread going to look fantastic when its done good job Link to comment Share on other sites More sharing options...
Alys Dwr Posted February 6, 2009 Author Share Posted February 6, 2009 I do hope so! Here's a couple of picture of where he stands at the moment. I'd say he's about 50% done. Need all the details finishing, touching up, weathering and some light damage. Then the base. Not happy with the green trim on the right leg plate, going to re-do and try to straighten it. The green trim aroun the multimelta is part of my cunning plan: It will allow me to switch the melta with an assault cannon from one of my green dreads and remain a sense of being (not just bolted on ork-style). http://i92.photobucket.com/albums/l39/bonsai-al/100_1367.jpg http://i92.photobucket.com/albums/l39/bonsai-al/100_1370.jpg Al Link to comment Share on other sites More sharing options...

Recommended Posts
Archived
This topic is now archived and is closed to further replies.