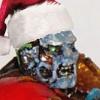
Styrofoam04 Posted April 25, 2010 Share Posted April 25, 2010 I’ve been working on my Red Corsairs for about over a year now. This is my first army and I have only about 900 pts painted (2100pts to go). I decided to post my finished models to keep me motivated. (I’m seeing red everywhere!) Right now the only pics I have are of Huron. This was taken a year ago I have since then ‘updated his look. I will take pics of what I have done and take some of my finished works. http://i306.photobucket.com/albums/nn268/Styrofoam04/huron006.jpg http://i306.photobucket.com/albums/nn268/Styrofoam04/huron002.jpg http://i306.photobucket.com/albums/nn268/Styrofoam04/huron003.jpg http://i306.photobucket.com/albums/nn268/Styrofoam04/huron004.jpg Then hopefully I’ll be able add some new stuff Link to comment https://bolterandchainsword.com/topic/199503-master-of-the-red-corsairs/ Share on other sites More sharing options...
skyst Posted April 25, 2010 Share Posted April 25, 2010 That's pretty sick! And unique looking. Link to comment https://bolterandchainsword.com/topic/199503-master-of-the-red-corsairs/#findComment-2376151 Share on other sites More sharing options...
Styrofoam04 Posted April 25, 2010 Author Share Posted April 25, 2010 thanks I have re taken the photo today and added close ups of his head http://i306.photobucket.com/albums/nn268/Styrofoam04/Huron007.jpg Mind you I played a few games with him and I've noticed a few chips. I'm kinda scared to coat them. What is the best way to do it? Which is the best to use? Link to comment https://bolterandchainsword.com/topic/199503-master-of-the-red-corsairs/#findComment-2376638 Share on other sites More sharing options...
Styrofoam04 Posted April 25, 2010 Author Share Posted April 25, 2010 These were my first marines i painted (and also my favorite) http://i306.photobucket.com/albums/nn268/Styrofoam04/RedCorsairs001.jpg http://i306.photobucket.com/albums/nn268/Styrofoam04/RedCorsairs002.jpg http://i306.photobucket.com/albums/nn268/Styrofoam04/RedCorsairs003.jpg I think I'm too rough with my models. my Champion's arm fell off and I noticed after taking this picture that I lost his finger as well :( http://i306.photobucket.com/albums/nn268/Styrofoam04/RedCorsairs004.jpg These ones are my crazies! (I let my little sister put them together) http://i306.photobucket.com/albums/nn268/Styrofoam04/RedCorsairs005.jpg My heavy bolters: http://i306.photobucket.com/albums/nn268/Styrofoam04/RedCorsairs006.jpg C&C welcome. More to come need to take more pictures Link to comment https://bolterandchainsword.com/topic/199503-master-of-the-red-corsairs/#findComment-2376643 Share on other sites More sharing options...
Styrofoam04 Posted April 26, 2010 Author Share Posted April 26, 2010 These next photos are of my Rhino. It is not complete and needs more detail on the outside, but right now it is on the back burner. More excited about getting other models on the board C&C welcome and maybe a few Ideas thanks http://i306.photobucket.com/albums/nn268/Styrofoam04/Rhino001.jpg http://i306.photobucket.com/albums/nn268/Styrofoam04/Rhino002.jpg http://i306.photobucket.com/albums/nn268/Styrofoam04/Rhino003.jpg These are shots of the interior. I'd like to do the astral claw symbol on the outside in red as well (backburner) http://i306.photobucket.com/albums/nn268/Styrofoam04/Rhino004.jpg http://i306.photobucket.com/albums/nn268/Styrofoam04/Rhino005.jpg Link to comment https://bolterandchainsword.com/topic/199503-master-of-the-red-corsairs/#findComment-2378301 Share on other sites More sharing options...
Styrofoam04 Posted April 28, 2010 Author Share Posted April 28, 2010 http://i306.photobucket.com/albums/nn268/Styrofoam04/RedCorsairs010.jpg Link to comment https://bolterandchainsword.com/topic/199503-master-of-the-red-corsairs/#findComment-2379913 Share on other sites More sharing options...
Styrofoam04 Posted April 28, 2010 Author Share Posted April 28, 2010 Here are my termies http://i306.photobucket.com/albums/nn268/Styrofoam04/Termie001.jpg I tried to put empty shell casings but I don't think i got the colours right. I really like the hanging sack http://i306.photobucket.com/albums/nn268/Styrofoam04/Termie002.jpg http://i306.photobucket.com/albums/nn268/Styrofoam04/Termie003.jpg http://i306.photobucket.com/albums/nn268/Styrofoam04/Termie004.jpg http://i306.photobucket.com/albums/nn268/Styrofoam04/Termie005.jpg http://i306.photobucket.com/albums/nn268/Styrofoam04/Termie006.jpg Link to comment https://bolterandchainsword.com/topic/199503-master-of-the-red-corsairs/#findComment-2379926 Share on other sites More sharing options...
Styrofoam04 Posted May 1, 2010 Author Share Posted May 1, 2010 This is my first Oblit Ive painted a 2nd but it is not based http://i306.photobucket.com/albums/nn268/Styrofoam04/Oblit001.jpg http://i306.photobucket.com/albums/nn268/Styrofoam04/Oblit002.jpg Link to comment https://bolterandchainsword.com/topic/199503-master-of-the-red-corsairs/#findComment-2384355 Share on other sites More sharing options...
blackbabyjesus Posted May 1, 2010 Share Posted May 1, 2010 these are looking really really sharp, the red is clean and bright and they're very tidy. bases look great too, care to share how you've achieved the sand colour on top? Link to comment https://bolterandchainsword.com/topic/199503-master-of-the-red-corsairs/#findComment-2384423 Share on other sites More sharing options...
Peakey Posted May 2, 2010 Share Posted May 2, 2010 I love the base, its pretty subtle as well so it doesn't distract from the figure Link to comment https://bolterandchainsword.com/topic/199503-master-of-the-red-corsairs/#findComment-2385142 Share on other sites More sharing options...
Ironjens Posted May 2, 2010 Share Posted May 2, 2010 I love the rhino. The black to red ratio is perfectly within the accepted A-Team norm :thanks: Link to comment https://bolterandchainsword.com/topic/199503-master-of-the-red-corsairs/#findComment-2385299 Share on other sites More sharing options...
Prot Posted May 4, 2010 Share Posted May 4, 2010 Great to see some Red Corsairs up and about... good job. Keep it up. ;) Link to comment https://bolterandchainsword.com/topic/199503-master-of-the-red-corsairs/#findComment-2387806 Share on other sites More sharing options...
Sons of Horus Posted May 7, 2010 Share Posted May 7, 2010 i like the rough texture :D Link to comment https://bolterandchainsword.com/topic/199503-master-of-the-red-corsairs/#findComment-2391527 Share on other sites More sharing options...
Cyrl Posted May 7, 2010 Share Posted May 7, 2010 Huron looks much better for the highlighting on his face in the 2nd set of pictures, I usually loathe that model everyt time I see it but I'm really liking it with your extra touches (e.g. the base). Although it's subtle you're managed to introduce some dynanicism to the Termi's with the basing, they look much better for it. I've got that set and they really need something 'extra' when they're straight out of the box. Great work, I hope to see more soon B) Link to comment https://bolterandchainsword.com/topic/199503-master-of-the-red-corsairs/#findComment-2391613 Share on other sites More sharing options...
Styrofoam04 Posted May 7, 2010 Author Share Posted May 7, 2010 Thanks everyone on the C&C. I running out of things to take pictures of Next up is a defiler that i have mixed feeling about. I bought it on eBay for a good price w/ some other things. The description and the pictures all looked good. But when i received it, it was a mess! The defiler was broken in many places. the CC arm pins were completely broken off. The reaper autocannon was glued on backwards w/ the bullet magazines facing outward. Most of the blades were broken off and the claws were put together in odd position. on top of all that the glue that was used was the plastic glue so that the pieces were melted together Well it took me a while to get it right. I had to re-pin the CC arm. Cut out the reaper autocannon and the claws very carefully and put it back together again here is a pic http://i306.photobucket.com/albums/nn268/Styrofoam04/Defiler001.jpg This is all I have painted so far. I have lots of plans and projects tho. Stay tuned! Link to comment https://bolterandchainsword.com/topic/199503-master-of-the-red-corsairs/#findComment-2391650 Share on other sites More sharing options...
Styrofoam04 Posted June 8, 2010 Author Share Posted June 8, 2010 So I bought the Space Wolves Pack (which comes w/ 56 heads!) and I plan on using the 10 as Chosen (I need meltas!). The rest of the heads I would like to exchange for the bunny ears on my 40+ berzerkers. So far the process is slow i have about 13 faces painted. The more I do the worse they get! I'm also working on another rhino for the converted wolves, my 2nd defiler and a land raider. As soon as I finish any of these I will take pics and post them. these are looking really really sharp, the red is clean and bright and they're very tidy. bases look great too, care to share how you've achieved the sand colour on top? I followed the recipe on the GW site for PARCHED DESERT PLAINS Then I used MIG weathering pigments on top Link to comment https://bolterandchainsword.com/topic/199503-master-of-the-red-corsairs/#findComment-2428056 Share on other sites More sharing options...
Styrofoam04 Posted October 7, 2010 Author Share Posted October 7, 2010 Next up is my 2nd defiler. I had problems with this on too. I bought this one and another one(not built yet) for about $20 for both. He had done some heavy conversions to both. The body parts where the legs attach to was cut in half to make two 4 legged walking gun platform. Alot of the detail pieces like the the back of the top body cut into pieces(lucky for me he kept all the pieces and his cuts were very clean). So lets just say it took me a while to get Humpty Dumpty back together again (and alot of green stuff). Even if you were to look closely you wouldn't notice the difference This model unlike that last one all the parts move or rotate. The Heavy flamer is magnetized to switch for the DCCW or a Havac Launcher(both of which are not completed) http://images.dakkadakka.com/gallery/2010/9/22/141363_sm-2nd%20Defiler.jpg http://images.dakkadakka.com/gallery/2010/9/22/141364_sm-2nd%20Defiler.jpg http://images.dakkadakka.com/gallery/2010/9/22/141359_sm-2nd%20Defiler%20Detail.jpg http://images.dakkadakka.com/gallery/2010/9/22/141365_sm-2nd%20Defiler%20Detail.jpg Link to comment https://bolterandchainsword.com/topic/199503-master-of-the-red-corsairs/#findComment-2530472 Share on other sites More sharing options...
Myxx Posted October 7, 2010 Share Posted October 7, 2010 Nice work, esp. the last defiler. If you didn't say anything about it being humpty-dumpty, no one would ever know. Link to comment https://bolterandchainsword.com/topic/199503-master-of-the-red-corsairs/#findComment-2530579 Share on other sites More sharing options...
Styrofoam04 Posted June 13, 2013 Author Share Posted June 13, 2013 WOW! I haven't posted here for years. I've been busy with my Red Corsairs; many games, alot of painting, but I just haven't really finished many models. If you like my work and would like to see more or follow my WIP see: Lord of the Maelstrom - A Red Corsairs WIP Blog In the meantime here is a finished model http://images.dakkadakka.com/gallery/2012/2/2/324555_sm-Red%20Corsairs%2C%20Wolf%20Guard.jpghttp://images.dakkadakka.com/gallery/2012/2/2/324556_sm-Red%20Corsairs%2C%20Wolf%20Guard.jpg Some motivation on my WIP blog might help to finish more models Link to comment https://bolterandchainsword.com/topic/199503-master-of-the-red-corsairs/#findComment-3393407 Share on other sites More sharing options...
Recommended Posts
Archived
This topic is now archived and is closed to further replies.