

DavicusPrime
-
Posts
20 -
Joined
-
Last visited
1 Follower

About DavicusPrime

DavicusPrime's Achievements






-
Alright... Here's Suppuratus, now with wings. I think I'm ready to paint him, but I might find the need to add a couple more details. We'll see. I'm just ready to get some paint on him though. http://i171.photobucket.com/albums/u298/DavicusPrime/Daemon%20Prince%20WIP/DPWIPFront3.jpg http://i171.photobucket.com/albums/u298/DavicusPrime/Daemon%20Prince%20WIP/DPWIPBack3.jpg Here's one with one of his Plague Raptor Minions: http://i171.photobucket.com/albums/u298/DavicusPrime/Daemon%20Prince%20WIP/SuppuratusandMinion.jpg -DavicusPrime
-
My rule for units in my army is that I always take 7 as it's Nurgle's sacred Number. As for the load out, I take one Meltagun and one flamer as well as a P-Fist Champ in most of my front line units do they can handle most situations (armor, massed infantry and anything that might need a good solid punch). So far testing the unit out with proxies has been interesting. I'm still trying to learn how to use them well. They don't hit as hard in assault as my regular Plague Marines so trying to take on melee threats, solo isn't were they shine, but adding their attacks to a strategic combat or in tying up a shooty unit to shut down their guns or going after an offending tank with melta and fist are all ways in which they've been useful. The wings have a wire protruding from the end which is inserted into a hole in the back pack with glue. Then I used green stuff around the join to better meld it to the pack in an organic fashion. You got it right for the eyes. A round blob of GS with lines pressed in with the blade of a mini screw driver I have. -DavicusPrime
-
Finally figured out how to best attach the wings to the Raptor prototype and here are some pre-paint pictures: http://i171.photobucket.com/albums/u298/DavicusPrime/Plague%20Raptors/RaptorWIPFront2.jpg http://i171.photobucket.com/albums/u298/DavicusPrime/Plague%20Raptors/RaptorWIPBack2.jpg http://i171.photobucket.com/albums/u298/DavicusPrime/Plague%20Raptors/RaptorWIPSide2.jpg Just finished the second wing for the Daemon Prince and as soon as the temps get above freezing I'll prime and paint them. -DavicusPrime
-
Thanks. Actually I plan on adding some ooze dripping from the corners of his mouth down his chin instead.
-
Made some progress: http://i171.photobucket.com/albums/u298/DavicusPrime/Daemon%20Prince%20WIP/DPWIP2Front.jpg http://i171.photobucket.com/albums/u298/DavicusPrime/Daemon%20Prince%20WIP/DPWIP2RightSide.jpg http://i171.photobucket.com/albums/u298/DavicusPrime/Daemon%20Prince%20WIP/DPWIP2Back.jpg A face only Pappa Nurgle could Love: http://i171.photobucket.com/albums/u298/DavicusPrime/Daemon%20Prince%20WIP/DPWIP2Bugeyez.jpg And the wing in comparison to the DP: http://i171.photobucket.com/albums/u298/DavicusPrime/Daemon%20Prince%20WIP/DPWIP2Wing.jpg I think I've got to the point where I can finish all the detailing. By which I mean adding some rot, skulls and oozing sores. Then it's time to get some paint on him. So the To-Do List: -Complete the basic bulking up of the right leg. DONE -Complete basic detail and trim to Lower Legs. DONE -Add some more Armor plate detail to the lower arms and elbows. 50% -Complete Fly Icon on the Left Shoulder -Add some bulk to the breast plate DONE -round out to the Gut more DONE -Add another fat roll to it's back DONE -Design and fabricate the wings 50% -Make it's back hairy and prepare the wing join. 50% -Add detail (Intestine, rivets, ooze, pocks, rot and skulls) as needed -DavicusPrime
-
To go with my plague Raptors I'm bringing in a winged Daemon Prince as I expand my army to the 2000 mark. After a couple months w/o being able to do any work, I finally have enough done to get some pictures of the Conversion so far... I still need to sort out the lower Right leg and detail the lower Leg guards on both sides. I like the head and think that I'm done with that part at least. The arms still need a little work and the gut needs to be a little more round, and then I need to make him some wings. Main things I did... 1) I cut the legs off at the knees and built armatures out of sprue to build them up to look like oversized power armor. 2) I cut the head off at the neck and lifted it up to make him look more upright and to make room for his double chin. :D 3) I have been adding more power armor like details instead of the "my armor turned to skin" look that it had before. 4) I added compound eyes. I'm most proud of the ears. ;) http://i171.photobucket.com/albums/u298/DavicusPrime/Daemon%20Prince%20WIP/DPWIPUpperFront.jpg http://i171.photobucket.com/albums/u298/DavicusPrime/Daemon%20Prince%20WIP/DPWIPRightSide.jpg http://i171.photobucket.com/albums/u298/DavicusPrime/Daemon%20Prince%20WIP/DPWIPLeft.jpg http://i171.photobucket.com/albums/u298/DavicusPrime/Daemon%20Prince%20WIP/DPWIPFront.jpg http://i171.photobucket.com/albums/u298/DavicusPrime/Daemon%20Prince%20WIP/DPWIPBack.jpg So the To-Do List: -Complete the basic bulking up of the right leg and foot. -Complete basic detail and trim to Lower Legs. -Add some more Armor plate detail to the lower arms and elbows. -Complete Fly Icon on the Left Shoulder -Add some bulk to the breast plate -round out to the Gut more -Add another fat roll to it's back -Design and fabricate the wings -Make it's back hairy and prepare the wing join. -Add detail (Intestine, rivets, ooze, pocks, rot and skulls) as needed I've got a lot more work to do. :lol: -DavicusPrime
-
So heres a pic of the first attempt at painting a raptor wing: http://i171.photobucket.com/albums/u298/DavicusPrime/Plague%20Raptors/PaintedRaptorWing.jpg These things feel like they're made of plastic. I'm quite pleased. So a quick step-by-step: 1) bend yourself the outline of the desired wing (I used 20 gauge wire) and make sure both wings match in shape. 2) Coat a piece of paper (I used standard copier paper) with a thin coat of PVA glue (I used Elmer's Carpenter glue). Then press the outline to it. 3) While the glue is still wet, add more wire to the interior of the wing to form the veins (I used 24 gauge wire but you could use the same stuff as the outline if that's what you've got). 4) Add some more glue to the interior of the wing filling in all voids and press a second piece of paper to the top and press it all together with a paper towel or something similar to push the paper down. Do this on both sides to ensure that the vein pattern is impressed on both sides and that excess glue is pressed out of the interior of the wing. Then allow to cure entirely. 5) Using scissors, cut out the periphery along the wire frame. 6) Coat each side and the edges with watered down PVA glue and allow to dry. And that's it. I did both wings at the same time but the glue kept drying out before I was done. So I had to keep adding a little water to extend the time. Its important to keep the glue wet through the completion of step 4 so that the contour of the veins turns out evenly on both sides. Oh, and I added a little Greenstuff to the end to bulk up the join to the raptor's backpack. I wanted to show you all the whole painted raptor but the temps around here got too low for me to prime him. So as soon as things warm up a bit, I'll get him in the works and the completed model will grace this here thread. So there you go. -DavicusPrime
-
I've been working on adding new units to my all nurgle army. I'm looking for non-traditional Death Guard units but with a definite plague flavor. The idea was to add a winged Daemon Prince calling him the Lord of Flies and his trusty followers the plague of flies (Nurgle Raptors). To fit the fluff the DP and raptors would need sime form of insect like wings. The trick was coming up with a way to make flywings that were sturdy and looked good enough for Papa Nurgle's minions. What is pictured below is my prototype Nurgle Raptor and a couple first attempts and the final design I'm going with. First the wings... I tried greenstuff on plastic card first and it just didn't do it for me. The next was done by making a wire frame and gluing paper to both sides which was much more successful. The final design built off of the wire and paper method but added veins to the wing by adding a wire pattern for the veins between the layers of paper. I rubbed a pencil over them to help make the relief pattern more visible in the picture. http://i171.photobucket.com/albums/u298/DavicusPrime/Plague%20Raptors/PlagueRaptorWingPrototype3.jpg The raptor himself was just some Greenstuff compound eyes and a quick reposition of the backpack vents to give the wings more clearance. http://i171.photobucket.com/albums/u298/DavicusPrime/Plague%20Raptors/PlagueRaptorPrototypeFront1.jpghttp://i171.photobucket.com/albums/u298/DavicusPrime/Plague%20Raptors/PlagueRaptorPrototypeRear1.jpg More pictures to come as I attach the wings and get some paint on him. -DavicusPrime
-
DavicusPrime's Death Guard
Images added to a gallery album owned by DavicusPrime in Death Guard & Nurgle
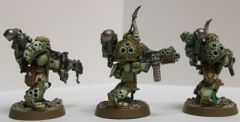
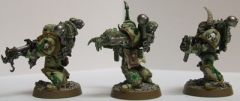
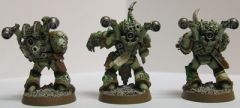
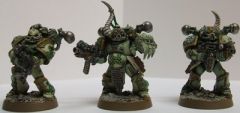
DG converted from new plastics -
-
DavicusPrime's Storm Bringers
Images added to a gallery album owned by DavicusPrime in Adeptus Astartes / Legiones Astartes
DavicusPrime's Storm Bringers -