kapturowski Posted January 21, 2011 Author Share Posted January 21, 2011 Built two more Plague Marines, one with a Plasma Gun and a Champion. They are a bit taller than their fellow Marines with standard Chaos Space Marine legs which is nice. Finished the shoulder pads for my Terminator. @ GooseDaMoose & xscottfergox Thanks! @ MagicMan :( @ Bloodmange Yeah, I'm starting to entertain that idea too. @ vezok the annihilator Sure, I'll see what I can come up with. :) Link to comment Share on other sites More sharing options...
Neth_Oni Posted January 21, 2011 Share Posted January 21, 2011 wow, just wow. The combination of fw's mk3 marines and the plaguemarine upgrade kit is awsome, even more so as you have started to rough up the mk3 parts. Can't wait to see them painted :) Link to comment Share on other sites More sharing options...
Captain Mick Posted January 21, 2011 Share Posted January 21, 2011 Great models really, well done :lol: . Link to comment Share on other sites More sharing options...
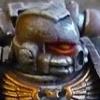
kapturowski Posted January 23, 2011 Author Share Posted January 23, 2011 DEATH GUARD PAINTING TUTORIAL Pt. 1: Armour Here's how I paint my Death Guard. The technique I use is mostly drybrushing and washes since it allows me to paint my models quicker while also enabling me to get a zenithal lighting effect that would be either quite time consuming to achieve with blending or require the use of a airbrush. The photos are snapped at my workspace so the colours are somewhat off but I hope it will be helpful anyway. The mini is basecoated with two thin coats of Adeptus Battlegrey and then all armour parts are given two thin coats of Catachan Green. A generous drybrush with a 50/50 mix of Catachan Green and Golden Yellow is brushed onto all armour parts. This is to bring in some overall definition so I don't pay any particular attention to my imagined lightsource. This time around the drybrushing is applied with the lightsource in mind. In this case the lightsource comes from the top-front where the model is facing. I try to be as careful as possible when drybrushing from now on and make sure that there is very little paint on the brush. Pure Rotting Flesh is drybrushed towards the top and those areas of the model that would receive the most light. With heavily thinned down Rotting Flesh I paint some highlights to the most prominent sections and where armour plates overlap. The entire mini is washed with some very thinned down Vermin Brown. Thinned Scorched Brown is washed into recesses and any nooks and crannys. Again, thinned Rotting Flesh is used to tighlight the most prominent areas, mainly the helmet and upper torso. Thinned Vermin Brown is used to bring back highlights that are to bright or blend them into the surrounding colour. That is the end of part one. @ Neth_Oni & Captain Mick Thanks! Link to comment Share on other sites More sharing options...
kapturowski Posted January 25, 2011 Author Share Posted January 25, 2011 DEATH GUARD PAINTING TUTORIAL Pt. 2: Battle Damage & Rust I use a sponge to give the damage some randomness. The scratches are highlighted with Rotting Flesh. All metal areas are basecoated with Scorched Brown. Time to start highlighting. Link to comment Share on other sites More sharing options...
Lord Ragnarok Posted January 25, 2011 Share Posted January 25, 2011 Excellent! Thanks! :tu: Link to comment Share on other sites More sharing options...
-=Dan=- Posted January 25, 2011 Share Posted January 25, 2011 Damn it! Time to tear my terminators apart and use the inspiration you gave me. Love the minis! Link to comment Share on other sites More sharing options...
Animerik Posted January 25, 2011 Share Posted January 25, 2011 Awsome death guard! The FW kit bash looks damn nice but a wee bit expensive for me, but I must say that I love that someone is doing these ^_^ I really like the additions you have done with plasticcart as well as the special pattern bolters. The painting tutorial is very helpful, I will save this :D Cheers man and thanks for sharing Link to comment Share on other sites More sharing options...
Lord Ragnarok Posted January 25, 2011 Share Posted January 25, 2011 Wait a minute...where are those legs from? Link to comment Share on other sites More sharing options...
MagicMan Posted January 25, 2011 Share Posted January 25, 2011 Great tutorial man, thanks! Link to comment Share on other sites More sharing options...
firestorm40k Posted January 25, 2011 Share Posted January 25, 2011 A thorough and informative tutorial, thanks very much for taking the time and effort to share it! :) Link to comment Share on other sites More sharing options...
Burias-Drak'shal Posted January 25, 2011 Share Posted January 25, 2011 Death guard look superb. Very good tutorial. Going to have to give it a go! Link to comment Share on other sites More sharing options...
Rogan Posted January 26, 2011 Share Posted January 26, 2011 Thanks for the tutorial - really filthy stuff. And that's a compliment ^^ Link to comment Share on other sites More sharing options...
kapturowski Posted January 26, 2011 Author Share Posted January 26, 2011 Thanks everybody, I'm glad you like it. ^_^ @ Animerik Tell me about it... :P But now that I've started using these parts I think I will have to continue doing so. Looking at the Death Guard upgrade kit, four of the torsos have a Mk V style, so I'm planning to buy some of those armour kits for my next batch. But I should really concentrate on painting what I've already got before buying more stuff. @ Lord Ragnarok They're from Forge Worlds Mk III armour kit, the Iron Armour. Link to comment Share on other sites More sharing options...
kapturowski Posted January 26, 2011 Author Share Posted January 26, 2011 Finished the Plague Marine from the tutorial and based the others. I'm going with a snow base to match my Space Wolves. I've lengthened the latest batch a bit more than the previous. This was not entirely intentional but I think the Forge world legs have more upright stances. Here's a side by side comparison: Link to comment Share on other sites More sharing options...
Animerik Posted January 26, 2011 Share Posted January 26, 2011 Damn nice, the finished piece look really good with the OSL, However the orange could be a bit brighter, as it is a bit to close to the rust tone IMO. Some slushy snow around the boot section would be cool ,as well as some pigments on the rust to get it extra crusty. But that is just nitpicking, as I said, wonderfully painted and built PMs You make papa proud :huh: Cheers mate and I'm looking forward to see some more *hint hint Link to comment Share on other sites More sharing options...
kapturowski Posted January 26, 2011 Author Share Posted January 26, 2011 You make some very good points Animerik. I will get back and do some tweaking, thanks! ^_^ Link to comment Share on other sites More sharing options...
xscottfergox Posted January 26, 2011 Share Posted January 26, 2011 I give up with painting when I see this So nice Link to comment Share on other sites More sharing options...
Lord Ragnarok Posted January 27, 2011 Share Posted January 27, 2011 Thanks everybody, I'm glad you like it. :D @ Animerik Tell me about it... :P But now that I've started using these parts I think I will have to continue doing so. Looking at the Death Guard upgrade kit, four of the torsos have a Mk V style, so I'm planning to buy some of those armour kits for my next batch. But I should really concentrate on painting what I've already got before buying more stuff. @ Lord Ragnarok They're from Forge Worlds Mk III armour kit, the Iron Armour. Hmmmmm I'm having visions of ripping off the current chaos legs on my plague marines. Link to comment Share on other sites More sharing options...
_Maelstrom_ Posted January 27, 2011 Share Posted January 27, 2011 Just read through the topic, must say absolutely fantastic work mate. The sculpting and conversion work is great. I really like the idea of using the Death guard conversion pack with the older armour kits as well:) Thanks for the tutorial, I'll definitely be looking at it when I update my plague marine squad looking forward to seeing more of these guys <_< Link to comment Share on other sites More sharing options...
pattison Posted January 27, 2011 Share Posted January 27, 2011 Great work, it's a pleasure to view this thread. Link to comment Share on other sites More sharing options...
kapturowski Posted September 8, 2011 Author Share Posted September 8, 2011 Started working on my Terminators. I don't like the sunken head on this torso so I replaced it with a head from the Empire Flagellants, I'll add some stuff to Nurglify it. I've also added studs to his right leg to make the armour look a bit more antique and lengthened him at the waist. I've sculpted some belly armour to hide the gap but the belly hangs a bit to low, I will try something slightly different on the next one. http://img.photobucket.com/albums/v190/kapturowski/b316772b.jpg Link to comment Share on other sites More sharing options...
Natanael Posted September 8, 2011 Share Posted September 8, 2011 Awesome models. I am quite blown away, actually. Usually PMs seems so... well, slimey and not very natural. Your guys seem perfect, however, old, rusty, damaged AND nurlich :D Love it - Nat Link to comment Share on other sites More sharing options...
Draakur Posted September 8, 2011 Share Posted September 8, 2011 Awesome models. I am quite blown away, actually. Usually PMs seems so... well, slimey and not very natural. Your guys seem perfect, however, old, rusty, damaged AND nurlich :lol: Love it - Nat This, basically. Couldn't have said it better myself. And thanks very much for the tutorial, this sort of thing is so valuable to the community. Good stuff. Link to comment Share on other sites More sharing options...
DuskRaider Posted September 8, 2011 Share Posted September 8, 2011 Great log, kapturowski! It's nice to see someone else using the FW Pre-Heresy parts with the Death Guard kits, it definitely adds a aura or history to them. Perhaps you could explain how you did their lenses, I love that color and would like to know more about it. Again, great job so far! Link to comment Share on other sites More sharing options...

Recommended Posts
Archived
This topic is now archived and is closed to further replies.