Rogan Posted June 27, 2010 Share Posted June 27, 2010 Hi folks! To make it absolutely clear, right from the beginning - I'm not a total newbie having seen the oh so cool Ultramarines army at my local Games Workshop (in fact, they have a Blood Ravens army ^^) and wanting to play them, too. I am a veteran of about six years of 40k. I made first contact with the hobby through the game "Chaos Gate" (which I still enjoy playing) and have been fascinated... well... right from the start ^^ Anyway, having gone through many armies and attempts to create a new chapter, I have decided to get back to the roots. Here's a pic of the first five Marines. The sergeant isn't finished yet; obviously he needs some work, like the insignia and the pouches attached to his belt. http://img22.imageshack.us/img22/8834/ultramarinescombatsquad.jpg Hope you noticed the little amount of effort I put into smaller details, like the aquila on my favourite marine's left knee cap and the words "manus dei" on the sarge's power fist. They'll all be given a name as soon as I take care of the bases - haven't decided where to put them yet. Ice wastes? Ash wastes? Urban... wastes? ^^ P.S.: CAN you see the highlighting? Need to take a better pic... Maybe tomorrow. Kind regards from Germany! Link to comment Share on other sites More sharing options...
sar mikael Posted June 27, 2010 Share Posted June 27, 2010 I hate to say it, but those are some nicely painted smurfs! good shading and good details- the inscriptions on the pauldron and greaves are a very nice touch. im looking forward to seeing this army grow. Link to comment Share on other sites More sharing options...
Rogan Posted June 27, 2010 Author Share Posted June 27, 2010 Thanks for your kind words. This army will grow, that's for sure, but it'll take a heck of a time until it's going to become a playable force. Have to stick to vassal for now ^^ If I hurry, I can finish the sarge before falling asleep while sitting in front of my desktop... Link to comment Share on other sites More sharing options...
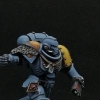
Rogan Posted June 28, 2010 Author Share Posted June 28, 2010 Sorry for the double post, but here's the promised update on the sarge. I hope you'll be able the additional details I added to him, like the quartered ultramarines insignia. ... I think I forgot to take a pic of his backpack as well... Why, never mind. http://img196.imageshack.us/img196/7497/ultramarinessarge2.jpg The first half of my tactical squad thus is finished. However, I feel there's something missing. The sarge could use some more heraldry... And of course the bases need "some" work. Link to comment Share on other sites More sharing options...
ShinyRhino Posted June 28, 2010 Share Posted June 28, 2010 What can be seen looks nice. I'd recommend cropping your photos to include only the mini, leaving the cropped result at its full, normal resolution. Link to comment Share on other sites More sharing options...
Rogan Posted June 28, 2010 Author Share Posted June 28, 2010 Done! The post above you has been edited. Good advice. ^^ Link to comment Share on other sites More sharing options...
chaplain belisarius Posted June 28, 2010 Share Posted June 28, 2010 wow! very nice ultramarines! how did you paint them? Link to comment Share on other sites More sharing options...
Rogan Posted June 28, 2010 Author Share Posted June 28, 2010 Thanks a lot! It's quite easy, to be honest. I use Mordian Blue as a basecoat, then I use Badab Black and highlight it with a line of Ultramarines Blue. The strongest highlight was painted with either Ice Blue or Space Wolves Grey - and only where the light could reach it. The yellow was done by using Snakebite Leather, highlights with Golden Yellow and Bleached Bone on the egdes. The red was achieved with a basecoat of Red Gore, followed by Blood Red lines and a few highlights of Blazing orange. All the connections and metal pieces were the easiest to paint: mix some Boltgun Metal with Chaos Black (50/50), highlight it with Boltgun Metal and add of few small lines of Mithril Silver. Could do a step-by-step if you wish. Need to paint some more of those guys ^^ Link to comment Share on other sites More sharing options...
chaplain belisarius Posted June 28, 2010 Share Posted June 28, 2010 that doesnt sound that bad at all mate (see my sig!) If you could do a step by step that would be cool... Link to comment Share on other sites More sharing options...
Shaun Carlin Posted June 28, 2010 Share Posted June 28, 2010 I like the 4th edtion style and the paint jobs are solid, the eyes look green unless Im seeing it wrong? Keep up the good work Link to comment Share on other sites More sharing options...
Rogan Posted June 28, 2010 Author Share Posted June 28, 2010 @ Shaun Carlin: Actually, yes, you're wrong. I painted the lenses red - but more of that later. You see, I'm alousy photographer and I have to borrow my father's truly ancient digital camera. But I'll try to get a better one soon. Thanks for the comment! @ chaplain belisarius: Alright - here's the first part of the tutorial. Step 1: assemble it! You don't need my help on that part ^^ http://img227.imageshack.us/img227/3856/sbs1.jpg Step 2: basecoat the model with thinned-down Mordian Blue. Not too thinned down, just add a little water. Make sure you leave out the area you want to paint black; as it's a waste of paint. :-) http://img63.imageshack.us/img63/9960/sbs2n.jpg Step 3: Apply a wash of Badab Black. Watch out for pools of colour! This wash is not so much to create dark gaps between armour plates, but to tone down the Mordian Blue. After the wash has dried, paint all the areas you want to be metal or black with Chaos Black. And don't worry if you mess it up a little - the next step will sort all those problems out. I don't like backpacks that like they were cast from one solid piece, so I paint the lower half of it with Boltgun Metal. Of course the tubes on the front part of the backpack, too, need some colour. Just paint it black. http://img28.imageshack.us/img28/1802/sbs3.jpg Next steps coming soon! Link to comment Share on other sites More sharing options...
Rogan Posted June 28, 2010 Author Share Posted June 28, 2010 And here we go again. Step 4: Time for the metal! Paint everything that's supposed to be metal Boltgun Metal mixed with Chaos Black (50/50). http://img404.imageshack.us/img404/3372/sbs4.jpg Step 5: Now it's time for the first highlight layer. Paint a thin line of Ultramarines Blue around the edges of the armour pieces. For the metal, use Boltgun metal in a similar way. http://img51.imageshack.us/img51/3887/sbs5.jpg Step 6: Paint everything red that ought to be red. Begin with the bolter casing. Red Gore will do just fine. Use some Blood Red to highlight it, just a thin line around the edges. Take care when painting the eyes! I recommend you to paint the first half of the eye with red gore. After that, apply the second and final highlight layer to the boltgun (Blazing Orange), the armour (Ice Blue) and the metal (Mithril Silver). Carefully brush along the edges of the area you are painting. http://img248.imageshack.us/img248/3687/sbs6.jpg Okay. Endspurt! P.S.: if this tutorial is useful, do you want me to release it as a .pdf file? Link to comment Share on other sites More sharing options...
Skirax Posted June 28, 2010 Share Posted June 28, 2010 I hate to say it, but those are some nicely painted smurfs! good shading and good details- the inscriptions on the pauldron and greaves are a very nice touch. im looking forward to seeing this army grow. This. Link to comment Share on other sites More sharing options...
Rogan Posted June 28, 2010 Author Share Posted June 28, 2010 So here's the final four steps. Step 7: Paint half of the Red Gore in the eyes red. The front half, to be precisely. After that, put a tiny little dot of Skull White into the other corner of the lenses. Finally, paint the shoulder guard's trims with Snakebite Leather. http://img526.imageshack.us/img526/6067/sbs7.jpg Step 8: Put a few layers of Golden Yellow on the previously painted Snakebite Leather. I painted the purity seal with a basecoat of Bestial Brown, followed by a mix of Bestial Brown and Vomit Brown (50/50). Just leave a little bit of the first layer visible. http://img149.imageshack.us/img149/1904/sbs8.jpg Step 9: Highlight the trim's corners with Bleached Bone. The purity seal then was highlighted with Vomit Brown, followed by a mix between Vomit Brown and Bleached Bone (50/50). http://img715.imageshack.us/img715/3910/sbs9.jpg Stage 10: Congratulations, you've made it this far without falling asleep or mourning your aching back. Just a few more tiny little things to do and yeah, you got your Ultramarine. Paint the Insignia with Skull White. You might need several layers to get a good result. Add some decorations, for example a few holy texts or kill markings. To paint those texts, use a really thin brush and water down your paint. I used a 50/50 mix of Scorched Brown and Chaos Black to add inscriptions to the purity seal. http://img340.imageshack.us/img340/8530/sbs10z.jpg Thanks a lot for reading my tutorial; hope you like(d) it. Link to comment Share on other sites More sharing options...
Bigger-than-Jesus Posted June 28, 2010 Share Posted June 28, 2010 I'm assuming you prime your minis first right? If you don't, I'd suggest you use black spray for these as without primer the paint will just wear off gradually. Link to comment Share on other sites More sharing options...
Rogan Posted June 29, 2010 Author Share Posted June 29, 2010 Please take a closer look at the tutorial, especially the first two pictures. :-) I actually don't like primers, as they make the miniature look dusty. Do you think some 'ardcoat would be enough? Link to comment Share on other sites More sharing options...
winterdyne Posted June 29, 2010 Share Posted June 29, 2010 Dusty primer is usually a result of spraying from too far (the paint dries before hitting the model), or on too warm a day (again, paint dries before hitting the model). Link to comment Share on other sites More sharing options...
Capt. Jack Posted June 29, 2010 Share Posted June 29, 2010 Bigger-than-Jesus and Winterdyne have a good point. Also, I would urge you to remove mold lines, as they totally detract from the effort you've put into painting some nice miniatures. Capt. Jack Link to comment Share on other sites More sharing options...
Rogan Posted June 29, 2010 Author Share Posted June 29, 2010 Perhaps you are right, guys. The funny thing is: this is the first time I actually tried to remove those stupid mould lines! Anyway, I strongly dislike priming my minis with GWs spray paint. And thanks to the Foundation Colours, I actually don't consider it necessary. I'll try it out, however, since I do like my minis and want them to survive for quite a time. Link to comment Share on other sites More sharing options...
chaplain belisarius Posted June 29, 2010 Share Posted June 29, 2010 thanks mate! :P Link to comment Share on other sites More sharing options...
Rogan Posted June 29, 2010 Author Share Posted June 29, 2010 Anytime, Brother Chaplain. You're welcome! Link to comment Share on other sites More sharing options...
chaplain belisarius Posted June 29, 2010 Share Posted June 29, 2010 any chance of doing a guide on painting white scars and imperial fists for us poor people who cant paint for toffee?:P Link to comment Share on other sites More sharing options...
Rogan Posted June 29, 2010 Author Share Posted June 29, 2010 Phew...! I'm not sure if I want to paint a White Scar ever again... But I could do that Fists tutorial. But it'll take some time. Link to comment Share on other sites More sharing options...
chaplain belisarius Posted June 29, 2010 Share Posted June 29, 2010 is it that difficult to paint white scars then? (always scared off by white-apparently its hard! ditto for the imperial fists...) thanks mate...:P Link to comment Share on other sites More sharing options...
Rogan Posted June 29, 2010 Author Share Posted June 29, 2010 You're welcome. Yellow isn't really much easier to paint - at least in my opinion. But as this thread is about blue fellows, so just send me a PM. Link to comment Share on other sites More sharing options...


Recommended Posts
Archived
This topic is now archived and is closed to further replies.