Jolemai Posted September 22, 2016 Author Share Posted September 22, 2016 Well seeing as you have Dante again I'll bring the Sanguinor and SG again, so that's one option scrubbed off :P MY VOTE is the Thunderhawk of course. That presumes we're on the same team which isn't guaranteed. I'll bring it up in the rules discussions over the coming months. As for the Thunderhawk, that'll probably be everyone's preference but I really don't think it's feasible... Link to comment Share on other sites More sharing options...
Damon Nightman Posted September 22, 2016 Share Posted September 22, 2016 Dante vs Dante?!?!? Jolemai 1 Back to top Link to comment Share on other sites More sharing options...
Jolemai Posted November 15, 2016 Author Share Posted November 15, 2016 Small update regarding the forthcoming Apocalypse (which now has ten participants...) I've settled on what I feel I can prepare for it and it looks something like this (likely completed in this order too): Repairing and finishing my Stormraven - Nov 30th (RTS vow) Painting twenty Mk IV BaC Marines - includes four Sergeants, three special weapons and four heavy weapons (magnetisation likely) - Doing this allows me to field an Angel's Blade in addition to everything else Magnetise my Imperial Knight With the following bonuses assuming I finish on time: Paint a Predator - Means my Pred formation has four models Scratchbuild a Void Shield Generator - had a feasible idea for this for years. Paint any extraneous hunte-killer missiles and pintle-mounted stormbolters - a game this big is strictly WYSIWYG Make paint ten counts-as Daemonettes and a counts-as Zarakeniel - because why not? Magnetise/fix my Cerberus CaptainHelion and Dolchiate Remembrancer 2 Back to top Link to comment Share on other sites More sharing options...
Charlo Posted November 15, 2016 Share Posted November 15, 2016 Make paint ten counts-as Daemonettes and a counts-as Zarakeniel - because why not? HERESY. FYI - I'm pretty sure the next made to order lot is the old amazing Daemonettes...... :o Jolemai 1 Back to top Link to comment Share on other sites More sharing options...
Jolemai Posted November 15, 2016 Author Share Posted November 15, 2016 Make paint ten counts-as Daemonettes and a counts-as Zarakeniel - because why not? HERESY. FYI - I'm pretty sure the next made to order lot is the old amazing Daemonettes...... Apparently, but I've already got ten Mantis Warriors coming in. Why? because if I run Malefic Daemonology it means I don't have to use my Dark Elves as counts-as Daemons! Charlo and foamy248 2 Back to top Link to comment Share on other sites More sharing options...
Dolchiate Remembrancer Posted November 15, 2016 Share Posted November 15, 2016 out of likes! Jolemai 1 Back to top Link to comment Share on other sites More sharing options...
Jolemai Posted November 29, 2016 Author Share Posted November 29, 2016 (edited) RTS update: My first ever Servitor (in the colours of my Knight House and Forge World, but that's another story): One day I'll master using this phone camera for models! (Yes, I've read the guides ) Edited November 29, 2016 by Jolemai CaptainHelion, Charlo and Damon Nightman 3 Back to top Link to comment Share on other sites More sharing options...
Jolemai Posted December 2, 2016 Author Share Posted December 2, 2016 Metallic Red Been experimenting with a metallic red armour scheme for my Terchmarines, but I'm not quite there yet. 1st attempt: This starts off in the same manner I did my Sanguinary Guard and how I commonly do metallics (although these days I tend to use Chainmail rather than Mithril Silver for bits which will stay silver) Black undercoat "Heavy" drybrush of Mithril Silver Two coats of (classic) Red Wash I wasn't happy with this because it's too dull for what I'm after. 2nd attempt (which also showcases the red I've got on my Stormraven) This follows the "Duncan Rhodes school of painting": Black undercoat Two thin, thinned down coats of Mithril Silver Black ink in the recesses Top coat of Mithril Silver mixed with two "brush loads" of Red Wash You can't really see it, but I've achieved a fabulous metallic pink... Basically, it looks like I've still got some developing to do. "Oh, but Jolemai," I hear you ask, "why not buy some Carroburg Crimson/Citadel Tint Set/Tamiya Clear?" We basically, I've got a lifetime supply of Mithril Silver and Red Wash and basically, I'd rather try and use it up before purchasing something else. I've also got some Purple Wash, so maybe try attempt two, but go for a mix of Red and Purple Wash at ratio of 3:1 (and enough silver to make it work)? Link to comment Share on other sites More sharing options...
Charlo Posted December 2, 2016 Share Posted December 2, 2016 (edited) Is this the old "Red Ink" ? That is what I used over the Retributor Gold on my TDA for the Apoc and after 2 coats that gave an ace finish. Flash is dulling it a little bit as it's flooded with light, but otherwise it's a very rich metallic blood red - more BA than Thousand Sons if you will. The blood drops are the same. I think the gold will give you that much richer base to work from and a warmer colour. Silver is the metallic from of white, and white + red = pink ;) Edited December 2, 2016 by Charlo Slothysaur and Jolemai 2 Back to top Link to comment Share on other sites More sharing options...
Jolemai Posted December 2, 2016 Author Share Posted December 2, 2016 I've just been linked this which might work with some modification. I also need to do some trial and error to get a colour similar to Carroburg Crimson (seriously, I don't need to buy more paints!) Link to comment Share on other sites More sharing options...
Charlo Posted December 2, 2016 Share Posted December 2, 2016 That is quite nice! Like a multi-step of mine. Whatever army I end up going with in Heresy it's going to be metallic as hell. Jolemai 1 Back to top Link to comment Share on other sites More sharing options...
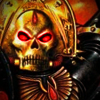
Jolemai Posted December 6, 2016 Author Share Posted December 6, 2016 Also been linked this from our archives which fits the paints I've got. Still unsure if I'll get the colour I'm after: Yes, it's this chap we all know and love. He's NMM red but I'm sure I can replicate it with the paints in my collection. Just need to somehow get my colour a more richer red. Lucumon 1 Back to top Link to comment Share on other sites More sharing options...
Jolemai Posted December 9, 2016 Author Share Posted December 9, 2016 A little belated but here's a battle report: Blood Angels Vs Eldar – 1250 points Army Lists Blood AngelsLost Brotherhood Strike Force – Red Thirst (+1 INT on the charge); Unleashed Upon the Foe (free 6” move on Deployment); The Angel’s Virtue (re-roll BA-related Warlord traits)Command Death Company ChaplainDeath Company Strike Force – The Black Rage (+1 ATK if within 12” of its Death Company Chaplain) Death Company Chaplain - Warlord Three squads of Death Company Death Company Dreadnought 10th Company Ambush Force – The Trap is Sprung (Precision Shots on the first turn); Concealed Positions (Stealth if you have infiltrated and haven’t moved) Three Scout SquadsOfficio Assassinorum Detachment Eversor Assassin EldarCraftworld Warhost – Run moves are automatically rolls of sixWindrider Warhost – Tempest of Blades (once per game and provided the Farseer is alive, shuriken weaponry gain Shred for a phase) Farseer – Jetbike, Runes of Fate, Warlord Three units of Windriders One squadron of Vypers Warlock Conclave - Jetbikes Crimson Death – Preferred Enemy (Flyers, FMCs); Evasive Manoeuvres (4+ cover save, electing to Jink makes it re-rollable) Three Crimson Hunters, one of which is an ExarchDeploymentMission: Cloak and ShadowsSetup: Default (Hammer and Anvil)The board is a Realm of Battle board with six tiles of the order: ABC DEF There are hills on the external corners of tiles C and D. All structures are ruins and follow the BRB rules for them, but the ground floor of a ruin offers no cover save or imposes no movement penalties. Ascending a floor is done via an access point or climbing the edges/through a window, descending is done via an access point of by jumping. Tiles A and C each have a ruin in the centre of them and there are two ruins in tile B. Tile D and E each have a ruin that is off-centre to the right, with Tile E also having a fenced off area with some smoking wreckage. Tile F has two ruins: one is in the top left and one in the bottom right. Finally, there’s an Imperial Statue in the centre of the board which affords the same cover save as everything else.Objective (Obj) 1 is placed on the ruin in tile D while Obj2 is placed adjacent to the Imperial Statue in tile B. Obj3 is on the first floor of the innermost ruin of tile F and Obj4 is in tile B underneath the ruin that is adjacent to tile A. Obj5 sits near the smoking wreckage and Obj6 sits by Tile D’s ruin. Mysterious Objectives are in play. In addition to Guide, the Farseer rolls Eldritch Storm, Fortune and Mind War from the Runes of Fate table. The Warlock Conclave get Enhance/Drain to compliment Conceal/Reveal from the Runes of Battle table.The DCW’s Warlord Traits were Master of Ambush (Warlord and three units gain Infiltrate) and Divide and Conquer (-1 opponent Reserve Rolls), while the Farseer’s trait was Fate’s Messenger (re-roll saving throws of 1). Death from the Skies content was not in use.Deploying first, the Blood Angels set up the DCC in line with Obj4 and advance towards it 6” and discovers it (bomb). The DCD starts in the Drop Pod and everything else Infiltrates.With little to counter, the Eldar player sets up defensively. The Farseer is in the centre of the Eldar deployment zone with the first squad of Windriders (J1) in the innermost ruin of tile F and underneath Obj3 (Scatterfield). The second squad (J2) deploys “south” of this in tile F and the third squad (J3) to the “north” in tile C. The Vypers deploy behind the Farseer and the Crimson Death Formation starts in Reserves.All Blood Angels Scouts infiltrate as close to J1 as they can and then advance 6” towards the Farseer. The Eversor does the same and remains 6” behind them and near to Obj2 (Skyfire Nexus). The squad of Death Company with the power lance (DCL) deploy on the ruin closest to the enemy in tile B, whilst the squad with the power axe (DCA) deploy on Obj1 (Skyfire Nexus). The DCW and the squad with the power fist (DCF) deploy behind the Imperial Statue and all DC squads use their 6” to get into cover if not already there. Finally, all the Scouts make their Scout move towards the Farseer. There is no night fight and the Blood Angels get the first turn. Turn One Blood Angels~ Three hidden Tactical Objectives (TO) are drawn~ The Drop Pods lands in Tile F and the DCD disembarks onto the ruin that houses Obj3. DCA advance into the cover of the Drop Pod, DCF advance towards Obj1 and DCL drop down a floor to meet the oncoming DCC at the bottom. The Eversor moves towards the Scouts.~ All the Scouts, DCD and the Drop Pod combine their fire to obliterate the Warlock Council (First Blood) and leave the Farseer on two wounds. DCF run onto Obj1 and DCL make it to the bottom floor.~ TOs 46 (Domination) is discarded Eldar~ Three hidden TOs are drawn~ J1 moves towards the DCF with the Farseer moving around the Drop Pod and within range of DCF. J2 moves towards DCL with J3 and the Vypers moving back towards the edge of tile C.~ A large Eldritch Storm is cast which scatters off target. This causes one wound to DCA and the Farseer takes a wound from Perils of the Warp~ J1 & J2 combine to obliterate DCF leaving the DCW remaining. J3 kills a mere three Scouts and the Farseer turbo boosts into tile D~ Further movement sees J1 and J2 move into tile E and J3 into the corner of Tile C.~ TO’s 52 (Blood and guts) and 63 (Scour the Skies) are discarded whilst 51 (Overwhelming Firepower) is claimed for 1 VP BA: 1-1 :Eldar Turn Two Blood Angels~ The Eversor and Scout Squad 3 (SC3) advance on J2, Scout Squad 2 (SC2) moves onto Obj1 and Scout Squad 1 (SC1) heads over to tile C. DCA approached J1, DCW goes after the Farseer and DCL moves onto Obj2.~ DCA shoot down one from J1, with DCL doing the same to J2~ DCA charge and destroy J1, the Eversor (and DCL cheerleaders) charge and annihilate J2 before consolidating back onto Obj2, while the DCW charges and easily dispatches the Farseer (Slay the Warlord)~ TO 21 (Claim Objective 2) is claimed for 1 VP and 61 (Kingslayer) yields 2 VPs Eldar~ J3 moves into line of sight of SC1, while the Vypers move out of range of the DCD and Drop Pod~ J3 shoot one from SC1~ J3 moves again into the midpoint between tile C and F~ TOs 43 (Hold the Line) and 55 (Psychological Warfare) are discarded BA: 5-1 :Eldar Turn Three Blood Angels~ Everything that can advance towards the Eldar does so~ SC2 shoot down a jetbike whilst everything else runs forward~ SC2 charges J3 and it’s a draw~ TO 55 (Psychological Warfare) is discarded Eldar~ The Vypers get line of sight on the DCD~ the Vypers knock a HP off the DCD~ The fight between SC2 and J3 continues BA: 5-1 :Eldar Turn Four Blood Angels~ The Eversor moves onto Obj2, DCA moves towards the Drop Pod and the DCD moves into cover of the large ruin in tile C. The remaining Scouts and DCL move towards the melee.~ Everything runs bar a squad of Scouts who Immobilise a Vyper.~ Combat continues Eldar~ The Crimson Death Formation arrives with the Exarch (CHE) moving over Obj3, a regular Crimson Hunter (CH1) moving over Obj1 and the final Crimson Hunter (CH2) lining up behind the DCD. The working Vypers abandon the broken one.~ The broken Vyper kills SC1 and the others, the CHE and CH2 combine to wipe out DCL. CH1 wrecks the DCD.~ Combat remains a stalemate~ TO E16 (Combined Strike) is cashed in for 1 VP, 53 (No Prisoners) yields 3 VP and 41 (Recon) is discarded BA: 5-5 :Eldar Turn Five Blood Angels~ DCA move onto Obj1, SC1 moves onto Obj3 and SC2 move over the wreckage of the DCD~ DCA knock a HP off CH1 thanks to the Skyfire Nexus~ SC3 win the combat by 1 and run down J3. They consolidate towards the Vypers.~ TOs DC16 (Vengeance for Sanguinius) and 42 (Behind Enemy Lines) are claimed for 1VP apiece Eldar~ The Vypers move to get a better line of sight and the CHE advances on the remaining Death Company. The other Flyers zoom around the board.~ The broken Vyper another Scout Squad whilst the other ones kill the Eversor. CHE and CH2 kill DCA (leaving the Chaplain alive) and CH1 moves Flat Out~ TO 56 (Harness the Warp) is discarded BA: 7-5 :Eldar Game ends LutherMax, Riot Earp and Lucumon 3 Back to top Link to comment Share on other sites More sharing options...
Lucumon Posted December 9, 2016 Share Posted December 9, 2016 ... you actually caught his farseer? How'd you manage that? Also, did the Crimson Hunters not come in until turn 4? That was a boon for you... Jolemai 1 Back to top Link to comment Share on other sites More sharing options...
LutherMax Posted December 11, 2016 Share Posted December 11, 2016 You did much better than I against a similar list! I drew impossible cards though and we didn't (do now) house rule that you can discard them... Jolemai 1 Back to top Link to comment Share on other sites More sharing options...
Xenith Posted December 11, 2016 Share Posted December 11, 2016 I think being able to discard one card per turn is part of the basic maelstrom rules, and not a house rule, Luther! Jolemai 1 Back to top Link to comment Share on other sites More sharing options...
LutherMax Posted December 11, 2016 Share Posted December 11, 2016 (edited) Really? We played Escalation where you always have a number of cards equal to the turn number. I thought you could only discard completed cards, or if you've completed everything that can be completed you can discard one additional card? I had some that were literally impossible (destroy a building when there were none, destroy an MC when there were none), but I also had Kingslayer which was not impossible in the same way, but I couldn't catch the Farseer on the bike. So because I couldn't complete that I couldn't discard anything..? Edited December 11, 2016 by LutherMax Jolemai 1 Back to top Link to comment Share on other sites More sharing options...
Tyriks Posted December 11, 2016 Share Posted December 11, 2016 We always house rule that you discard ones that are conceptually impossible (like destroy a building when there are none) but not ones that are conceptually possible even if they are not functionally possible (like slay the Witch if his Psykers aren't on the table yet, or big game hunter when I have no weapons to hurt it, et cetera). It benefits both players and it makes the game more fun. We started doing that in my group after a deadlock game where we both had multiple impossible cards turn one which made the game a total drag since discarding objectives doesn't actually get you new ones. Jolemai 1 Back to top Link to comment Share on other sites More sharing options...
LutherMax Posted December 11, 2016 Share Posted December 11, 2016 Yeah that's how we're gonna play it from now on. But it's true to say you can't normally choose to discard one of your choice each turn..? Jolemai 1 Back to top Link to comment Share on other sites More sharing options...
Xenith Posted December 11, 2016 Share Posted December 11, 2016 Check the paragraph in the rulebook under "discarding tactical objectives" page 137. You can choose to discard one objective that remains incomplete after scoring completed ones. Dolchiate Remembrancer and Jolemai 2 Back to top Link to comment Share on other sites More sharing options...
Tyriks Posted December 11, 2016 Share Posted December 11, 2016 Discarding is not dependent upon completing some. It just happens afterwards. Jolemai 1 Back to top Link to comment Share on other sites More sharing options...
Xenith Posted December 11, 2016 Share Posted December 11, 2016 Never said they were, it's all in the end of turn scoring sequence. You cannot discard an objective you just completed for obvious reasons. Jolemai 1 Back to top Link to comment Share on other sites More sharing options...
Tyriks Posted December 11, 2016 Share Posted December 11, 2016 Never said they were, it's all in the end of turn scoring sequence. You cannot discard an objective you just completed for obvious reasons. Sorry, I was responding to LutherMax, not you. Xenith and Jolemai 2 Back to top Link to comment Share on other sites More sharing options...
LutherMax Posted December 11, 2016 Share Posted December 11, 2016 Damn, we played that wrong. May have been quite a different game! Thanks for the lesson guys, we'd better not derail Jolemai's thread any further! Jolemai 1 Back to top Link to comment Share on other sites More sharing options...
Jolemai Posted December 12, 2016 Author Share Posted December 12, 2016 Don't worry about it; it's nice to see my report provoked some discussion for a change. So yeah, you can discard a single Tactical Objective at the end of your turn - of course, the problem here is that you end up having one (or more) cards you cannot achieve in your hand for at least a turn. I don't actually mind this. To me, the whole point of Maelstrom is the fluidity of the Objective system and it represents having to do things during battle with the orders coming from on high. When a card appears that you can't achieve, this "accurately" represents the fog of war; be it incorrect information sent to High Command or be it a delay in the message coming through (technological/warp shenanigans). The game is no less interesting to me because of this but then, there's not a great deal riding on my games other than banter. I do understand why people want to house rule it though. Xenith 1 Back to top Link to comment Share on other sites More sharing options...

Recommended Posts
Create an account or sign in to comment
You need to be a member in order to leave a comment
Create an account
Sign up for a new account in our community. It's easy!
Register a new accountSign in
Already have an account? Sign in here.
Sign In Now