Biohazard Posted December 12, 2012 Share Posted December 12, 2012 Ive been asked a few times how I made my Defiler counts as so thought Id give a little rundown on the parts used. It was a really simple build so I wont go into too much depth with the actual 'how to' One thing to note is if you were to buy all the kits needed to build this outright it would cost an absolute fortune but if you have a decent sized bitz box you may have most of the parts already, if not ebay or bits sites are your friend. Or if you happen to be pretty handy with plasticard you could knock one of these up for next to nothing. ;) I was lucky as I had pretty much all the parts left over from my other walker (seen in my WE thread) the only thing I had to buy was the lascannon mount for one of the toes. I saw some crazy prices for it as a lot of places wouldnt seel it as an individual bit so be warned. ;) This is what my Blood Stalker looks like http://i113.photobucket.com/albums/n235/Stovie_2006/A28E43CF-F96F-49F7-A218-7E1A02F22298-1769-00000240A2994EEB.jpg Red Lines indicate where I cut. This is really rough and ready so I apologise. For this you'll need Defiler torso,legs and Exhausts. 4 legs and as many armour plates as you like. :P http://i113.photobucket.com/albums/n235/Stovie_2006/Blood%20Stalker%20Tutorial/Untitled.jpg http://i113.photobucket.com/albums/n235/Stovie_2006/Blood%20Stalker%20Tutorial/chaos_defiler_exhausts_large.jpg http://i113.photobucket.com/albums/n235/Stovie_2006/Blood%20Stalker%20Tutorial/chaos_defiler_body_bottom_large.jpg The twin linked weapon mount found on the Defiler and Land Raider sprues http://i113.photobucket.com/albums/n235/Stovie_2006/Blood%20Stalker%20Tutorial/chaos_defiler_weapon_mount_2_large-1.jpg The Havoc Launcher mount from the Chaos Tank Sprue http://i113.photobucket.com/albums/n235/Stovie_2006/Blood%20Stalker%20Tutorial/776170393133.jpg The rear vents from the SM Whirlwind missile launchers http://i113.photobucket.com/albums/n235/Stovie_2006/Blood%20Stalker%20Tutorial/space_marine_whirlwind_missile_pod_large.jpg Two Dreadnought feet, Im sure you are all familiar with these so I wont add a pic of them :) Storm Raven Tail section and Rear Assault Ramp http://i113.photobucket.com/albums/n235/Stovie_2006/Blood%20Stalker%20Tutorial/blood_angels_storm_raven_tail_large-1.jpg http://i113.photobucket.com/albums/n235/Stovie_2006/Blood%20Stalker%20Tutorial/space-marine-stormraven-ramp-rear-4662-pekm288x288ekm.jpg Land Raider parts needed are the front assault ramp (both parts) and two of the lower sponson mounts http://i113.photobucket.com/albums/n235/Stovie_2006/Blood%20Stalker%20Tutorial/space_marine_land_raider_sponson_mount20-20right.jpg http://i113.photobucket.com/albums/n235/Stovie_2006/Blood%20Stalker%20Tutorial/land_raider_ramp_bottom_large.jpg http://i113.photobucket.com/albums/n235/Stovie_2006/Blood%20Stalker%20Tutorial/land_raider_ramp_top_large.jpg And any weapons you like, I used Twin Linked Lascannons as I had loads from the Land Raider kit and I converted the Reaper Assault Cannon from the Defiler kit into a heavy flamer for the other weapon option. The cannon on top was from the Ork Battlewagon kit with the defiler battlecannon front section added. In the next post Ill give some closeups of all the areas so you can get an idea of how it all goes together. Link to comment https://bolterandchainsword.com/topic/267651-blood-stalker-pattern-defiler/ Share on other sites More sharing options...
HellChyld Posted December 13, 2012 Share Posted December 13, 2012 This will be Epic!! and closely watched..... Link to comment https://bolterandchainsword.com/topic/267651-blood-stalker-pattern-defiler/#findComment-3259858 Share on other sites More sharing options...
Biohazard Posted December 13, 2012 Author Share Posted December 13, 2012 First off this is still paint in progress so apologies if there are rough spots. I started by using a saw to cut the defiler torso through the rear of the torso mount so when switched to bipedal it wouldnt sit so high, on top of this I glued a rhino hatch with a magnet glued to the bottom of it for a flat surface but any flat piece will do. http://i113.photobucket.com/albums/n235/Stovie_2006/D34F27FF-288B-4ED4-9498-816E7C8E20B6-4327-0000055ACC1CE9E9.jpg The legs were put together normally and then I cut the 'toes' off both sets and removed the blades (you might want to keep these as I readded them later.) The lower leg was made by cutting one pair of legs at the point indicated and simply glueing in the desired position. I made claw like toes for the feet by trimming all the extra bits off the dual weapon mounts and attached them to the sides of the lower leg, the blades from earlier were glued on above the lower pistons. http://i113.photobucket.com/albums/n235/Stovie_2006/Blood%20Stalker%20Tutorial/84CE51F4-22FD-48A9-948C-408E9B2F26C1-2079-000001D00508C7F8.jpg http://i113.photobucket.com/albums/n235/Stovie_2006/Blood%20Stalker%20Tutorial/938A7B8F-CEF5-4AB2-A362-63C89B8CE6B0-2079-000001CFFF6AC851.jpg I used a Defiler face mask to cover the random hole the original torso mount leaves. http://i113.photobucket.com/albums/n235/Stovie_2006/Blood%20Stalker%20Tutorial/6CBE70E7-6CC8-4020-AC11-F81B335484EB-2079-000001CFF91F3B69.jpg For the torso I simply lay the Storm Raven rear ramp down tor form the base and glued the cut side sections of the tail to it. These will form the sides of the hull. Be advised this does taper slightly to the rear due to the original shape of the tail but I liked the look of it. :o http://i113.photobucket.com/albums/n235/Stovie_2006/Blood%20Stalker%20Tutorial/812B41E4-B01B-4EEE-BA42-DF2E81B6780E-2079-000001D1A8319B37.jpg http://i113.photobucket.com/albums/n235/Stovie_2006/Blood%20Stalker%20Tutorial/480C7721-72F6-4BD0-9EFA-776DAA0A6AD9-2079-000001D1E0361105.jpg The Land Raider lower assault ramp was used as the 'roof' of the torso and the upper ramp was trimmed of all detail adn added as the rear wall. I then cut the Whirlwind vents to this to form a mock engine/power plant. The Defiler exhausts were cut and added to the sides just for aesthetics really. http://i113.photobucket.com/albums/n235/Stovie_2006/Blood%20Stalker%20Tutorial/26AB51F7-8742-4333-B425-FD8C36EFFA58-2079-000001D1AF8EB086.jpg http://i113.photobucket.com/albums/n235/Stovie_2006/Blood%20Stalker%20Tutorial/0165328B-AFC6-40EF-B428-15972C9ABE38-2079-000001D1B5DCE983.jpg The original top section of the SR tail is cut in half and glued to the sides of the torso box. To be perfectly honest I should have found a more sturdy way of attaching these as I do worry the join is a little flimsy. Iadded the cowl from the CSM bike to the front as there was a rather large gap left. The weapon mounts were created simply by glueing the Sponson mounts from the Land Raider to the underside of the wings with a dreadnought foot in the centre of each of these. I added a small magnet to the insert of the Dread foot so I could switch the weapons out at will. I also added another magnet to the inside of the torso so the Defiler could be split into two for transport. ;) http://i113.photobucket.com/albums/n235/Stovie_2006/Blood%20Stalker%20Tutorial/40EDE894-50B9-4B87-9871-A3FD0A44E40C-2079-000001D25A21337A.jpg I then added another small magnet to the top of the Havoc mount and mounted the twin linked lascannons in the launcher cradle, I had to use an off cut of plastic to help the Las fit a little better in the cradle as they were slightly to thin. The Battle cannon as stated is an Ork Shoota from the Battlewagon kit with the Defiler piece added. http://i113.photobucket.com/albums/n235/Stovie_2006/Blood%20Stalker%20Tutorial/4658A5BF-799C-41E9-82AF-77C09BAA3B06-2079-000001D2A8A55F23.jpg http://i113.photobucket.com/albums/n235/Stovie_2006/Blood%20Stalker%20Tutorial/E1E224A9-A336-4E1B-ADD1-05DB3AEAC433-2079-000001D2C2498F87.jpg http://i113.photobucket.com/albums/n235/Stovie_2006/Blood%20Stalker%20Tutorial/E638F714-F13F-4C9D-93A6-83223C7A05AA-2079-000001D2DDF5D107.jpg Link to comment https://bolterandchainsword.com/topic/267651-blood-stalker-pattern-defiler/#findComment-3259878 Share on other sites More sharing options...
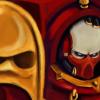
Biohazard Posted December 13, 2012 Author Share Posted December 13, 2012 For some reason I forgot to add the list of parts for the head in the original post. I used the Defiler battlecannon mount and the skull (minus the obnoxioulsy large horns) from the Ogre Kingdoms Stonehorn kit. I stuck the two Teleport homers side by side, this took a little trimming but they do fit snugly....eventually. I cut the flashy light looking bit from the end of these and left the two stalks. I glued this to the part where the cannon originally sat on the mount. Again some trimming was required to get it to sit flush. After cutting the mahoosive horns off the Stonehorn skull I added this over the top and added some cables from the Defiler CCW and other bits from my bitz box. http://i113.photobucket.com/albums/n235/Stovie_2006/815251BE-09A4-4FFD-AEF2-AD74E64DA689-9794-00000A04CC7B8F31.jpg http://i113.photobucket.com/albums/n235/Stovie_2006/46635257-5DF6-40A7-B1F2-69CA813F6724-9794-00000A04BF6F2D1D.jpg http://i113.photobucket.com/albums/n235/Stovie_2006/2F0B1629-5AAE-45B4-A132-9166B1BF649C-9794-00000A04C5D6E5FF.jpg Thats pretty much it. I have had a few beers while writing this so if anything doesnt really make sense drop me a line and Ill try and clarify. ;) The almost finished product Kill Maim Burn etc etc :o http://i113.photobucket.com/albums/n235/Stovie_2006/0207693E-096E-433B-8B90-9DB0C426D401-1769-000002407E345C1F.jpg http://i113.photobucket.com/albums/n235/Stovie_2006/0520AC0A-32F8-4358-A9EA-5558DD1732F7-1769-0000024095857CC3.jpg http://i113.photobucket.com/albums/n235/Stovie_2006/D524F676-E95E-4A7F-BC12-AD22F5188830-1769-000002408E12176D.jpg Cheers Craig (Biohazard) Link to comment https://bolterandchainsword.com/topic/267651-blood-stalker-pattern-defiler/#findComment-3259898 Share on other sites More sharing options...
HellChyld Posted December 13, 2012 Share Posted December 13, 2012 Once again Epic! Looking forward to building one for my khorne Nightlords. Awesome tut! Link to comment https://bolterandchainsword.com/topic/267651-blood-stalker-pattern-defiler/#findComment-3259917 Share on other sites More sharing options...
lionofjudah Posted December 13, 2012 Share Posted December 13, 2012 thats really freakin cool man...genius idea with your bits box....ive got the majority of this stuff, now just need some time;)...thanks for the inspiration!!! Link to comment https://bolterandchainsword.com/topic/267651-blood-stalker-pattern-defiler/#findComment-3260344 Share on other sites More sharing options...
Brother Ambroz Posted December 13, 2012 Share Posted December 13, 2012 Wow awesome Biohazard, I'd really like to make one these one day down the road. I'm a bit confused about the head though, I recognize the skull from the stonehorn kit but what part of that comes from the defiler battlecannon mount? Also what kit did you get the teleport homers from? Link to comment https://bolterandchainsword.com/topic/267651-blood-stalker-pattern-defiler/#findComment-3260363 Share on other sites More sharing options...
Azekai Posted December 13, 2012 Share Posted December 13, 2012 This guide is fantastic. Thanks for this, Biohazard, and well done! Link to comment https://bolterandchainsword.com/topic/267651-blood-stalker-pattern-defiler/#findComment-3260420 Share on other sites More sharing options...
DarKHaZZ13 Posted December 13, 2012 Share Posted December 13, 2012 It is a beaut of a conversion I'm thinking about nicking the idea, making it slightly more imperial and using it for an ad-mech unit Link to comment https://bolterandchainsword.com/topic/267651-blood-stalker-pattern-defiler/#findComment-3260486 Share on other sites More sharing options...
Biohazard Posted December 14, 2012 Author Share Posted December 14, 2012 Thanks folks, if anybody does try this post your creations in here, id love to see someone elses take on it. Tanith Ghost its this bit that the head is mounted on.http://i113.photobucket.com/albums/n235/Stovie_2006/Blood%20Stalker%20Tutorial/chaos_defiler_battlecannon_large.jpg I cut the barrel off and turned it on its side, with a magnet underneath it the head also pivots. :D The teleport homers are from the Terminator kit I believe. Link to comment https://bolterandchainsword.com/topic/267651-blood-stalker-pattern-defiler/#findComment-3261189 Share on other sites More sharing options...
Biohazard Posted December 14, 2012 Author Share Posted December 14, 2012 Thanks folks, if anybody does try this post your creations in here, id love to see someone elses take on it. Tanith Ghost its this bit that the head is mounted on. http://i113.photobucket.com/albums/n235/Stovie_2006/Blood%20Stalker%20Tutorial/chaos_defiler_battlecannon_large.jpg I cut the barrel off and turned it on its side, with a magnet underneath it the head also pivots. :D The teleport homers are from the Terminator kit I believe. Link to comment https://bolterandchainsword.com/topic/267651-blood-stalker-pattern-defiler/#findComment-3261190 Share on other sites More sharing options...
Midnightmare Posted December 23, 2012 Share Posted December 23, 2012 Excellent guide bro, you make it look easy! Finished product looks excellent ;) Link to comment https://bolterandchainsword.com/topic/267651-blood-stalker-pattern-defiler/#findComment-3268096 Share on other sites More sharing options...
Biohazard Posted February 16, 2013 Author Share Posted February 16, 2013 Thought Id update this with a couple of finished (for now) pics http://i113.photobucket.com/albums/n235/Stovie_2006/F62BFB13-F25D-41A5-BBA3-687D9CA27C7B-201-0000000F36D3A0E6.jpghttp://i113.photobucket.com/albums/n235/Stovie_2006/05A2AC1F-EF08-40C6-92F4-B3BB56F10A44-201-0000000EA3389A5F.jpghttp://i113.photobucket.com/albums/n235/Stovie_2006/8FF3186C-6E41-44D0-84E5-3FF363B4CCDA-201-0000000E8A61340B.jpghttp://i113.photobucket.com/albums/n235/Stovie_2006/68D0A534-2D18-48E3-A5E0-5E3B2A8AD220-201-0000000F074D4D50.jpghttp://i113.photobucket.com/albums/n235/Stovie_2006/014A0D9F-B8B3-4E10-B98E-981EE50EF4F0-201-0000000F1DAEF8C3.jpg Link to comment https://bolterandchainsword.com/topic/267651-blood-stalker-pattern-defiler/#findComment-3306794 Share on other sites More sharing options...
Pors Posted February 17, 2013 Share Posted February 17, 2013 That is a machine of pure unadulterated chaos. You did a great job with the figure. :P Link to comment https://bolterandchainsword.com/topic/267651-blood-stalker-pattern-defiler/#findComment-3306891 Share on other sites More sharing options...
redmapa Posted February 17, 2013 Share Posted February 17, 2013 This is just brutal! awesome stuff Link to comment https://bolterandchainsword.com/topic/267651-blood-stalker-pattern-defiler/#findComment-3306943 Share on other sites More sharing options...
Biohazard Posted February 26, 2013 Author Share Posted February 26, 2013 Thanks guys, like i say if anyone has a go at this Id love to see the results in here. :) Link to comment https://bolterandchainsword.com/topic/267651-blood-stalker-pattern-defiler/#findComment-3315025 Share on other sites More sharing options...
Adeptus-Alaska Posted February 26, 2013 Share Posted February 26, 2013 you, are a madman! any chance of scottish decent? If I played the dirty traitors, I woulde definately have a go. you scare me, and thats not a bad thing! Link to comment https://bolterandchainsword.com/topic/267651-blood-stalker-pattern-defiler/#findComment-3315156 Share on other sites More sharing options...
PassionFruit Power Posted April 7, 2013 Share Posted April 7, 2013 hi i looked at this tutorial and i just had to make one slightly different design but i really like how mines coming along not to sure bout the head what do'ya think http://i1324.photobucket.com/albums/u601/Pedro2621/907100e4-dd1f-4f87-8075-c9a2986e339d_zpscbbbdf34.jpg this pic does not give it any justice Link to comment https://bolterandchainsword.com/topic/267651-blood-stalker-pattern-defiler/#findComment-3344624 Share on other sites More sharing options...
Biohazard Posted April 7, 2013 Author Share Posted April 7, 2013 hi i looked at this tutorial and i just had to make one slightly different design but i really like how mines coming along not to sure bout the head what do'ya think http://i1324.photobucket.com/albums/u601/Pedro2621/907100e4-dd1f-4f87-8075-c9a2986e339d_zpscbbbdf34.jpg this pic does not give it any justice This looks like you're off to a great start. Any chance of some more pics? Are those bits from the Aegis defence line you've used for the torso? It looks great, for the head I think it's also promising but could maybe do with a grille or something in the mouth area, the grille from the bastion kit would be ideal for this. Also nice touch on the eyes. Now, show me more haha :) :tu: Link to comment https://bolterandchainsword.com/topic/267651-blood-stalker-pattern-defiler/#findComment-3344650 Share on other sites More sharing options...
PassionFruit Power Posted April 7, 2013 Share Posted April 7, 2013 i have used the top part of a bastion i made mine like a bunker take 2 of the head http://i1324.photobucket.com/albums/u601/Pedro2621/Photoon2013-04-07at15112_zps64f974a9.jpg http://i1324.photobucket.com/albums/u601/Pedro2621/Photoon2013-04-07at15113_zps8776a7bb.jpg sorry bout the bad photos can't find my camera Link to comment https://bolterandchainsword.com/topic/267651-blood-stalker-pattern-defiler/#findComment-3344659 Share on other sites More sharing options...
Biohazard Posted April 7, 2013 Author Share Posted April 7, 2013 Looking good, I used a similar style of single eye on one of my Gorehound mock up heads. Will your walker be a Chaos or Imperial one mate? Link to comment https://bolterandchainsword.com/topic/267651-blood-stalker-pattern-defiler/#findComment-3344921 Share on other sites More sharing options...
PassionFruit Power Posted April 7, 2013 Share Posted April 7, 2013 chaos for sure, its so hard to get the right head though i thought it would be easy Link to comment https://bolterandchainsword.com/topic/267651-blood-stalker-pattern-defiler/#findComment-3345097 Share on other sites More sharing options...
Biohazard Posted April 8, 2013 Author Share Posted April 8, 2013 Trust me buddy, it took me a lot of trial and error to come up with the head for this and even more for my Titan kit bash. Lol. It's the most important part of the model IMHO so I always like to spend a bit more time on it. Will you be going for an undivided walker or for a follower of one of the four gods? Link to comment https://bolterandchainsword.com/topic/267651-blood-stalker-pattern-defiler/#findComment-3345591 Share on other sites More sharing options...
PassionFruit Power Posted April 8, 2013 Share Posted April 8, 2013 i'm not sure if mine will follow one of the chaos gods, i am very close to scraping what i have done and to start making a GOREHOUND (any tips if i go insane) not much work getting done at the min Link to comment https://bolterandchainsword.com/topic/267651-blood-stalker-pattern-defiler/#findComment-3345853 Share on other sites More sharing options...
Biohazard Posted April 11, 2013 Author Share Posted April 11, 2013 Lol, I went insane with the Gorehound aaaaages ago. I've recently move home and unfortunately i got a little damaged in transit. Good thing is I can rebuild it slightly better. Bad thing is I have to rebuild it lol. Link to comment https://bolterandchainsword.com/topic/267651-blood-stalker-pattern-defiler/#findComment-3347377 Share on other sites More sharing options...
Recommended Posts
Archived
This topic is now archived and is closed to further replies.