Augustus b'Raass Posted May 21, 2016 Author Share Posted May 21, 2016 (edited) @ Midnight Runner: thanks man, I'm glad you like them. :)Which ones are your favourite? @ Res: Ooooh you mean magnetize the thorax to the daemon body! Yeah that's totally doable. Easy smeezy, actually. Just drill holes in both ends, put some putty in and reasonable strong magnets (these will probably do the trick just fine) while the putty is still maleable, so the magnets line up properly. That'd be a possibility, no? PS You can get your megnets cheap and fast from www.supermagnete.de Edited May 21, 2016 by Augustus b'Raass Res Ipsa Loquitur 1 Back to top Link to comment https://bolterandchainsword.com/topic/286791-augustus-braass-pre-heresy-brass-scorpion-p247/page/88/#findComment-4401556 Share on other sites More sharing options...
GhostMalone Posted May 21, 2016 Share Posted May 21, 2016 Dude blood slaughterers are awesome! I still hope one day you do a full Imperial army as in cardiac or vostroyan or steel Legion etc. Ohh and how are you doing those bases? Link to comment https://bolterandchainsword.com/topic/286791-augustus-braass-pre-heresy-brass-scorpion-p247/page/88/#findComment-4401619 Share on other sites More sharing options...
Atia Posted May 22, 2016 Share Posted May 22, 2016 (edited) I need to admit, the daemon-claw always screamed Slaanesh to me, but it works here :) And holy moly stop beeing so fast QQ I mean ... be fast but ... *,* Ps: the slaughterers are sooo cute Edited May 22, 2016 by Atia Augustus b'Raass 1 Back to top Link to comment https://bolterandchainsword.com/topic/286791-augustus-braass-pre-heresy-brass-scorpion-p247/page/88/#findComment-4401726 Share on other sites More sharing options...
Midnightmare Posted May 22, 2016 Share Posted May 22, 2016 @ Midnight Runner: Which ones are your favourite? I have got to admit I am looking forward to your Spartan (as well as the Typhon ofc), the GUO (one of FW's best) and the new Bloodthirster holds a special place in my heart :) Link to comment https://bolterandchainsword.com/topic/286791-augustus-braass-pre-heresy-brass-scorpion-p247/page/88/#findComment-4401769 Share on other sites More sharing options...
Augustus b'Raass Posted May 22, 2016 Author Share Posted May 22, 2016 Thanks for all the replies, gang. :D @ Kurama: Haha, thanks bro. Admittedly, there's very little chance of me doing a loyalist IG army. But perhaps in the distant future there'll be some traitor guard. The bases are easy to do, but involve quite a lot of steps. I'll do a how to on the bases when I'll start the Bloodthirster, how's that? @ Atia: Thanks Re: the blood slaughterers. Re: the claw: Oh right, well, I agree actually. But I guess a Khornate colour scheme makes everything look khornate? I'm serious, actually! :) Also, no way I'm slowing down! I need to beat that history loving Kurama! @ Midnight Runner: Oh crap dude, all of those are last on my to do list! First up are all the Khornate things... I'm still debating about whether or not I'll do the Spartan in Khornate colours.... GhostMalone and Atia 2 Back to top Link to comment https://bolterandchainsword.com/topic/286791-augustus-braass-pre-heresy-brass-scorpion-p247/page/88/#findComment-4401779 Share on other sites More sharing options...
Dragonlover Posted May 22, 2016 Share Posted May 22, 2016 I've spotted a flaw in my plan this year. As with last year, we've both vowed the same superheavy. As with last year, you'll probably finish yours first. As with last year, yours will look *way* better than mine. Ah well. Tis a small price to pay for glory! You're off to a fine start chap. Got any Maulerfiends planned? They'd look sweet in that scheme. Dragonlover Augustus b'Raass 1 Back to top Link to comment https://bolterandchainsword.com/topic/286791-augustus-braass-pre-heresy-brass-scorpion-p247/page/88/#findComment-4401849 Share on other sites More sharing options...
Eldrick Shadowblade Posted May 22, 2016 Share Posted May 22, 2016 (edited) This is my favorite pic! They look great. Wouldn't want to face them across the table! We're coming for your table quarter.... Edited May 28, 2016 by Eldrick Shadowblade Augustus b'Raass 1 Back to top Link to comment https://bolterandchainsword.com/topic/286791-augustus-braass-pre-heresy-brass-scorpion-p247/page/88/#findComment-4401864 Share on other sites More sharing options...
KrautScientist Posted May 22, 2016 Share Posted May 22, 2016 Whoa, you're on fire, buddy! Khorne is pleased! ;) The Bloodslaughterers are looking excellent, and your new Khornate scheme seems to be working just fine! Now I'll have to be a bastard for a second here and point out that the Soulgrinder, while already pretty cool, is not quite as awesome yet as it could be. I don't know, it just seems to be missing that special something, especially some kind of pop around the facial area -- maybe some glowing blue eyes might do the trick?! Link to comment https://bolterandchainsword.com/topic/286791-augustus-braass-pre-heresy-brass-scorpion-p247/page/88/#findComment-4401889 Share on other sites More sharing options...
Pearson73 Posted May 22, 2016 Share Posted May 22, 2016 Those daemon engines are looking great. Link to comment https://bolterandchainsword.com/topic/286791-augustus-braass-pre-heresy-brass-scorpion-p247/page/88/#findComment-4401895 Share on other sites More sharing options...
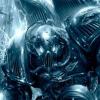
Augustus b'Raass Posted May 22, 2016 Author Share Posted May 22, 2016 Next up, the dreadclaw. I'm doing this bad boy in 40K World Eaters colours. For the longest time I thought I'd do it in Night Lords colours, but that army is a bit finished. I recently fielded the unpainted one in a KDK game, with a vanilla Contemptor inside, and it worked great! Hence, the colours, followed by maybe a Contemptor in a subsequent vow. :) http://i35.photobucket.com/albums/d185/mkruijff/World%20Eaters/temporary_zpszdo6xtzv.jpg I even magentized the pod itself to the flight stand: http://i35.photobucket.com/albums/d185/mkruijff/World%20Eaters/temporary_zpsxachiklg.jpg http://i35.photobucket.com/albums/d185/mkruijff/World%20Eaters/temporary_zpsorxmruwe.jpg Hope you like, and thanks for looking and commenting. ;) Replies: @ Dragonlover: Oh right, you're doing a Kytan too, no? I think I recall you having problems with the scoprion's legs last year, which cut back in your available painting time. The Kytan will give you no such trouble, for sure, so you can make that thing look exactly like you want it :) @ Eldrick Shadowblade: Hey buddy! Long time no hear from you! Glad you're back. If I'm ever in Florida or you in Amsterdam, we can face off against each other for sure ;) BTW would you mind putting the quoted pic in hidden brackets? Thanks! @ KrautScientist: Thanks! How is your work on the contemptor, Lord, and Fabius faring? The SG is indeed in need of some facial focal point, and perhaps blue glowing eyes is the way to go... @ pearson72: Cheers, buddy! :tu: Race Bannon, Atia, Kizzdougs and 1 other 4 Back to top Link to comment https://bolterandchainsword.com/topic/286791-augustus-braass-pre-heresy-brass-scorpion-p247/page/88/#findComment-4402097 Share on other sites More sharing options...
sockwithaticket Posted May 22, 2016 Share Posted May 22, 2016 In as far as a staunch loyalist such as myself can have favourit demon engines, the Blood Slaughterer is one of mine. And you've done two! They look great. Link to comment https://bolterandchainsword.com/topic/286791-augustus-braass-pre-heresy-brass-scorpion-p247/page/88/#findComment-4402348 Share on other sites More sharing options...
Aasfresser Posted May 23, 2016 Share Posted May 23, 2016 (edited) First: I love the new deamonengines! But.... but how about some small freehand or decal on the Slaughterers? Even on some of the open spaces on the Grinder. Like a Khorne symbol or the symbol of your khornate warband. Don't get me wrong: they are perfect as they are, but a little bit of freehand or decal to "loosen" the whole appearance. Like Kraut suggested with the face-focus on the Grinder. Edited May 23, 2016 by Aasfresser Link to comment https://bolterandchainsword.com/topic/286791-augustus-braass-pre-heresy-brass-scorpion-p247/page/88/#findComment-4402543 Share on other sites More sharing options...
Mechanist Posted May 23, 2016 Share Posted May 23, 2016 hose are some brutal looking engines of war. great job. Link to comment https://bolterandchainsword.com/topic/286791-augustus-braass-pre-heresy-brass-scorpion-p247/page/88/#findComment-4402563 Share on other sites More sharing options...
Kizzdougs Posted May 24, 2016 Share Posted May 24, 2016 Awesome work bro! Great to see you smashing out high quality completions :tu: Link to comment https://bolterandchainsword.com/topic/286791-augustus-braass-pre-heresy-brass-scorpion-p247/page/88/#findComment-4403288 Share on other sites More sharing options...
Augustus b'Raass Posted May 25, 2016 Author Share Posted May 25, 2016 Thanks guys! Today sees me finish the fourth of the ten models in my first ETL vow: the Dreadclaw Assault Pod. The more I paint my new found red recipe, the more I like it. I added a slight highlight of a 1:1 mix of FW Word Bearers Red and GW Wild Rider Red, which nicely complements the red so far. I also put on some of the GW chaos transfers - mostly black chaos stars and khornate symbols, but also three of the green-blue World Eater symbols. I know they look kind of comically, but I actually quite like how they complement the colour scheme I have going for my KDK warband. Anyway, here's pictures. Take a look : http://i35.photobucket.com/albums/d185/mkruijff/World%20Eaters/temporary_zpskuabcoj3.jpg http://i35.photobucket.com/albums/d185/mkruijff/World%20Eaters/temporary_zpsifjfibae.jpg As the Dreadlcaw is a flyer, I also made a flying base for it. It looks super weird! Take a look: http://i35.photobucket.com/albums/d185/mkruijff/World%20Eaters/temporary_zps4khen9lj.jpg I hope you like them :) Thanks for looking and your comments. Feedback is alsways welcome, it makes me a better hobbyist. :) Replies: @ sockwithaticket: Thanks, sock! I really like your recent additions too. Did you know that Rapiers are fomrally also daemons, albeit not rules-wise? @ Aasfresser: Decals will follow, most definitely. I'll put some on them and take pictures soon. Thanks for the suggestion. :tu: @ Mechanist: Cheers, buddy! @ kizzdougs: Thanks, kizz. You being such an accomplished painter, I always appreciate your feedback. :D As the Dreadlcaw is a flyer, I also made a flying base for it. It looks super weird! Take a look: Psykic_scribe, Eldrick Shadowblade and rednekkboss 3 Back to top Link to comment https://bolterandchainsword.com/topic/286791-augustus-braass-pre-heresy-brass-scorpion-p247/page/88/#findComment-4404628 Share on other sites More sharing options...
KrautScientist Posted May 25, 2016 Share Posted May 25, 2016 Aw, man, sweet Dreadclaw and everything, but PUH-LEASE: Not those horrible decals! And as if to add insult to injury, they are not even aligned in a straight way... ;) Link to comment https://bolterandchainsword.com/topic/286791-augustus-braass-pre-heresy-brass-scorpion-p247/page/88/#findComment-4404635 Share on other sites More sharing options...
Augustus b'Raass Posted May 25, 2016 Author Share Posted May 25, 2016 I KNEW IT! I KNEW IT! I know you don;t like those decals, Kraut. I do, however. The misallignment too was on purpose. CHAOS, BABY!!! Link to comment https://bolterandchainsword.com/topic/286791-augustus-braass-pre-heresy-brass-scorpion-p247/page/88/#findComment-4404638 Share on other sites More sharing options...
KrautScientist Posted May 25, 2016 Share Posted May 25, 2016 Huh. Chaos is no excuse for sloppiness ;) But seriously: I could really talk myself into a rage about GW's World Eaters decals. They released an excellent version of the legion badge alongside the first plastic berzerkers, and every subsequent iteration of the symbol has been increasingly terrible. From an actual design standpoint, that is. Link to comment https://bolterandchainsword.com/topic/286791-augustus-braass-pre-heresy-brass-scorpion-p247/page/88/#findComment-4404641 Share on other sites More sharing options...
codyrstuart Posted May 25, 2016 Share Posted May 25, 2016 (edited) Auggie, seriously, I need you to quit making me look bad. Awesome work so far! I can't really make any other comment than that. Edited May 25, 2016 by codyrstuart Link to comment https://bolterandchainsword.com/topic/286791-augustus-braass-pre-heresy-brass-scorpion-p247/page/88/#findComment-4404652 Share on other sites More sharing options...
Dragonlover Posted May 25, 2016 Share Posted May 25, 2016 They never look right flying. Dragonlover Link to comment https://bolterandchainsword.com/topic/286791-augustus-braass-pre-heresy-brass-scorpion-p247/page/88/#findComment-4404655 Share on other sites More sharing options...
Warsmith Uveron Posted May 25, 2016 Share Posted May 25, 2016 They never look right flying. Dragonlover Its the spikes... they are blunted.. just makes it looks odd. Link to comment https://bolterandchainsword.com/topic/286791-augustus-braass-pre-heresy-brass-scorpion-p247/page/88/#findComment-4404732 Share on other sites More sharing options...
Augustus b'Raass Posted May 25, 2016 Author Share Posted May 25, 2016 (edited) Allright, at the request of Kurama, here's a simple step by step tutorial on how I do my Khorne Daemonkin bases. Note: the pin sticking out of this particular base will slot right into my Bloodthirster's right leg, so it's technically not part of the basing process. Anyway, here goes... Step 1: Put some putty of whatever kind on the base in an irregular form. make sure the edges smoothly transition into the rest of the base. Take a couple jabs at the putty with the back of a brush, or your fingers or whatever, to make it even more irregular. http://i35.photobucket.com/albums/d185/mkruijff/Night%20Lords%20WIP/temporary_zpso9xd5mw6.jpg Step 2: Cut the uncovered parts of the base with a modelling knife: this will give your elmers/PVA glue something to hold on to. Then cover parts of the base with basing paste. You can cover parts of the putty applied before with paste. The colour of course doesn't matter, but for those interested: I used Vallejo Dark Earth paste. Take a piece of miniature razor wire and roll it around a brush, then push it into a thick part of the putty. The with a wet brush, smooth over the gaps left in the putty by the razor wire. http://i35.photobucket.com/albums/d185/mkruijff/Night%20Lords%20WIP/temporary_zpsw1cipuht.jpg Step 3: Cover the parts of the base that are not covered with paste, and some parts that are, especially among the paste, with PVA glue. http://i35.photobucket.com/albums/d185/mkruijff/Night%20Lords%20WIP/temporary_zpsrbulsifr.jpg Step 4: Sprinkle small slate from the Citadel basing kit over parts of the base. http://i35.photobucket.com/albums/d185/mkruijff/Night%20Lords%20WIP/temporary_zpskvrx3dap.jpg Step 5: Apply some puddles of PVA glue and push piles of skulls in those piles. I use 32 mm skulls from Dark World Creations. http://i35.photobucket.com/albums/d185/mkruijff/Night%20Lords%20WIP/temporary_zpsmdyyzhvp.jpg Step 6: Sprinkle basing sand all over the base, then tap it off, leaving only the parts with exposed PVA glue covered with sand. http://i35.photobucket.com/albums/d185/mkruijff/Night%20Lords%20WIP/temporary_zpsr7yzgyph.jpg Step 7: Cut plasticard T or H beams with a very blunt pair of plyers (blunt is good to make the 'metal' look worn and torn. Again apply puddles of PVA glue (as shown in the picture above). Then apply the H or T beams. Then repeat step 6. http://i35.photobucket.com/albums/d185/mkruijff/Night%20Lords%20WIP/temporary_zps4rc1fvwv.jpg Step 7: leave the base for at least 12 hours to give the PVA time to dry. Then cover the entire base minus the plasticard, the skulls, and the razor wire with super thinned down PVA glue, so as to make the basing material rock hard. I hope this helps someone. Replies: @ KrautScientist: Yes, yes, I was a bit sloppy. I admit it. I just really didn't like painting that Dreadclaw. @ codyrstuart: Well, thanks? I don;t mean to do that, just to inspire! I hope there's also a teeny tiny bit of inspiration here, buddy. Wouldn't want to loose you as a visitor... @ Dragonlover: I know right? Super weird. Edited May 25, 2016 by Augustus b'Raass Battybattybats, Thousand Eyes, Brother Chaplain Ryld and 2 others 5 Back to top Link to comment https://bolterandchainsword.com/topic/286791-augustus-braass-pre-heresy-brass-scorpion-p247/page/88/#findComment-4404739 Share on other sites More sharing options...
GhostMalone Posted May 25, 2016 Share Posted May 25, 2016 Dude love it, I'll be trialing this on my next knight! Hope you've got a second etl vow coming after this Augustus b'Raass 1 Back to top Link to comment https://bolterandchainsword.com/topic/286791-augustus-braass-pre-heresy-brass-scorpion-p247/page/88/#findComment-4404760 Share on other sites More sharing options...
Thousand Eyes Posted May 26, 2016 Share Posted May 26, 2016 Wow fair play, that is quite the effort you put in. Does that generally take you long to do? The effect pays for it I am sure though as your bases do look sweet. Link to comment https://bolterandchainsword.com/topic/286791-augustus-braass-pre-heresy-brass-scorpion-p247/page/88/#findComment-4405031 Share on other sites More sharing options...
codyrstuart Posted May 26, 2016 Share Posted May 26, 2016 Oh, I didn't say I was giving up! Look at it more as I need to step my game up. Link to comment https://bolterandchainsword.com/topic/286791-augustus-braass-pre-heresy-brass-scorpion-p247/page/88/#findComment-4405137 Share on other sites More sharing options...
Recommended Posts
Create an account or sign in to comment
You need to be a member in order to leave a comment
Create an account
Sign up for a new account in our community. It's easy!
Register a new accountSign in
Already have an account? Sign in here.
Sign In Now