Flint13 Posted January 22, 2015 Share Posted January 22, 2015 Looking quite lovely! It's really starting to come together as a solid armor unit. If you're still looking to improve your lens painting, I've got half a dozen decent tutorials saved. Link to comment Share on other sites More sharing options...
Brother Callius Posted January 22, 2015 Author Share Posted January 22, 2015 Thanks a lot guys, that Sicaran looks nice and crisp Gresiloth. It's fun to see the model I'm working on, painted in the other end of the weathering scale Link to comment Share on other sites More sharing options...
Brother Callius Posted January 24, 2015 Author Share Posted January 24, 2015 (edited) The Sicaran is done! Just as I planned I got the Sicaran done by the end of the weekend, I actually pulled an all nighter yesterday as I was ''in the zone'' and lost track of time... With this kit the assembly and painting was quite easy and I did not encounter any major issues other than those of my own doing; I might have glued one of the sponson bolters together just to find out that it would either be upside down and facing the front or the right way up and facing straight backwards (with the gunshield and all) After I remedied that little screw up the rest was a breeze. Once again I have experimented on the amount and placement of the black sections and I am pleased with the final variation and the weathering is again on the heavy side, but that's the whole point so that's just spot on. One area that I am really happy with is the left track guard where the lion head heraldy of the 41st company is sitting. I love the design of the head and I think it gives my company a personal touch to set them apart from the rest of the Fists out there and then they're not called the lions of terra for nothing... But you did not come here for my words now did you? So here is the Sicaran, Sword of Truth for ya: That was all I had for you this time around, the next thing will be the first half of my tactical squad and their sergeant. Have a great weekend everyone and remeber to set some time apart for your geeky self, I know I will ++EDIT: New Photos++ Edited January 23, 2016 by Brother Callius ephrael, Reyner, Xavier Targhost and 10 others 13 Back to top Link to comment Share on other sites More sharing options...
Operative Posted January 24, 2015 Share Posted January 24, 2015 Simply amazing, great job Callius! Brother Callius 1 Back to top Link to comment Share on other sites More sharing options...
lokkorex Posted January 24, 2015 Share Posted January 24, 2015 I like the weathering you've accomplished, very gritty and dirty. Link to comment Share on other sites More sharing options...
Brother Sgt. Steine Posted January 24, 2015 Share Posted January 24, 2015 These look great. Keep 'em coming! BSS Link to comment Share on other sites More sharing options...
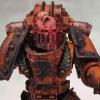
Packe Posted February 2, 2015 Share Posted February 2, 2015 (edited) Now this is something I really like, I don't know how I could've missed it. Now I want to paint IF ... No must stick to my DG, but your IF are amazing, I love the yellow and how worn they are (I think your IF and my DG would get along quite well.) I don't have anything to complain about your models, the only thIng I could have some constructive criticism about is your photos, your white balance seems of, unless your Contemptor is "redish" in hue, but looking at some other pictures they seem more yellow, except that they look awesome! Keep it coming! Looking forward to see more of your IF. EDIT: The photos were better once I got to my computer, but they still look a little bit off. Edited February 2, 2015 by Packe Link to comment Share on other sites More sharing options...
Brother Callius Posted February 2, 2015 Author Share Posted February 2, 2015 Glad you all like them guys! I have been very busy at work so my hobby time has been severely reduced but I promise to make up for that soon @ Packe: Thanks a lot mate! I have been looking over at your Death Guard progress and I must say that they too look stunning, I especially love the Sicaran, nice and gritty. It seems that we are of equal minds when it comes to the amount of weathering and overall worn look of our minis On the photo front I must side with you and say that I too find the contemptor pics a different hue than some of the others. I will chalk that one up to my experimenting with the photos. I do not have a dedicated lightbox or setup and my photographs rely on me setting up different lamps and backgrounds on my desk so I do not have what you would call a dedicated photo area, but in time I may have... Link to comment Share on other sites More sharing options...
chaplain mortis Posted February 2, 2015 Share Posted February 2, 2015 Lovely job on the sicaran.. Looks like the bugger belongs on the battlefield! Big thumbs up on a great looking army thats coming together! Brother Callius 1 Back to top Link to comment Share on other sites More sharing options...
Daemon2027 Posted February 2, 2015 Share Posted February 2, 2015 Fantastic looking Sicaran, the weathering is outstanding. Link to comment Share on other sites More sharing options...
Packe Posted February 3, 2015 Share Posted February 3, 2015 Why thank you, glad that you liked it. :) I can appreciate the look of clean minis but for me the only way is dirty and worn. I think the problem is the white balance, fix that and the pictures will look awesome. And how do you paint your minis, pigments, dab of paint, chipping fluid etc? Link to comment Share on other sites More sharing options...
DimDim Posted February 3, 2015 Share Posted February 3, 2015 This type of heavy wear on a unit like tanks or destroyers works really well, I like it! Brother Callius 1 Back to top Link to comment Share on other sites More sharing options...
deathspectersgt7 Posted February 3, 2015 Share Posted February 3, 2015 ACE!!!! Link to comment Share on other sites More sharing options...
Flint13 Posted February 4, 2015 Share Posted February 4, 2015 Perfectly grubby and beaten to hell. Looks just like a VII Legion vehicle should look :D Brother Callius 1 Back to top Link to comment Share on other sites More sharing options...
Brother Callius Posted February 4, 2015 Author Share Posted February 4, 2015 Well I guess a big thank you is in order, you are all too kind... I'm really happy about the way my minis are recieved, it's always nice to see ones hard work being appreciated. @ Packe: I'm not quite sure what it is that you're after, is it a step by step from the very beginning or more of a weathering description you would like? Link to comment Share on other sites More sharing options...
Packe Posted February 4, 2015 Share Posted February 4, 2015 Just how you do your weathering. For instance I start with an oil based wash, then rust pigtments etc. Link to comment Share on other sites More sharing options...
Brother Callius Posted February 4, 2015 Author Share Posted February 4, 2015 Okay then, it's quite simple really... 1. I use a sponge to weather the decals with the corresponding colour that they are placed on. 2. I go over the whole mini with Rhinox hide on a sponge and dap lightly on random areas. I try to find places that would chip naturally and where paint would be rubbed off. 3. Then I go for Leadbelcher, again on a sponge. With that I go over the areas where I dapped the Rhinox hide, but more lightly. And don't forget the black areas! 4. I give the whole thing a wash with Agrax earthshade to tie the colours together and also darken them a bit. 5. Last but not least I use Typhus corrosion to weather the tracks and give the trackguards and bottom a darker, more gritty look as gravel and mud would splash onto these areas. That's about it, then I sit back and enjoy my newewst work with my most important tool: a good cup of tea... Link to comment Share on other sites More sharing options...
Packe Posted February 4, 2015 Share Posted February 4, 2015 Hehe nice. (The cup of tea thing) Okey good to know how different people do, have you thought about tyring oil/pigments? I would say it's easier since you have more control and can clean up if there is to much rust/corrosion etc. Link to comment Share on other sites More sharing options...
Brother Callius Posted February 5, 2015 Author Share Posted February 5, 2015 I have only tried Forge Worlds own set of weathering pigments or "powders" as they are called. With those I never got the result I was hoping for, no matter what I did they would always rub off very easily, but I have never tried another brand due to the poor results. What brand do you use? And how do you do it? Your results speak for themselves so I would love to hear how you do it. Link to comment Share on other sites More sharing options...
Hrolf the Cunning Posted February 5, 2015 Share Posted February 5, 2015 Amazing work brother, don't know how I missed your work up till now. Anyway really nice stuff, I particularly like the vehicle work. Link to comment Share on other sites More sharing options...
Packe Posted February 5, 2015 Share Posted February 5, 2015 I use almost exclusively MIG products. You have to thin them down with thinner and make them into a paint, you could also mix them with oil based paint. You should be able to seal the pigments, but I have failed with that, but airbrushing/ "washing" with thinner should seal them in. I can write some more in depth when I get home. Link to comment Share on other sites More sharing options...
Brother Callius Posted February 9, 2015 Author Share Posted February 9, 2015 Im back with a progress update! I have finished working on my tac. squad sergeant this morning and he is just lovely. I planned on posting this yesterday evening but there where a few minor touch ups left on him and since I can't post pics of him with blemishes I had to wait till I was happy with the result. Well I have just finished him and taken the pics so these are fresh of the press... I tried doing something different with the tactical arrow since I want my squads to be easily identifiable but still show where they belong in the company. So to achieve that I gave him a templar cross to show his veterancy and the standard tac arrow as needed. His face is not the greatest but that is one of my major weakpoints, still I am lucky that most of his face is covered otherwise it might have turned out nasty. The base is a placeholder until I can get some 32mm scuplted bases that fit my narrative. Well enough of me, I present to you Veteran Sergeant Baldrich ''The Unyielding'': Hope you enjoy him and thanks for reading Combat_Vet, deathspectersgt7, Beardbattered and 3 others 6 Back to top Link to comment Share on other sites More sharing options...
Dantioch Posted February 9, 2015 Share Posted February 9, 2015 Your fists look awesome, the weathering is so well done too! Love the sergeant that half helm is a personal favourite of mine. Keep up the excellent work! Brother Callius 1 Back to top Link to comment Share on other sites More sharing options...
Pearson73 Posted February 9, 2015 Share Posted February 9, 2015 Great weathering and nice work on the arrow, simple but effective. Link to comment Share on other sites More sharing options...
Reyner Posted February 9, 2015 Share Posted February 9, 2015 The sergeant looks good - I want to get that same head for my Iron Warriors but I have to ask. If this is Sergeant Baldrich where is Captain Blackadder? Brother Callius 1 Back to top Link to comment Share on other sites More sharing options...

Recommended Posts
Create an account or sign in to comment
You need to be a member in order to leave a comment
Create an account
Sign up for a new account in our community. It's easy!
Register a new accountSign in
Already have an account? Sign in here.
Sign In Now