Grizzly_bear Posted April 11, 2015 Share Posted April 11, 2015 Fantastic poses, great weathering and great conversions, your libby blows my mine out the water Link to comment Share on other sites More sharing options...
deathspectersgt7 Posted April 11, 2015 Share Posted April 11, 2015 DITTO !!! on what has been said. Link to comment Share on other sites More sharing options...
Stercus Posted April 11, 2015 Share Posted April 11, 2015 That flamer with the fuel tank on the backpack is a great piece of modelling. Love it. Link to comment Share on other sites More sharing options...
Daemon2027 Posted April 11, 2015 Share Posted April 11, 2015 That is one gorgeous looking model, well done. Link to comment Share on other sites More sharing options...
Overdrive Posted April 14, 2015 Author Share Posted April 14, 2015 I'm glad people are enjoying the work I put up here, really helps the motivation! At the moment I'm in the midst of studying for exams but thought I'd take a break and throw up a paint in progress shot: http://i281.photobucket.com/albums/kk213/x2005eig/Taurans%20Space%20Marines/20150414_165144.jpg Here's the remainder of the squad as they stand. I was more careful masking the legs off when I sprayed the torso's than with the first model. Should speed up the touch up work. I was also more careful applying the chipping fluid on these four to ensure I got a more natural look. I've been taking step by step pics of the Sergeant as I go, so I'll throw a few of those up in the near future. Cheers! Link to comment Share on other sites More sharing options...
Overdrive Posted April 19, 2015 Author Share Posted April 19, 2015 Update time! Two more marines almost done. I'm just going to put a single photo of each up for now and when they're done and based I'll do the 360. I've been experimenting with my photo's trying to get the exposure correct. I realized my main problem was the white spot on my background. I flipped it around to a solid dark blue and the photo's look much better. Made a mistake cropping one guy, but It's just a PIP shot. I also experimented with cutting a stencil for the shoulder patterns and I'm torn on them. Some of them have turned out well and some less so. The biggest issue is how hard it is to get them centered properly on the shoulder. For right now the shoulder pads aren't glued on as I think I am going to try and make decals instead. Pictures: Thought I'd do a better shot of the first guy: http://i281.photobucket.com/albums/kk213/x2005eig/Taurans%20Space%20Marines/20150419_145120.jpg Next two: http://i281.photobucket.com/albums/kk213/x2005eig/Taurans%20Space%20Marines/Com.jpg http://i281.photobucket.com/albums/kk213/x2005eig/Taurans%20Space%20Marines/20150419_140904.jpg The Sergeant and Flamer should be along shortly. (The two big white spots on the knee pad of the third marine here are just dust fluffs BTW) Cheers! Link to comment Share on other sites More sharing options...
Overdrive Posted April 21, 2015 Author Share Posted April 21, 2015 Triple post. Uh Oh! I'll keep this update brief. Two of the squad finished. Just a coat of matte varnish once I decide what to do about the chapter badge. You can see the airbrushed stencil on the second model, what do you think? Pics or it didn't happen: http://i281.photobucket.com/albums/kk213/x2005eig/Taurans%20Space%20Marines/20150421_201249.jpghttp://i281.photobucket.com/albums/kk213/x2005eig/Taurans%20Space%20Marines/20150421_201300.jpg http://i281.photobucket.com/albums/kk213/x2005eig/Taurans%20Space%20Marines/20150421_201310.jpghttp://i281.photobucket.com/albums/kk213/x2005eig/Taurans%20Space%20Marines/20150421_201324.jpg http://i281.photobucket.com/albums/kk213/x2005eig/Taurans%20Space%20Marines/20150421_201341.jpghttp://i281.photobucket.com/albums/kk213/x2005eig/Taurans%20Space%20Marines/20150421_201354.jpg http://i281.photobucket.com/albums/kk213/x2005eig/Taurans%20Space%20Marines/20150421_201404.jpghttp://i281.photobucket.com/albums/kk213/x2005eig/Taurans%20Space%20Marines/20150421_201419.jpg Getting close on the final three, looking forward to getting a group shot up. Cheers! Link to comment Share on other sites More sharing options...
Larkyn Posted April 22, 2015 Share Posted April 22, 2015 I absolutely love the rusty-chipping effect you've got going on. It looks awesome. The Libby too is looking wonderful, the torso especially is just awesome. Looking forward to seeing more of these guys! Link to comment Share on other sites More sharing options...
Angrypantz Posted April 22, 2015 Share Posted April 22, 2015 Those marines look like they fought to the Eye and back. Love it! Link to comment Share on other sites More sharing options...
Grizzly_bear Posted April 22, 2015 Share Posted April 22, 2015 Fantastic work again fella Link to comment Share on other sites More sharing options...
WilhelMiniatures Posted April 22, 2015 Share Posted April 22, 2015 Very nice! I love the battle damage and bases. But I'm not really sure about the red eyes. They are painted in a colour that look too much like the rusty battle damage. I think green or another spot colour would work better. Link to comment Share on other sites More sharing options...
Forgeman Posted April 22, 2015 Share Posted April 22, 2015 Awesome, epic, badass, are any other adjectives required? Some of the best conversions and most original paint scheme I've seen in a very long while. The chipping looks really effective and the bases are great pieces just on their own. Really cool project you've got here, look forward to seeing more. Link to comment Share on other sites More sharing options...
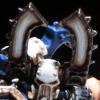
Durus Posted April 23, 2015 Share Posted April 23, 2015 Really like what you are doing here, especially with the bases. I think the battle damage on the first marine looks a lot more effective than on the second one, because the scratches are smaller. The second one has this large black patch on the shoulder that made me think of something completely else given the bovine nature of the chapter iconography. Talking about the iconography I think those stenciled icons look pretty good. Maybe going back with the base color and sharpening up the edges and adding a few scratches would make them look even more crisp. First time I've seen this done on a shoulder pad like this and I would have thought it would be pretty hard to get the stencil to stay where you want it. Really interesting stuff from a technical pov (for me at least). How do you make your stencils? The Chapter icon from the How to paint SM dudes has the horns curled up in a tighter crown, so if wrapping the stencil around the entire pad is a problem maybe that variant of the symbol is easier to work with. Link to comment Share on other sites More sharing options...
Overdrive Posted May 2, 2015 Author Share Posted May 2, 2015 Thanks for the C&C guys! @WilhelMiniatures - The more I look at them, the more I agree. While I'm really happy with the look of the eye's they just don't stand out. I've tried glowing blue on the next set of 5, you'll have to stay tuned for that though! @Durus - It is very hard to keep the stencil in the right place while airbrushing it. One of the reasons I am considering custom decals is the difficulty of keeping them in place. I made the stencil by shrinking an image I found online and cutting it out carefully with a hobby knife. I don't like the curled up horns as much, I'd rather they stick out more. I strongly considered adjusting Minotaurs iconography but it wasn't quite what I wanted. Update: I've been waiting patiently for a nice day to get some photo's and my patience ran out today. I think it's been well over a week since we've seen some sunshine here. Because of the weather I haven't been able to Matt varnish them either. For whatever reason I am getting terrible results with my bottle of Vallejo Matt varnish out of the airbrush. It almost ruined the bases I had done (drying milky). If anyone has experienced this as well I'd love to hear solutions/potential reasons. I picked up a Razorback the other day and have been pondering modelling options for it. I don't want to do anything too serious, so I'm thinking just some minor work on the turret. It will also of course double as a Rhino. Hopefully I'll get a start on it soon. On to pictures! Group shot: http://i281.photobucket.com/albums/kk213/x2005eig/Taurans%20Space%20Marines/20150501_170501.jpg Aiming Marine: http://i281.photobucket.com/albums/kk213/x2005eig/Taurans%20Space%20Marines/Collage%201.jpg Flamer: http://i281.photobucket.com/albums/kk213/x2005eig/Taurans%20Space%20Marines/Collage%202.png Sergeant: http://i281.photobucket.com/albums/kk213/x2005eig/Taurans%20Space%20Marines/Collage%203.jpg I really wanted to do something interesting with the shields on the squad but after painting them white and weathering them I was really happy with the look so I've decided to leave them as is. My final step/goal is to decide on a subtle and effective way to tie them together with squad markings/numbers - thoughts? The sergeant also has his banner removed for ease of painting. Trying to cook up something interesting. I stated at the beginning I really want to experiment with some freehand on the banners so this will be try #1. For anyone interested, here's a pic of my final prep stage before painting. I find this especially important when the models have been sitting around collecting dust for awhile as these ones have: http://i281.photobucket.com/albums/kk213/x2005eig/Taurans%20Space%20Marines/20150425_145711.jpg Just a little scrub with some dish soap to remove dust, oils etc. Seen here are the next 5 guys on the bench. So far only the heads have been finished, but I'm hoping to start on the rest soon. Cheers! Link to comment Share on other sites More sharing options...
Forgeman Posted May 2, 2015 Share Posted May 2, 2015 These really are awesome! I suppose a numeral on the lower part of the greave might work for a squad marking, it's hard to see where you could put something without impacting on the rest of model. Perhaps a very small numeral on the rear/side of the helmet? I don't recall ever seeing a squad marking depicted in such a way and it would be a very small detail so wouldn't detract too much. Link to comment Share on other sites More sharing options...
Overdrive Posted May 4, 2015 Author Share Posted May 4, 2015 Thanks man! The greave or the helm may work well, the problem with the helm are the models without a helmet will have no marking, but I'll have to do some visualization. Link to comment Share on other sites More sharing options...
Bmseifer Posted May 4, 2015 Share Posted May 4, 2015 Wow, some of the best painted marines I've ever seen!! I'm a big fan of battleworn paint schemes and this is definetely perfection! I'm in the process of painting heavy weathered marines in a white scheme myself but after seeing yours I might as well give up. If you ever start giving classes in miniature painting, sign me up! Link to comment Share on other sites More sharing options...
Radiation Posted May 5, 2015 Share Posted May 5, 2015 Awesome marines. Cool chapter, great conversions and weathering. I went a little crazy hitting the like button. Link to comment Share on other sites More sharing options...
Overdrive Posted May 10, 2015 Author Share Posted May 10, 2015 Thanks guys, appreciate the kind words! @Bmseifer - Don't give up on a white scheme, the goal is to help inspire others! I don't think I'm in a position to teach others, but I do appreciate the sentiment! Not much of an update. I've been working on the next batch of 5 guys. Switched to blue eye lenses, would love some input on blue vs. red. This is the only marine in the squad with no purity seals. I see him as the newest recruit, hasn't quite been around long enough to earn any yet. http://i281.photobucket.com/albums/kk213/x2005eig/Taurans%20Space%20Marines/Combat%2010.jpg Hopefully more updates through the week. Cheers! Link to comment Share on other sites More sharing options...
Soric Posted May 10, 2015 Share Posted May 10, 2015 Your Taurans are looking great, I especially like the silvered arm of your sergeant model. The blue eye lenses stand out more from the rust on the helmet of the one you've done already, and the glow effect looks really good. Link to comment Share on other sites More sharing options...
Pearson73 Posted May 10, 2015 Share Posted May 10, 2015 Ace weathering on these guys, nice work with the eyes also. Link to comment Share on other sites More sharing options...
Olis Posted May 10, 2015 Share Posted May 10, 2015 Some beautiful weathering going on here - they look really battered. Certainly not fresh off of the battle barge, that's for sure. ;) Link to comment Share on other sites More sharing options...
deathspectersgt7 Posted May 10, 2015 Share Posted May 10, 2015 Looking Ace!!!! Blue Eye Lenses look better.. Link to comment Share on other sites More sharing options...
BrotherCaptainArkhan Posted May 10, 2015 Share Posted May 10, 2015 This log really, really makes me miss 40k and painting in general (which is an achievement as the general state of the game has almost entirely turned me off the hobby). Can't wait to get back to my own models now. Love the battle damage, general weathering and the basing. Link to comment Share on other sites More sharing options...
Thousand Eyes Posted May 10, 2015 Share Posted May 10, 2015 My apologies but this is a cease and desist post. Your work is too annoyingly well done. I thought I was doing well on my conversions until I saw this. I do have to admit I am not sold on the paint scheme. At first glance I thought it was a partially stripped model. On closer inspection you can really see the skill used. Link to comment Share on other sites More sharing options...

Recommended Posts
Archived
This topic is now archived and is closed to further replies.