Tortura Posted April 18, 2015 Share Posted April 18, 2015 Hey guys! I ThatOneMarshal, Njjesters4, Aubéron and 25 others 28 Back to top Link to comment Share on other sites More sharing options...
Memento Of Prospero Posted April 18, 2015 Share Posted April 18, 2015 That is awesome in so many ways. Tortura 1 Back to top Link to comment Share on other sites More sharing options...
Rev. Tiberius Jackhammer Posted April 18, 2015 Share Posted April 18, 2015 Yowza - great NMM. Tortura 1 Back to top Link to comment Share on other sites More sharing options...
GrandMagnus Posted April 18, 2015 Share Posted April 18, 2015 I just got a new favorite guy on this forum. Tortura and The Milkman Of Baal 2 Back to top Link to comment Share on other sites More sharing options...
Landrick Posted April 18, 2015 Share Posted April 18, 2015 more please! Tortura 1 Back to top Link to comment Share on other sites More sharing options...
Dolchiate Remembrancer Posted April 18, 2015 Share Posted April 18, 2015 that gold...that is awesome! Link to comment Share on other sites More sharing options...
Firepower Posted April 18, 2015 Share Posted April 18, 2015 First off, welcome to the BnC :) Secondly, holy hell man Link to comment Share on other sites More sharing options...
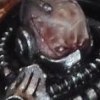
Olis Posted April 18, 2015 Share Posted April 18, 2015 Welcome to the forums, brother. Excellent model, I must say. For now, I´ll leave you with a pic of a heresy BA praetor I did a while back for the Forge World euro open day. Thanks for looking! Amsterdam, was it? Link to comment Share on other sites More sharing options...
Ovidius Incertus Posted April 19, 2015 Share Posted April 19, 2015 Tell me about that chainsword, please! Link to comment Share on other sites More sharing options...
The Milkman Of Baal Posted April 19, 2015 Share Posted April 19, 2015 Jesus titty :cussing christ!!! Some people are on a whole different level!!! Link to comment Share on other sites More sharing options...
Tortura Posted April 19, 2015 Author Share Posted April 19, 2015 Tell me about that chainsword, please! First of all: wow guys, thanks for all the nice words, means a lot! Regarding the chainsword, It´s the Forge world MK3 two handed chainsword with the hands cut off and fitted with a resculpted grip, which was added to the legion praetor terminator arm. Welcome to the forums, brother. Excellent model, I must say. For now, I´ll leave you with a pic of a heresy BA praetor I did a while back for the Forge World euro open day. Thanks for looking! Amsterdam, was it? Yeah it was in Amsterdam indeed. I live about a 15 min drive from there which was nice! Again thanks for the interest, more pics of my stuff are incoming! Link to comment Share on other sites More sharing options...
Tortura Posted April 19, 2015 Author Share Posted April 19, 2015 Hey guys! Until I sort out some good pics of the rest of my army, here are some different angles of the praetor! Also, these pics aren't the best quality as they are done with a phone but you get the idea! CaptainHelion, Finn, Olis and 3 others 6 Back to top Link to comment Share on other sites More sharing options...
Tortura Posted April 19, 2015 Author Share Posted April 19, 2015 Here's a quick pic of a libby I finished a couple of days ago. He's not finished to the same standard as the praetor, as spending 100+ hours on a model isn't really doable when trying to complete an army in a reasonable amount of time Cheers! LutherMax, Landrick, GrandMagnus and 3 others 6 Back to top Link to comment Share on other sites More sharing options...
sockwithaticket Posted April 19, 2015 Share Posted April 19, 2015 Can you go away? I'm sure I'm not the only person you're making feel completely inadequate! I jest, I jest; these are inspirational. I love the freehand on the Praetor's shoulders in particular. Link to comment Share on other sites More sharing options...
Jolemai Posted April 19, 2015 Share Posted April 19, 2015 Recipe for the Praetor, please? I've tried a metallic red before but it wasn't bright enough. Link to comment Share on other sites More sharing options...
Olis Posted April 19, 2015 Share Posted April 19, 2015 Recipe for the Praetor, please? I've tried a metallic red before but it wasn't bright enough. I'm pretty sure that the praetor was done using a NMM technique. Link to comment Share on other sites More sharing options...
Tortura Posted April 19, 2015 Author Share Posted April 19, 2015 Recipe for the Praetor, please? I've tried a metallic red before but it wasn't bright enough. Recipe for the Praetor, please? I've tried a metallic red before but it wasn't bright enough. I'm pretty sure that the praetor was done using a NMM technique. Here you go! Red: Base: Mephiston Red, Wazdakka Red 1:1 Shade: Base, Xereus Purple 2:1 + brush tip of black, then adding more black and purple until I had a very dark mix for the deepest shadows (about 5 additional mixes). Highlights: Base, Evil Sunz Scarlet 1:1, pure Evil Sunz, Evil Sunz, Wild Rider Red 1:1, pure Wild Rider, then White was added to Wild Rider in loads of steps, final light spots with pure white. After the highlights were done I glazed the transitions with various very diluted (10+ parts water to 1 part paint ratio) red mixes until it felt 'right'. The armour was indeed done in an NMM style, by gradually painting smaller and narrower vertical lines as the colour turned brighter with each mix. Pairing this with really dark shadows and 'bright spots' in specific locations creates the shiny surface look. Bonus recipes! ;) Gold: Base: Gehenna's Gold Shade: Base, Xereus Purple 2:1 + brush tip of black, then adding more black and purple until I had a very dark mix for the deepest shadows (about 5 additional mixes). Highlights: Base, adding more and more Vallejo metal medium in about 5 steps, glaze with W&N yellow ink, final light spots were done with pure metal medium. Green (gems, lenses): Base: Caliban Green, black 2:1 Highlights: Caliban was gradually lightened by adding Warboss Green to the base, after which white was added up to almost pure white (loads of steps). The glow effect underneath the lense was done by carefully glazing the area with Warboss Green + white in about 3 stages. Final light spots were done with white. Cheers, hope it helps! Chaplain Gunzhard 1 Back to top Link to comment Share on other sites More sharing options...
ThatOneMarshal Posted June 7, 2015 Share Posted June 7, 2015 Holy crap that's art. All I can do is look at my blood angels in shame. Link to comment Share on other sites More sharing options...
Morticon Posted June 7, 2015 Share Posted June 7, 2015 WHOAAAAAAAAAAAH !?!?!! Link to comment Share on other sites More sharing options...
Tortura Posted June 8, 2015 Author Share Posted June 8, 2015 Hey guys! Update time, prepare for pic spam! First up, tac squad with their razor. Meltacide ASM with their ride. Sicaran Fraggies And finally some WIP bikers. Also making progress on my Deredeo dread for the ETL. Waiting for my new shiny BA transfers for that one, but should have some pics up soon. Cheers! Bukimimaru, marine7312000, gogmagog and 1 other 4 Back to top Link to comment Share on other sites More sharing options...
Charlo Posted June 8, 2015 Share Posted June 8, 2015 Incredible stuff! Look forward to seeing more! Link to comment Share on other sites More sharing options...
Vel'Cona Posted June 8, 2015 Share Posted June 8, 2015 Agreed, these models are excellent! Your weathering and freehand blend perfectly, and the finish on your red is superb. Can't wait to see more WIP! Link to comment Share on other sites More sharing options...
DarkMark Posted June 8, 2015 Share Posted June 8, 2015 Some of the best BA I've seen in a long time, much kudos! Your standard is super high, so don't think I'm sniping. The snow bases need to have some ice to look more realistic, imo. A bit of ice blue/ turquoise ice under the snow would remedy this. Don't forget to add streaks to the side of the tanks; far too many leave this effect off. Really looking forward to more from you. Link to comment Share on other sites More sharing options...
Remtek Posted June 8, 2015 Share Posted June 8, 2015 Awesome work :) Link to comment Share on other sites More sharing options...
Tortura Posted June 8, 2015 Author Share Posted June 8, 2015 Some of the best BA I've seen in a long time, much kudos! Your standard is super high, so don't think I'm sniping. The snow bases need to have some ice to look more realistic, imo. A bit of ice blue/ turquoise ice under the snow would remedy this. Don't forget to add streaks to the side of the tanks; far too many leave this effect off. Really looking forward to more from you. Thanks for the nice words! :) Regarding the bases I think you're right. The bases do have some secret weapon miniatures crushed glass on them, the sparkling effect this creates, however, doesn't show in the pics. I've done some tests with broken up shards and spikes of ice made with a 'clear' crackle medium gel. I say 'clear' because they dried up with a quite opaque yellow tint, so back to the drawing board on that one. Additionally I think i'll add some streaking to the sides as you rightly point out ;) I've had some questions regarding the way I do my airbrush reds and golds, so rather than being all hush hush about it, I'll spill the beans here! Red: Base: Vallejo model air black matt primer (2-3 light coats: keep them looking matt rather than wet on the surface of your piece). Red1: Vallejo model air Scarlet Red (2-3 light coats again). Shade1: Scarlet Red, VMA Burnt Umber, brush full of black 1:1:1 Shade2: Burnt Umber, black 1:1 (only deepest shadows). Highlight1: Vallejo game air Bloody red (this stage is done by spraying the colour from above the minature, creating the effect of an overhead light source). Highlight2: VGA Bloody red, GW wild rider red 1:1 (done the same as stage 1, but concentrating only on edges/ highest points of the model). Highlight3: edges are done with a 1:1 mix of wild rider/ army painter skeleton bone. (normal brush) Battle damage is then done by sponging a 1:1 mix of umber/black with a bit of blister foam, after which individual marks are underlined with the same mix used on the edges. As a last step, scorch/smoke/streak marks are done with burnt umber, black 1:2, and bare metal edges are applied with Vallejo Metal medium. Gold: Base: VMA black Gold1: GW Gehenna's gold, VGA Polished gold, black 1:1:1 Shade1: wash with army painter strong tone, water 1:3 Shade2: Deepest shadows are done with Burnt umber. Highlight1: light dusting (again angled from the top down, where possible) of Polished gold. Highlight2: edges are done with Vallejo metal medium. Hope it helps some of you, and stay tuned for more stuff soon! Cheers. frozenjordan and Chaplain Gunzhard 2 Back to top Link to comment Share on other sites More sharing options...

Recommended Posts
Create an account or sign in to comment
You need to be a member in order to leave a comment
Create an account
Sign up for a new account in our community. It's easy!
Register a new accountSign in
Already have an account? Sign in here.
Sign In Now