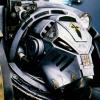
Vash113 Posted November 30, 2015 Share Posted November 30, 2015 So last saturday (ya know two days ago) I participated in a 9400 point Apocalypse Megabattle at my local Games Workshop store. A couple weeks back I was asked to participate because I was one of the more regular Imperial players and apparently the game was organized in large part by the store's Tau players who wanted to use the scenarios from the Damocles Warzone books. So the game was setup with the intention of using the first of the Damocles scenarios which put the Tau in a defensive position in the middle of the board occupying a large ring of tidewall defenses stocked with all five of the scenario objective markers. The Imperial players would have to deploy from the four board corners and advance to the center with the secondary immediate victory objective of killing Shadowsun if and when she was deployed. Things were already falling apart by the time I arrived for the game at 11:30 AM on Saturday. Of the two Tidewalls that was supposed to be in use only one set, and a partial one at that, was there, primed but unpainted and the other tidewall that was supposed to be there was completely absent. This was annoying as there were a number of special rules in use for the Tidewall that were now being applied to stand-in counts-as defense lines that I knew would just lead to some confusion and disagreement. The second problem was that the supposedly set number of players, wasn't set. We had more Imperial players wanting to participate than Tau players leading to the uneven 9400 point limit forcing the Imperial players to divide up the points as best we could. Thirdly the table size was doubled from 4' by 6' to 8' by 6' however we were left with the same designated 12” corner deployment zones. Trying to deploy all the Imperial forces was a huge pain in the rear and left us with a royal mess to disentangle as the game progressed, not to mention divided our forces far more than I liked. Despite these problems my fellow Imperial players and I managed to work together quite well, breaking off for tactical discussions frequently and managing to co-ordinate our efforts quite nicely. Ultimately we had an Imperial Knight player fielding a single Cerastus knight, a Blood Angel player, a counts-as White Scars player, The_Chaplain and his counts-as Black Templars army dubbed the Confessors, my Space Wolves, and a 30k World Eaters army. The Blood Angels would serve as an alpha strike distraction, deploying assassins (which I felt were a waste of points) and Drop Pods around the Tau defenses to draw fire and obstruct and lock-up the enemy firebase as much as possible. The White Scars would serve as a mobile irritant and distraction force, as all of the White Scars troops squadrons returned to ongoing reserves whenever they were destroyed as part of the scenario special rules. This meant we could use the bike squadrons to soak up overwatch fire and harass and tie-up enemy reinforcements with impunity, careless of their losses. The core of the assault forces was made up of the World Eaters, Space Wolves and Confessors, which mounted around 100 assault oriented Space Marines mounted in seven Land Raiders of various patterns. The Tau would only destroy one Land Raider and damage a couple others through the entire course of the game, the AV 14 stretching the Tau firepower to the limit. From the beginning I was anticipating the Tau focusing all of their firepower, particularly that of the Stormsurge, on the Land Raiders in a desperate bid to keep our assault troops from reaching the Tau lines, as the game would essentially be over the moment that happened. As such the plan was to use the Blood Angels and White Scars to distract, delay and harass the enemy as a screen for the Land Raiders to close as fast as possible on the center of the board before unloading a mass of assault troops to charge the center and sweep it. http://i107.photobucket.com/albums/m307/Vash113/12316081_840055762778186_754999535773369503_n_zpsyhwvq8li.jpg This picture shows the players involved (as well as some onlookers), I was standing on the right-side of the table wearing the blue hooded sweat shirt. http://i107.photobucket.com/albums/m307/Vash113/12289671_840079099442519_6722741805191863506_n_zpswf9musa4.jpg This shows the Tau firebase at the center during Turn 1. As you can see we had a lot of heavy Tau units to take out if we wanted to capture the center. A Stormsurge, three Riptides, two-three squads of Broadsides, crisis suits, Firewarriors and a single unit of Pathfinders with Aun'shi manning the Railgun and providing leadership and rules support to the Tau units. http://i107.photobucket.com/albums/m307/Vash113/12308764_840079092775853_8403991376681310941_n_zpsh9vlhz18.jpg This picture shows the game during the Imperial Turn 1, here you can see the Space Marine forces advancing from the deployment zones towards the center. http://i107.photobucket.com/albums/m307/Vash113/12313777_840079126109183_4583045845088052405_n_zpsl3w0tbdz.jpg This picture shows the left side of the board during the beginning of Turn 2. My third Land Raider that was forced to remain in reserve due to deployment limitations arrived and moved to support the World Eaters assault element. http://i107.photobucket.com/albums/m307/Vash113/12279191_840079152775847_6909298664091146491_n_zpsm3xrxfbv.jpg Again the left side of the board, showing the Bikes advancing towards the center screening the World Eaters advance. http://i107.photobucket.com/albums/m307/Vash113/12308447_840079132775849_5268037791851543006_n_zpscfckvskx.jpg This shows the right-side of the board during Turn 2, the Confessors and Space Wolves continued a rushed advance, driving towards the center of the board. Unfortunately that's where the pictures end, as the game continued after lunch the players started to tire and tempers started to flare and nobody seems to have thought to take more pictures. So hopefully the pics do give you guys some idea of the board and what happened but it was Turn 3 where things got crazy on the Tau side. Turn 1 and Turn 2 went exactly according to plan. The Tau firebase managed to take out the Imperial Knight with a lucky Strength D missile but it took three tries to bring it down, the fourth missile wiffed trying to shoot the Spartan. Shots of opportunity took out one of the World Eaters Rhinos but the disembarked squad simply jumped into my empty Land Raider Phobos which continued to drive them towards the center of the board. The Blood Angels went down hard but bloodied the Tau center somewhat and soaked up all the fire the Tau could throw at them and the White Scars succeeded in drawing off and engaging the infiltrated Stealth Suit teams thrown out to slow down our advance. Turn 3 things got a bit nuts. The Tau brought in a ton of reserves including a Ghostkeel Stealth formation that took out the Confessors Vindicator Squadron, a mass of five Hammerhead tanks that attacked the Blood Angels Whirlwind artillery hidden in the corner and a mass of battlesuits dropped down in the open amidst the Confessors advance and behind my own Space Wolves advance. Essentially I think the Tau were expecting the Imperial side to turn and respond to this threat from behind and get drawn from the center. Instead the Confessors were diverted to assault the largest concentration of arriving battlesuits including a fourth Riptide, though they took cassualties the Confessors took down a large number of enemy units including the Riptide and opportunistic shooting from our armor focused almost exclusively on the 4-6 Pathfinder squads arriving from reserves, attempting to limit the number of Markerlights the Tau players could field. Meanwhile the core of the Imperial assault units continued to advance on the Tau firebase from both directions, getting off assaults Turn 3 from both the World Eaters and my Space Wolves. The World Eaters took a lot of cassualties to enemy shooting as their single squad target died and left them in the open however I chose to weather the overwatch and multi-charge as many enemy units as I could, engaging three squads of Firewarriors, a Crisis Squad and a Riptide on Turn 3. Though I lost fully half my attacks in doing so the strategy worked (in part due to Aun'Shi's leadership bubble), I cut down a lot of Firewarriors and brought the Riptide down to two wounds but stayed locked in combat, keeping my squads safe from enemy fire through the Tau turn. Rolling into Turn 4 fresh bike squads arriving from Reserves combined with the two surviving Confessors Squads continued to engage the Tau at will out in the open while a second World Eaters squad disembarked from my Land Raider Phobos and charged into the center. My Blood Claws finished off the Firewarriors freeing up my Wolf Priest led squad to charge again on Turn 4 while the second Blood Claw squad brought the Riptide down to one wound. I managed to multi-charge again, hitting the lone survivor of the center's Pathfinder Squad as well as the Broadsides and Aun'Shi holding the center platform. The second World Eaters squad engaged more of the enemy infantry in the center. Turn 5 would see the game brought to a sudden end. The Tau side was continually boasting about dropping large blasts from the Tigershark flyer's main weaponry on the center before a mass of battlesuits would rush in to retake it. However despite this boasting the battlesuit reinforcements were continually scattered and eliminated piecemeal by rampaging Confessors and White Scars bikes, our Land Raiders continued to unleash firepower with impunity as the Tau had very little that could scratch them and in the center the World Eaters took punishing fire but my Space Wolves remained firmly locked in combat. In the bottom of Turn 4 my Wolf Priest smacked down Aun'Shi hard and his squad finished off the Broadsides. The player controlling Shadowsun and her large Stealth Suit bodyguard trusted to her 2+ cover save and ablative wounds to keep her alive as he used her unit to spearhead the counter-assault on the center, knowing that without retaking those objectives (thanks to variable game length) the Tau risked losing at the end of Turn 5 and even then it was clear that the counter-assault element the Tau had pinned a lot of hope on was being quickly torn apart. In a mass of combined fire half of Shadowsun's bodyguard was eliminated and with my second Blood Claw pack taking down their Riptide Target on Tau Turn 4 both squads unleashed all of their small-arms into Shadowsun's bodyguard before charging. Overwatch killed very few Space Wolves and without defensive grenades or a multi-charge my wolves unleashed a mass of attacks. The Tau player was hoping to hide Shadowsun in a challenge with my Wolf Priest but with all the remaining Tau eliminated Shadowsun was left open to take a power fist to the face, killing the Warlord and winning the game for the Imperium of man, top of Turn 5. In conclusion I think this game was very informative in a lot of respects. The Tau players (though most were good sports about it) made a lot of rules errors for their own armies, with lots, and lots of special rules to remember they inevitably forgot some (or a lot) and it led to poor performance by some of their key units and formations. Secondly the Tau side made a lot of tactical blunders as well. Our transports should have been priority targets, we had to take the center objectives or we would have lost, if they had been able to eliminate our transports and force our troops to foot-slog into their guns we would have been torn apart and easily defeated. Instead they focused on all the wrong targets, throwing inordinate ammounts of fire into the Blood Angels, Assassins and White Scars while leaving the World Eaters, Space Wolves and Confessors Land Raiders and assault forces almost untouched. Then when the Tau reserve arrived I thought they were badly deployed. Assigning the entire mass of enemy heavy armor to remove two Whirlwinds and a single Vindicator was just... nuts, the Hammerheads accomplished really nothing the rest of the game and certainly were in no position to retake the center. Meanwhile the mass of battlesuits and stealth suits that arrived landed solely amidst and behind the Confessors. I expected the squadron of Vindicators to be a priority target, their ignores cover apocalyptic blast was scary for the Tau, but it also diverted a much greater points value of the enemy force to destroy three tanks than the three tanks were worth and left the Ghostkeel formation too far from the center to really help in it's recapture. This left a single mass of arriving Crisis, Broadsides and a single Riptide battlesuits as the main counter-attack force which the Confessors promptly charged and scattered beyond all coherency or effectiveness. The Shadowsun stealth unit when it arrived Turn 4 was forced to spearhead the counter-attack despite the risk of sudden defeat because if it didn't, the Tau weere going to lose anyway, and a second squad of Crisis suits that deep-struck behind my own assault element held back hoping for my Blood Claws to leave the objectives and chase after them, why the Tau players thought I would do something that foolish I just cannot fathom, but that was their plan. Armed primarily with plasma rifles those crisis suits couldn't scratch my Land Raiders leaving them powerless to intervene in any meaningful way in the bloody battle for the center of the board. Meanwhile the battle went exactly according to the plan I laid out with the Imperial players during our pre-game huddle. The Land Raiders rushed for the center, the Blood Angels and White Scars blocked and distracted. The only diversion from the plan was the redeployment of the Confessors to engage the Tau reinforcements rather than continue their push for the center, but really the results were so incredibly gratifying. Watching thirty Tau battlesuits scatter for their lives away from rampaging Assault Squads was just... hilarious. Really the Imperial plan was much, much simpler than the Tau plan, our rules were considerably simpler and more straightforward and we massed towards a single, well-defined goal. I was very pleasantly surprised by how well the Imperial players all worked together, we got a little fractious as the game wore on but came together and kept our heads cool and followed the plan. Time and again when a problem occurred we would step aside, confer for a few seconds and then return to the game, keeping all of the Imperial players focused on our objectives. The White Scars and Confessors were definitely the unsung heroes of the game, though it was my squads who took out Aun'Shi and Shadowsun and secured the center the sheer chaos the Confessors and Scars unleashed on the enemy was just awesome to see. Every move the Tau made was countered by fast-moving bike squads getting in their way, launching assaults and soaking up damage while the Tau main counter-attack was totally blunted and scattered by thirty angry Black Templar Assault Marines storming out of Land Raiders, it was sweet. Of the four Imperial Players who stayed in the game to the end (the Knight and Blood Angels essentially annihilated by Turn 2) everybody accomplished something awesome. The combined efforts of the Scars and World Eaters took out the Stormsurge, brought down multiple Riptides and drove the Tau players nuts trying to deal with them. Of particular note the White Scars Captain, Apothecary and Kor'sarro Khan soaked up a ton of fire and made an incredible number of armor saves and feel no pain rolls while Apothecary Kargos of the World Eaters did the same, surviving his first World Eaters squad to join another and survive the fall of every member of that squad too before finally falling to concentrated enemy fire. The Confessors brought down a Riptide, multiple Crisis, Broadside and Stealth battlesuit squads and the Siege Master HQ of the Confessors cut down a second, non-warlord Shadowsun fielded by one of the Tau players. It was a great game with lots of awesome and hilarious moments and I was very pleased by the efforts, attitudes and cooperation of the Imperial players. So anyway, for those who have taken the time to read this, thanks, and I hope you enjoyed it. Lemme know what you guys think! I'll likely write up a fluff-version of the fight for my Space Wolves shortly and will post that as well. Link to comment Share on other sites More sharing options...
The_Chaplain Posted December 1, 2015 Share Posted December 1, 2015 It was an interesting game for sure. For the record though, my siege master and his unit killed a riptide and several units of various battle suits. The faux shadowsun was felled by a siege assault squad. That siege master was tough as nails though-- he's definitely going to be used in further games; soaking up 5 or 6 units worth of shooting and only taking a wound is pretty impressive considering how many markerlights were floating around the table. Link to comment Share on other sites More sharing options...
BlodVargarna Posted December 1, 2015 Share Posted December 1, 2015 Love that it was Blood Claws in the end winning it! Great Saga. Link to comment Share on other sites More sharing options...

Recommended Posts
Archived
This topic is now archived and is closed to further replies.