Enigami Posted May 18, 2016 Share Posted May 18, 2016 Hey all! I'm finally moving my 30k work over to the AoD forum. I figure I can get some good comments and criticism from everyone here. I'll be periodically adding some of my existing work over here, but this thread will start out mainly as a think tank for my next project, a cityscape board build off of FW's realm of battle tiles. I received this in the mail yesterday: http://i683.photobucket.com/albums/vv194/Enigami1990/image_zpsdsoszalg.jpeg I've got several city sector boxes, a relicos militarum, and a shrine on my way to populate the board. I'd prefer not to have sections of buildings, but rather tall full buildings on the board. I'd like to hear what you all think I should do for the board. I want the board to be exclusively Horus Heresy themed and to fit my existing Sons of Horus and Death Guard armies. Let me know what you guys think. to get an idea of what armies I want to go with the board, my existing work can be found here: http://www.bolterandchainsword.com/topic/317381-enigamis-pre-heresy-log-update/ Thanks all! Link to comment Share on other sites More sharing options...
Jerichus Posted May 18, 2016 Share Posted May 18, 2016 Looks neat! Can't wait to see how you inject the two legion's flavor into it! Link to comment Share on other sites More sharing options...
Brother Pheidias Posted May 18, 2016 Share Posted May 18, 2016 Loved your armies, that's a sick setup you've got on the horizon, can't wait to see some pretty ruins on those tiles! Link to comment Share on other sites More sharing options...
Enigami Posted May 25, 2016 Author Share Posted May 25, 2016 Here's how my board stands as of now: http://i683.photobucket.com/albums/vv194/Enigami1990/image_zpstvxzmkwp.jpeg Here are some close ups of the buildings I currently have put together: http://i683.photobucket.com/albums/vv194/Enigami1990/image_zps0npydwoa.jpeghttp://i683.photobucket.com/albums/vv194/Enigami1990/image_zpsgaczudgy.jpeg These buildings have taken much more time and bits than I had ever expected. Although, I am very happy with the progress so far. I do have to give credit to John at the paintingbunker.com whose board provided much inspiration and guidance for constructing the buildings. I loved his town plaza shrine so much I had to build something similar. If it wasn't for his board I wouldn't have had any idea where to begin. I'm struggling with what to put in the remaining sections. Does anyone have any ideas? Link to comment Share on other sites More sharing options...
Enigami Posted May 26, 2016 Author Share Posted May 26, 2016 Here's some progress on a duo of buildings. I've decided to attempt to make a walkway between two of the buildings. Any suggestions? http://i683.photobucket.com/albums/vv194/Enigami1990/image_zpsu43pjncu.jpeg http://i683.photobucket.com/albums/vv194/Enigami1990/image_zpsu00oj5kf.jpeg Link to comment Share on other sites More sharing options...
Enigami Posted May 31, 2016 Author Share Posted May 31, 2016 I've finally completed the buildings for my board, and have now moved onto painting. Here are some updated photos. http://i683.photobucket.com/albums/vv194/Enigami1990/Mobile%20Uploads/image_zpsz7re0ujq.jpeghttp://i683.photobucket.com/albums/vv194/Enigami1990/Mobile%20Uploads/image_zpstnahvmsw.jpeghttp://i683.photobucket.com/albums/vv194/Enigami1990/Mobile%20Uploads/image_zpsdtkqgimd.jpeg I'm fairly happy with the colors in this tile so far. I plan on washing the white/beige with burnt umber to grime it up. I also plan to do the surrounding ground in a grey with some light brown pigments. During my prep of the board I discovered a great way to remedy warped forgeworld tiles. Several of my tiles came warped, and two so badly I considered e-mailing forgeworld. However, I decided to try my hand at repairs first. I tried a blow dryer and boiling water to no avail. Then I read some horror stories of folks leaving their tiles in sunlight, which caused warping. So, I dragged tiles, wood, and some weights outside on a sunny 84 degrees day. I weighted down the board and let it sit in the heat all day. When I brought it inside, it was as straight and flat as the board i set it on. It left me free to build and paint all day. It seems risky, but might be a last ditch effort to fix a badly warped board. Link to comment Share on other sites More sharing options...
BlueBelly1863 Posted May 31, 2016 Share Posted May 31, 2016 Wow all of that looks exciting. Supremely jealous you have the time and capital to invest in such an undertaking! Will definitely be following this thread. The tile youve painted up looks good, and I imagine the ground will be colored in such a way to match up with how you've painted the bases of your force? Link to comment Share on other sites More sharing options...
GhostMalone Posted June 1, 2016 Share Posted June 1, 2016 Hell yeah great to see some terrain! Loving the look of your boards Link to comment Share on other sites More sharing options...
Soric Posted June 1, 2016 Share Posted June 1, 2016 The terrain is looking great. When you asked for suggestions earlier I felt that my ideas of adding railings to your steps leading up to the overhead bridge building and having a fence built around the generators were a bit uninspiring in comparison to what you've built. Regardless keep up the great work. Link to comment Share on other sites More sharing options...
Enigami Posted June 1, 2016 Author Share Posted June 1, 2016 Thanks guys!Blue: I do want to tie the ground into the bases I've got for my death guard, but I don't want to do it so blatantly. I feel like that much terra cotta earth tone would be overwhelming. I plan on painting the ground like broken asphalt/concrete. After some washes I was going to take the pigments I use on my bases and tie in the colors. I'm thinking of the board as being on the outskirts of a city close to open fields of the terra cotta colored earth. I'd like to water down my pigments and let it seep into cracks and dust up sides of buildings to give the effect of loose earth being blow through the ruined city. What say you on that idea?Soric: Thanks, but even the smallest detail would go far. I do feel I need smaller things like you suggested. I'm particularly perplexed on how I'm going to create stairs for the smaller bridge building. The way I built the building inadvertently put the door about an inch and a half above the ground. I'm struggling with a remedy since I put the door facing the smaller industrial-like platform (d'oh!). Any ideas from anyone regarding that issue would be particularly appreciated.Thanks again guys for commenting! edit: Remedied stupid spelling and grammatical mistakes caused by posting from phone Link to comment Share on other sites More sharing options...
Enigami Posted June 6, 2016 Author Share Posted June 6, 2016 Here are some updates: http://i683.photobucket.com/albums/vv194/Enigami1990/Mobile%20Uploads/image_zpsbyonh57w.jpeg http://i683.photobucket.com/albums/vv194/Enigami1990/Mobile%20Uploads/image_zpsi4hqdt5u.jpeg This is my progress so far. I've gotten everything done that I can with an airbrush. I'll start detailing and whatnot soon. The other boards are still in the process of clean up and straightening. This has been a massive undertaking. I feel like I could have easily painted a 3000 point army with all of the build and paint time put into these boards, but I've already played a game on the board when it was unpainted. I don't think I can ever go back to a table with random pieces of terrain scattered around. The games are so much more fun on a board like this. Link to comment Share on other sites More sharing options...
Newtoncain Posted June 6, 2016 Share Posted June 6, 2016 Fantastic gaming board so far. Link to comment Share on other sites More sharing options...
Enigami Posted June 13, 2016 Author Share Posted June 13, 2016 Here are a bunch of new photos of where I'm at now with the board. http://i683.photobucket.com/albums/vv194/Enigami1990/image_zpst6meblyu.jpeg http://i683.photobucket.com/albums/vv194/Enigami1990/image_zpsfhherk5l.jpeg http://i683.photobucket.com/albums/vv194/Enigami1990/image_zpssvvzebu8.jpeg http://i683.photobucket.com/albums/vv194/Enigami1990/image_zps6bmwzvxh.jpeg http://i683.photobucket.com/albums/vv194/Enigami1990/image_zpslx6imnyq.jpeg http://i683.photobucket.com/albums/vv194/Enigami1990/image_zpsc3u7wmgo.jpeg Link to comment Share on other sites More sharing options...
BlueBelly1863 Posted June 13, 2016 Share Posted June 13, 2016 Thanks guys! Blue: I do want to tie the ground into the bases I've got for my death guard, but I don't want to do it so blatantly. I feel like that much terra cotta earth tone would be overwhelming. I plan on paint all the ground like broken asphalt/concrete. After aome washes I was going to take the pigments on use on my base and tie in the colors. I'm thinking of the board as being on the outskirts of a city close to open fields of the terra cotta colored earth. I'd like to water down my pigments and let it deep into cracks and dust up sides of buildings to give the effect of loose earth being blow through the ruined city. What say you on that idea? Thanks again guys for commenting! Sounds awesome to me!! Can't wait to see how it looks when it's all said and done. Keep up the great work, I'm sure its a lot to get through Link to comment Share on other sites More sharing options...
Enigami Posted June 17, 2016 Author Share Posted June 17, 2016 I'm finally about done with my first tile as far as actual paint goes. Some pigments might come later. All I have left to do with paint is an oil wash on the left side of this tile. The board still looks like it needs a little something. I was thinking of possibly a drybrush on the lightest part of the rubble or maybe just to try to finish with my pigments. Any suggestions? http://i683.photobucket.com/albums/vv194/Enigami1990/image_zpstujjp0p3.jpeg Link to comment Share on other sites More sharing options...
Shrieker Posted June 18, 2016 Share Posted June 18, 2016 A neat thing for your walkway would be to have 'the bit that has fallen' as debris underneath Link to comment Share on other sites More sharing options...
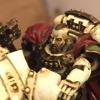
Enigami Posted June 22, 2016 Author Share Posted June 22, 2016 I can't really decide whether I painted this Luna Wolf because I'm too nice of a friend, needed a break from my board, or have some form of hobby related ADD. Anyways, my buddy decided that he'd like to have a Luna Wolves army after reading Horus Rising and offered a swap for my Sons of Horus since my interest in them had been waning. I agreed and now I've found myself to have already base coated an entire Luna Wolves army excepting vehicles. I'm terrible at this whole remaining focused thing. Well, here is my first test mini. Let me know what you all think. I'll post more Lunas this evening and get back to my board eventually. http://i683.photobucket.com/albums/vv194/Enigami1990/Mobile%20Uploads/image_zps9glhhtpu.jpeg Note: I absolutely hate how glossy he is, but I'm getting him ready for Luna transfers when they arrive. He'll eventually have a flat finish like nearly everything else I've painted. Link to comment Share on other sites More sharing options...
Athrawes Posted June 23, 2016 Share Posted June 23, 2016 Lovely Luna Wolf! That light grey looks spectacular, would you mind sharing a guide? It might find use when I reboot my Lightning Bearers. Link to comment Share on other sites More sharing options...
Enigami Posted June 23, 2016 Author Share Posted June 23, 2016 Thanks Athrawes! I'll be happy to share. Its incredibly quick and easy if you have an airbrush. I started with a nice flat black primer then: 1. Airbrush German Grey from Vallejo to completely cover the model. 2. Airbrush Dawnstone avoiding only the darkest recesses. 3. Airbrush Administratum Grey on the lighter areas and large panels. (I sprayed down at a 45 degree angle and worked up and then lightened up some of the areas where I felt the gradient was too unrealistic). 4. Airbrush 2-3 thin coats of pure white from the top and maybe at some angles to taste. This won't really ever get to white. but seems to stay a very light grey after dry. 5. Paint everything not white/grey black. I picked out all my metals and other colors in black first. (I think it helps them pop next to all the grey/white). 6. Metals and details to taste. 7. Seal the model with a clear coat. 8. Oil pin wash with a 60/40 mix of white/burnt umber. The oil paint looked like a light mud when i was ready to wash. I tried to keep it as precise as possible to give it some depth, but avoiding looking like my death guard. 9. Seal in gloss coat in anticipation of transfers. (On a side note, that wolf only took about 2-2 1/2 hours minus some dry time. So, if you can use the scheme it makes for some fast painting.) That's as far as I've gotten. Athrawes, I've finished the grey on everything my buddy has now, but I'd be willing to do a picture guide if you really want it for your Second. Link to comment Share on other sites More sharing options...
Athrawes Posted June 23, 2016 Share Posted June 23, 2016 That would actually be super helpful if you don't mind the hassle. I've been playing with my airbrush doing my Thousand Sons army, and it has been 1000x more enjoyable painting the basecolors with an airbrush over by hand, especially the vehicles. So I've been on the lookout for months for a nice grey airbrush scheme for my II Legion as I want to get back to them but they are just so time consuming to paint compared to the TS. Your grey looks perfect. Link to comment Share on other sites More sharing options...
Enigami Posted June 24, 2016 Author Share Posted June 24, 2016 Athrawes, if you can hold out for my current Forgeworld order to get here, I'll gladly post a picture guide. Loken is included and I'll walk you through my scheme when I paint him up. I'll also put some in progress of the rest of the infantry so you can see what they look like before details and oil. Link to comment Share on other sites More sharing options...
Brother Pheidias Posted June 25, 2016 Share Posted June 25, 2016 Looking great, terrain has a very attractive earthy quality to it. That Luna Wolf is great though, just the right amount of off-white IMHO. Link to comment Share on other sites More sharing options...
Enigami Posted June 26, 2016 Author Share Posted June 26, 2016 So, I was able to pick up several of the exclusive praetors this weekend. Lucky for Athrawes, I was able to use one for my buddy's Luna Wolves force. I've done a painting guide for my grey that goes all the way up to detailing. I'll be able to finish after I get the enormous amount of resin we have sitting around built. It really adds up when you get two new forces in the mail. Sorry, its picture heavy, but here it is: 1. I start by priming black. http://i683.photobucket.com/albums/vv194/Enigami1990/image_zpsgjh3ce37.jpeg 2. I then air brush Vallejo German Grey over the entire model. I make sure to get the recesses so my gradient in the later stages isn't too unrealistic. I went over the lighter areas with maybe two thin passes. http://i683.photobucket.com/albums/vv194/Enigami1990/image_zpsc0expqnm.jpeg 3. Next, I took some GW dawnstone and did the same thing. This time I made sure to leave a bit of the darker areas, but still tried to get a nice full cover. http://i683.photobucket.com/albums/vv194/Enigami1990/image_zpscqktco0t.jpeg 4. The last grey I used is GW administratum grey. I tried to do less of a full coat focusing only on the lighter areas. I still kept an eye out for unrealist gradients so I could have dark shadows while maintaining a sense of realism. http://i683.photobucket.com/albums/vv194/Enigami1990/image_zpsxrdyejhh.jpeghttp://i683.photobucket.com/albums/vv194/Enigami1990/image_zpsglumdxe2.jpeg 5. Next I start to add my white picking out all of the highlights with a few passes. I also do a couple long range sprays to bring up the overall color. http://i683.photobucket.com/albums/vv194/Enigami1990/image_zps5dkjpgag.jpeghttp://i683.photobucket.com/albums/vv194/Enigami1990/image_zpsyngqh5kj.jpeg 6. The last step I've I got for you today is blocking in my blacks. I paint everything in black that will be a color other than my base. http://i683.photobucket.com/albums/vv194/Enigami1990/image_zpsk7molupg.jpeg He looks a little too white here, but its just a visual trick as the colors are close to the extremes on the grey scale. The the details and washes will make the color appear as it does on the other model I've painted. I'll try to finish this in a few days. I hope it was helpful. Let me know if you have any questions. Link to comment Share on other sites More sharing options...
Enigami Posted June 28, 2016 Author Share Posted June 28, 2016 Here are some photos of the rest of the Luna Wolves I've got in the queue right now. I'm trying to get these done before I get Loken/Abbadon, Horus, 2 dread claws, a laser vindi, deredeo, dread drop pod, leviathan, some rhinos, and quad mortars in the mail. I swear its never ending. The guys in the picture are all in the middle of a nice healthy serving of black before details. http://i683.photobucket.com/albums/vv194/Enigami1990/image_zpsdfz4wtju.jpeghttp://i683.photobucket.com/albums/vv194/Enigami1990/image_zpsfrqlxuuo.jpeghttp://i683.photobucket.com/albums/vv194/Enigami1990/image_zpsbdwb9ngx.jpeg I apologize for the kitchenware in the background. There isn't a good place to take pictures in my new place yet. I'll post some closer ups as these guys leave boring and start nearing completion. Link to comment Share on other sites More sharing options...
Athrawes Posted June 28, 2016 Share Posted June 28, 2016 Looking forward to seeing this progress (for selfish reason yes, because of the painting tutorial, but also because a full army to this standard should look quite beautiful.) Keep it up! Link to comment Share on other sites More sharing options...

Recommended Posts
Archived
This topic is now archived and is closed to further replies.