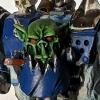
FlamingDeth Posted June 19, 2016 Share Posted June 19, 2016 (edited) Hello! Here, have the first post in my absurdly slow army plog for my DIY DA successors, the Raven Order. I was going to start with a fluff blurb but then I remembered that, despite having lots of fluff for them I'm terrible at writing. I'll likely include little bits occasionally but not in story form like the more talented amongst us... Anyways, evidence that I actually am working on this...I have very little time to paint and when I do I'm not the fastest at it, in fact the most consistent time I have to paint is in my car when I'm on lunch at work, hence the extremely modest first vow. Picture! So in the time that Elmo has painted half of a battle company, I've almost painted half of a tactical squad. Some of them are second hand rescues, like the guy on the left who is stuck together with so much plastic cement I couldn't pull him apart to put him in a less awkward pose. The two guys on the right are minor conversions of AoBR tacticals, with he sergeants combimelta and backpack icon broken off some time during transit. There's a bit of experimentation going on. The multimelta guy obviously failed at having his shading done with the old flesh wash, which as it turns out isn't quite subtle enough to shade bleached bone, whereas elf flesh is too subtle. I'll probably have to actually buy some more paints to do that properly. Also will probably have to redo the tactical arrows in red, the black doesn't stand out enough. Anyways, more updates later. Edited December 31, 2017 by CardinalVirtue Interrogator Stobz, elmo, paulJam and 1 other 4 Back to top Link to comment Share on other sites More sharing options...
Brother Captain Arkley Posted June 19, 2016 Share Posted June 19, 2016 For the bone I would try Soft Tone (Army Painter) or Seraphim Sepia (GW). You WILL get the hang of it :)... But good start.... FlamingDeth 1 Back to top Link to comment Share on other sites More sharing options...
FlamingDeth Posted June 19, 2016 Author Share Posted June 19, 2016 It's mostly just trying to work with the ten paints that survived being in storage for two years. Went to try highlighting the red with blazing orange only to find that it was a solid pigment brick...same with the devlan mud. Link to comment Share on other sites More sharing options...
Chaplain Raeven Posted June 20, 2016 Share Posted June 20, 2016 Interesting scheme, looks good. However, you punish yourself by using bone, since that stuff is hard to paint (IMO). Brother Arkley's suggestion of Seraphim Sepia is a good one, although Agrax Earthshade isn't bad either for a more grim shading (great for skullz). Never used Army Painter, but Brother Arkley's marines are gorgeously done with that, so it does work. What is your technique? Base/bone/shade/highlight or Base/shade/bone/highlight? FlamingDeth 1 Back to top Link to comment Share on other sites More sharing options...
jbaeza94 Posted June 20, 2016 Share Posted June 20, 2016 You brother are insane. Quartered color scheme? But in that madness there is beauty! Your marines look good :) Agrax earthshade in my opinion is a little harsh for ushabti in my opinion. I used it on my belial, and it was a bit dark. Then again I was still learning how to properly shade at the time. But indeed great for skulls FlamingDeth 1 Back to top Link to comment Share on other sites More sharing options...
Chaplain Raeven Posted June 20, 2016 Share Posted June 20, 2016 (edited) ... although Agrax Earthshade isn't bad either for a more grim shading (great for skullz). Agrax earthshade in my opinion is a little harsh for ushabti in my opinion. I used it on my belial, and it was a bit dark. Earthshade is now Grimdark-approved. Never tried it on large surfaces before. I can image that Agrax with Ushabti is very stark contrast. I was going to experiment with it for a bit, but I'll trust your judgement and stick to my trusty Sepia. Edit: But like I said, Agrax is awesome for Purity Seals & Skullzzzzz. Edited June 20, 2016 by GreyRavenC FlamingDeth and jbaeza94 2 Back to top Link to comment Share on other sites More sharing options...
FlamingDeth Posted June 20, 2016 Author Share Posted June 20, 2016 (edited) Thanks, I think my only hope is for the scheme to look good, since I'm afraid that my painting skills aren't going to reach those of, say, Brother Arkley. I've always wanted to do a quartered scheme but for the decade I've been planning it I have not, until now, worked up the courage to risk ruining models with it. The purple is because it's my wife's favorite color, the bone is to help tie it in with DA proper, similar to how all the details are going to be black. There are fluff justifications for everything, but those are the more practical reasons. The bone, in theory, is off of black primer, and goes base (elf flesh), bone (bleached bone), shade (both flesh wash and more elf flesh have been attempted), highlight (I don't remember which white I've been using, it's only made it on to purity seals so far). The shade thus far has to change, as flesh wash stands out too much and the elf flesh doesn't stand out enough, I was just trying to get as far as I could before buying replacement paints. This first squad is all about experimentation and finding what works though, so everything is changable. Edit: Probably going to try sepia, though. Edited June 20, 2016 by CardinalVirtue Link to comment Share on other sites More sharing options...
Chaplain Raeven Posted June 20, 2016 Share Posted June 20, 2016 I had great results with this combination: - Black primer (I HATE white primer) - Rakarth flesh - Seraphim Sepia - Ushabti bone - Screaming skull for high surfaces (optional) - Random white highlight (White Scar or Pallid Wychflesh) It's harder to paint, but painting bone AFTER the wash yields better results. I tried it the other way around once, but Sepia on Ushabti is not a pretty colour. FlamingDeth 1 Back to top Link to comment Share on other sites More sharing options...
Major_Gilbear Posted June 20, 2016 Share Posted June 20, 2016 It's a nice colour scheme you have there IMO, but I feel a few things will help it really look sharp: 1) Use a grey primer. White will mean several coats of purple to get it looking solid, and black will mean several coats of bone to get it looking solid. A careful light pass with some automotive grey spray primer helps with both colours, and leaves any missed spots in very-hard-reach area a neutral colour that won't stand out. I find it easier to see details on models primed grey as well. 2) The paint and glue on the models looks really thick. I know these are re-paints and rescues, but maybe they need better strip? I'm guessing you're probably in the US or Canada, so I would suggest looking for some Simple Green to give the models a long soak in (you want to use the concentrated stuff, and use it neat - no dilution). I would normally suggest a soak in Dot3-4 clutch & brake fluid, but the old 3E and 4E plastics were softer (i.e., less dense) than the newer models that have been released from 5E onwards, and they can go soft in the brake fluid (they do harden up again after a few days, but they break very easily until then). With the detail obscured it is very tricky to get nice clean lines or a smooth finish, and I think it just makes harder for you than it needs to be! (Of course, if these are just test models before you paint the actual model you're intending, then please disregard this point! ) 3) With off-white colours like bone, you can either paint a darker shade and then highlight, or you can paint the lighter colour and then shade into the recesses only (as opposed to washing all over). Both give you a nice finish without needing to worry about highlighting too much, but I would say that shading into the recesses is much easier (because it's easy to encourage the paint into the recesses and have it stay put - the model "works with you" in effect). If you shade into the recesses, a neutral brown colour like Agrax Earthshade or Army Painter Strong Tone are probably your best bet - I'd put some on a palette and add a drop or two of clean water to thin them and just carefully brush it into all the cracks. Being thinned will also soften the contrast a bit, and you can always reapply if you want it darker. These washes will also gradually settle in on their own and give you a smoother look anyway. If you paint it all over the bone colour however, you will then have much more work highlighting and such afterwards - I always try and use as few steps as possible, and to make those steps as easy as possible (especially with fussy colours like ivory). 4) I notice your comment on the ten old paints... I'm sorry, but I think you need to say goodbye to them and get some new ones! If the Citadel ones are too much for your budget, P3 paints give you a lot more for similar money, and Vallejo paints are both bigger bottles and cheaper. There are lots of other brands as well, but these "big three" of miniatures painting are fairly easy to come by. Reaper paints are lovely, but hard to get outside the US. However, as far as I'm concerned paint is paint, and as long as you get a suitable acrylic formulated for miniatures painting, great results can be achieved with nearly all brands you will come across. You should therefore feel free to mix and match brands based on your preferences rather than feel you have to use "X" brand all over a model. 5) While you're at (4), get yourself some new brushes too. Brand is less important as long as they are Kolinsky sable and come to a really sharp point without needing much encouragement. Bigger brushes (size 1) are much more useful for the whole of a 28mm trooper than smaller brushes - the sharpness of the point determines the detail you can paint, not the size of the brush (and small brushes dry out faster and leave more marks). Whilst fancy brushes won't magically produce Golden Demon results, they do make your life much easier and the painting much faster. A nice brush, well looked-after, will last you a good while too; so even if it costs you $12 for a brush or whatever, you might only need one or two in a whole year (or longer). Anyway, apologies for the info dump; I am just trying to be helpful, but will leave it there for now unless you have any questions. I am really looking forward to seeing how your force comes along. :) Lostrael, FlamingDeth, Greenz and 2 others 5 Back to top Link to comment Share on other sites More sharing options...
Greenz Posted June 20, 2016 Share Posted June 20, 2016 Very nice colour scheme you've got there! Purples not a colour you see often outside of 30k Emperors Children. And not only a quarter pattern, but with bone as well! It'll be A rough road, but we'll worth it As for tips, I don't have much to add that hasn't already been thrown out there. Major Gilbear has given you some great tips. Bone is very tricky, it's a lot of trial and error. But once you get a formula you like, you will get the hang of it. FlamingDeth 1 Back to top Link to comment Share on other sites More sharing options...
FlamingDeth Posted June 22, 2016 Author Share Posted June 22, 2016 Trying GRC's method first for the bone here, as it starts from a black primer, which I've always preferred. Just got to the wash today, will try to get the actual bone on there tomorrow to see how it goes. I'm already liking this more, just have to not suck with brush control in the future. Also need to get some more sepia on his mighty ceramite codpiece. I'm hopeful for how this one will turn out. Gilbear: No need to apologize, good info is good! I'm sure these guys will end up back in the drink eventually, and probably attacked with the hobby knife to clean up them up to a not horrible standard. Brushes shouldn't be a problem, I've got a pile of windsor-newtons in conditions ranging from "I don't think I've used this one" to "you poor thing", so I should be good there. Slowly replacing the paints as fast as my wife will let me as well. Greens: Thanks! I know it'll be rough, but there's that proverb that nothing that's worth doing is easy...now that I have regular, if still minimal, time to paint, the plan is to push myself and my skills, try out and develop new techniques, and eventually be able to produce miniatures that are at least average. We'll see how it goes. elmo and Chaplain Raeven 2 Back to top Link to comment Share on other sites More sharing options...
Chaplain Raeven Posted June 23, 2016 Share Posted June 23, 2016 That's a nice start! Now you just have to avoid the recesses when painting the bone colour. Here is the video I used to paint mine. It's a really good tutorial, it helped me alot. FlamingDeth 1 Back to top Link to comment Share on other sites More sharing options...
Major_Gilbear Posted June 23, 2016 Share Posted June 23, 2016 I think that the sepia wash all over is a good example of what I meant by only shading the recesses instead: now you have to re-paint 95% of that area in a colour that doesn't cover very well. If you just do the recesses with the shade, then apart from a few touch-ups here or there, it saves you a lot of work! Thinning the wash a bit (and maybe doing two passes) also helps you, as the wash is less likely to need touch-ups because the colour will be less saturated (and therefore very small slips won't be noticeable when dry). This also leads the point about stripping too: you need the detail to still be fairly sharp and not filled-in for this to work best. Looking at that last model, there does appear to be a lot of paint filling in what should be a clear gap between the bottom of the scope and the top of the bolter! Colour-wise it's a good start - looking at that and your avatar pic, I don't think you're very far away from the finished scheme! :) FlamingDeth 1 Back to top Link to comment Share on other sites More sharing options...
Chaplain Raeven Posted June 23, 2016 Share Posted June 23, 2016 I think that the sepia wash all over is a good example of what I meant by only shading the recesses instead: now you have to re-paint 95% of that area in a colour that doesn't cover very well. If you just do the recesses with the shade, then apart from a few touch-ups here or there, it saves you a lot of work! Thinning the wash a bit (and maybe doing two passes) also helps you, as the wash is less likely to need touch-ups because the colour will be less saturated (and therefore very small slips won't be noticeable when dry). That's something I noticed as well on my last termies. It makes the job a lot easier to leave the flat/high surfaces unshaded, even if it take more time & effort. FlamingDeth 1 Back to top Link to comment Share on other sites More sharing options...
FlamingDeth Posted June 24, 2016 Author Share Posted June 24, 2016 (edited) Watched the video, that's a pretty simple way to get some good depth to the bone. I really ought to watch more videos like that, I have a feeling that it'll come in handy. I'll see how close I can get to that with my current stuff until my paint budget refreshes next month. Just for fun, since I didn't actually have a chance to paint anything, here's a couple older models showing off the "pinnacle" of my line troops from a few years ago when could still paint with any regularity. Some green guy. Not really great, but I'd like to think he passes the three foot test. And the slightly worse top of my bone painting ability. Shouldn't be too hard to surpass that. Not really relevant to anything, next time I'll probably throw in some fluff instead. Edited June 24, 2016 by CardinalVirtue Link to comment Share on other sites More sharing options...
Chaplain Raeven Posted June 24, 2016 Share Posted June 24, 2016 The majority of my green guys look like that. If it looks fine on the tabletop: mission accomplished Link to comment Share on other sites More sharing options...
Major_Gilbear Posted June 24, 2016 Share Posted June 24, 2016 To be fair, my first Space Marines looked much worse than that, but then again they were Epic-scale Blood Angels! I even scaled the three-foot rule accordingly (i.e., look okay at 7-8") because at 3' they were too small to see well anyway. Mind you, it was also the only time in my life that I was "fully painted", so it wasn't all bad. :) FlamingDeth 1 Back to top Link to comment Share on other sites More sharing options...
FlamingDeth Posted June 25, 2016 Author Share Posted June 25, 2016 (edited) So, some bone. There's some lessons here. The first is don't be a cheapskate, replace old paints. The bone is the major culprit here, it's the oldest of the paints I'm still trying to use, and no matter how much I try to thin it, it comes out clumpy and leaves brush strokes. The second lesson is don't take shortcuts, layers are important, and making sure that they're the proper colors is equally important. Looking at that tutorial video, it's a very deliberate color choice. Starting with the vase coat, my brain says, "how different can those two flesh colors be!" But elf flesh is a much more vibrant color than the rakarth he uses in the video. No matter how thin the wash is it's going to pop a lot more over elf flesh than rakarth. The two different bone colors are also important to get that smoother gradient. I don't think there's any way around that, I'll likely improvise my way through this batch with what I've got, only because it may not be possible to ruin them more. Now on to something completely different...fluff! All names, titles, and numerical designations are subject to change since most of my fluff knowledge comes from lexicanum. Origins: 23rd founding chapter. The chapter's founding was ordered by the High Lords of Terra in response to a reading of the Emperor's Tarot. Neither the High Lords themselves nor the current Grand Master of the Dark Angels understood the reason, they obeyed dutifully. While the Unforgiven were preparing their training cadres, their fleet happened upon a rather ancient space hulk. As is the nature of space hulks, they suspected it to contain secrets of the Imperium, and sent in a team to recover them. What they found surprised even them. In the conglomorate of wreckage that formed this hulk there was the remains of the Ring of Glory, the flagship of the 14th Chapter of the original Dark Angels legion, lost to the initial barrage of fire from the planetary defense systems of Caliban. While they recovered the odd weapon, vehicle, or suit of armor from the whole of the ship with minimal xenos resistance, their final discovery was unprecedented: the personal armory of Grand Master Solomon was completely intact and undisturbed. His own banners, armor, weapons, and even a Mk1 Razorback -- all expertly hand crafted by the finest artificers of the time. The timing of the discovery was uncanny. The entire find was gifted to the new successor chapter, who adopted Solomon's personal heraldry. Shortly thereafter, the fledgeling chapter was bestowed their initial fleet assets and begun training excersizes. Once up to a marginal fighting level, they began a small crusade through the SOMETHING sector, cleansing it of a moderate greenskin waaagh, and a series of small uprisings. Reclaiming the sector from the greenskins pleased the administratum, enough to grant the new chapter their choice of homeworld from among the conquests. It pleased the Unforgiven Legion as they had, in the process, encountered and captured what remains their only Fallen. He was swiftly turned over to the Dark Angels for redemption. From that point on the chapter was considered fully functional. They defended their conquered sector steadfastly, and continued conquests outward whenever possible. And for fun, space marine painter image of how the color scheme ideally ends up. Edited June 25, 2016 by CardinalVirtue Link to comment Share on other sites More sharing options...
FlamingDeth Posted August 13, 2016 Author Share Posted August 13, 2016 Vow complete. They pretty much all aren't great, but it's a learning experience. Eventually they'll be stripped and repainted, but as a wise man once said, it's better to have an army of badly painted models than a squad of well painted models and an army of grey. FinylCut, Chaplain Raeven, Solrac and 3 others 6 Back to top Link to comment Share on other sites More sharing options...
Malcifer Posted August 13, 2016 Share Posted August 13, 2016 Man, they look really cool. I like the colors. Very striking. That is a cool symbol too. A sickle next to an angle wing? My two cents on stripping models. I like buying old models on ebay and I have tried almost everything under the sun to strip off old paint. The best I have found is something called Purple Power. You can get it at Walmart in the auto section. I think it is intended to be used as a de-greaser. It is awesome. If you plunk your models into some of that the paint will almost fall off after a couple days. I have even used it on soft plastic (i.e. Reaper Bones) with no ill effects, it does break down super glue though. The one thing I will say though is be careful about getting it all over your skin. It feels slippery like soap and I am pretty sure that is because it is emulsifying the oil on your skin. Chaplain Lucifer 1 Back to top Link to comment Share on other sites More sharing options...
Chaplain Raeven Posted August 14, 2016 Share Posted August 14, 2016 Vow complete. They pretty much all aren't great, but it's a learning experience. Eventually they'll be stripped and repainted, but as a wise man once said, it's better to have an army of badly painted models than a squad of well painted models and an army of grey. Those look pretty good. Your skills with bone is improving. Man, they look really cool. I like the colors. Very striking. That is a cool symbol too. A sickle next to an angle wing? My two cents on stripping models. I like buying old models on ebay and I have tried almost everything under the sun to strip off old paint. The best I have found is something called Purple Power. You can get it at Walmart in the auto section. I think it is intended to be used as a de-greaser. It is awesome. If you plunk your models into some of that the paint will almost fall off after a couple days. I have even used it on soft plastic (i.e. Reaper Bones) with no ill effects, it does break down super glue though. The one thing I will say though is be careful about getting it all over your skin. It feels slippery like soap and I am pretty sure that is because it is emulsifying the oil on your skin. No matter how safe it looks, always use gloves with chemicals. I always had chemical burns from dettol, while that stuff has no warningssymbols on the package. Link to comment Share on other sites More sharing options...
FlamingDeth Posted August 14, 2016 Author Share Posted August 14, 2016 More direct image of the insignia, and yep, winged scythe. Originally it was going to be more ravenwing style, just with the sword replaced with the scythe, but that was too fiddly to replicate en masse. I think i like this version better at this point anyways. Hopefully later iterations get a little sharper. Epher and Malcifer 2 Back to top Link to comment Share on other sites More sharing options...
Gillyfish Posted August 16, 2016 Share Posted August 16, 2016 I love the colour scheme, although you haven't made it easy for yourself! However, the bone is definitely coming along nicely. I've found the sepia wash is excellent for shading around details. I tend to use a thinned dark brown line to define the boundaries between armour plates, which can be effective. I found with Deathwing that dawnstone (I think is the name) followed by sepia and then highlighted with a mix of bone and white, with a another highlight or two with more white, worked really well. Link to comment Share on other sites More sharing options...
Chmur Posted August 16, 2016 Share Posted August 16, 2016 (edited) There is another way to do the bone - it's fairly harder in terms of work, but should provide neater results; and that would be oil washes. If you coat the model in gloss varnish (non-oil based so the wash doesn't eat into it), you can then coat it in handmade oil wash and it will flow way better into recesses and you can clean off the remains with cotton-bud/paper towel easily. The result is this - I washed the whole model generously and then just wiped excess away, didn't come back with Bonewhite at all: http://i.imgur.com/AMapGih.jpg If you want more detailed photos I can take more at home. Oil washes are generally more work, but far better result once you get the hang of them. And you can buy them (paint + thinner) in most craft stores. Here are some youtube videos explaining the oil washes: Edited August 16, 2016 by Chmur Link to comment Share on other sites More sharing options...
FlamingDeth Posted August 20, 2016 Author Share Posted August 20, 2016 I think I'll hold off on the oil washes until I'm a little less shaky on the basics, but it is something to keep in mind. QUESTION FOR EVERYONE! I'm having a conundrum with colors for chaplains. The notion that I had for the army in general is that decorations and honors re black, with black cloth as well to give contrast with the bone, and higher ranking people wear more cloth. This looks decent to me most of the time, as in the SM painter image. Chaplains are another story though. Having a black robe on black armor just doesn't work for me, so I need to figure something else out. The options that I'm thinking of are either bone robe with quartered shoulders, or possibly normal coloration for the shoulders and a quartered robe. Thoughts? Either of those sound good? Other suggestions? Link to comment Share on other sites More sharing options...

Recommended Posts
Create an account or sign in to comment
You need to be a member in order to leave a comment
Create an account
Sign up for a new account in our community. It's easy!
Register a new accountSign in
Already have an account? Sign in here.
Sign In Now