MithrilForge Posted February 7, 2019 Share Posted February 7, 2019 your painting table looks full of stuff so i'll be patient ,But yeah i guess i'm busting your Orbs so fairs fair,you get to kick back i'm painting some Primaris Necropolis Hawks at the moment so yes i'll update that soon for you...my raptors are in the cabinet on a holding pattern... i also have a push fit redemptor iv'e base coated that's destined for Necropolis Hawks too (he's next after the intercessor squad) Question though! whats everyone find that the best general purpose loadout for intercessors is?... just the plain ol' bolt rifle?, especially now with that beta rule "Bolter drill" and whats with no power weapons in the intercessor boxset this is the first box of any new stuff iv'e opened and was suprised to find no pwr weapon at all...am i expected to buy some GW or FW upgrade pack?... Cheers, Mithril Link to comment Share on other sites More sharing options...
MajorNese Posted February 7, 2019 Share Posted February 7, 2019 and whats with no power weapons in the intercessor boxset this is the first box of any new stuff iv'e opened and was suprised to find no pwr weapon at all...am i expected to buy some GW or FW upgrade pack?... The Chapter Approved rules just give the options for chainsword, power sword and power fist. Which are in the GW upgrade sprues (which is why these are in the rules and others are not), or in any marine player's bitzbox. IIRC, there's even a power sword in the intercessor box. Link to comment Share on other sites More sharing options...
duz_ Posted February 7, 2019 Author Share Posted February 7, 2019 For those who are complaining about lack of progress ;) :P That's just the painting table of projects I want to focus on. It doesnt include the tray in the basement of other projects... :sweat: I think the arms are interchangeable between primaris and regular marines so kit bashing should be straight forward. I'm gonna dig around to find some chainswords for my sgts and attach them because who doesnt want +1A for free :D Ive done 2 squads of bolt rifles and 1 stalker I really want some of the assault rifles but missing the Ap-1 really hurts them Dracos, WAR, Johanhgg and 3 others 6 Back to top Link to comment Share on other sites More sharing options...
Race Bannon Posted February 7, 2019 Share Posted February 7, 2019 His base looks a little tall to me. Unless you are going for a top-of-the-spire kinda thing? :P Link to comment Share on other sites More sharing options...
duz_ Posted February 7, 2019 Author Share Posted February 7, 2019 Temporary bottle cap base for painting :PSpeaking of the base I guess I should do a shrubland-esque base?Generally I haven't done that before so I was hoping Armageddon dust texture, plus a GW shrub or something could work?How would could I incorporate some green? (NO FLOCK! :P ) Paint the texture green? ONDIG 1 Back to top Link to comment Share on other sites More sharing options...
thewarriorhunter Posted February 7, 2019 Share Posted February 7, 2019 you could look into static grasses, or use flock clumps to make bushes. I did that on my RG bases. Link to comment Share on other sites More sharing options...
Race Bannon Posted February 7, 2019 Share Posted February 7, 2019 Paint the green … greenskin blood man. BLOOD FOR THE … whoops, wrong forum. duz_ 1 Back to top Link to comment Share on other sites More sharing options...
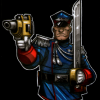
MithrilForge Posted February 8, 2019 Share Posted February 8, 2019 Can i ask why you NEED to do grass and shrubs?, you could always put a pillar/post or wall corner from any of the scenery kits and paint it up in drab colours for a city fight themed base like he's moving through cover in a street fight?...he does have that sniper sneaking look to him!... anyways well done on getting that base coat down so well i'll go searching my bitz box for a pwr sword or chainsword for my Primaris Sgt duz_ 1 Back to top Link to comment Share on other sites More sharing options...
duz_ Posted February 14, 2019 Author Share Posted February 14, 2019 Happy Valentine's Day to me! WAR, Dracos, ONDIG and 3 others 6 Back to top Link to comment Share on other sites More sharing options...
Shadow Captain Vyper Posted February 15, 2019 Share Posted February 15, 2019 duz_, Johanhgg and Race Bannon 3 Back to top Link to comment Share on other sites More sharing options...
duz_ Posted February 15, 2019 Author Share Posted February 15, 2019 Haha That is for my other thread... its a Custodes Caladius Grav Tank ;) Link to comment Share on other sites More sharing options...
WAR Posted February 15, 2019 Share Posted February 15, 2019 Unlike nope still unlike ONDIG, thewarriorhunter and Race Bannon 3 Back to top Link to comment Share on other sites More sharing options...
duz_ Posted February 15, 2019 Author Share Posted February 15, 2019 Unlike nope still unlike :P Im sure my DoS vow will make up for this WAR 1 Back to top Link to comment Share on other sites More sharing options...
WAR Posted February 15, 2019 Share Posted February 15, 2019 probably Link to comment Share on other sites More sharing options...
Dracos Posted February 15, 2019 Share Posted February 15, 2019 :down: Unlike nope still unlike :teehee: lmao :) Mor Deythan .... anybody else get that pleasant chill from the shadows crawl up their spine as they previews the Primaris Snipers? I thought I felt the fan blades of the Whispercutter barely overhead as they spread out over the ancient ruins ;) Shadow Captain Vyper, WAR, duz_ and 1 other 4 Back to top Link to comment Share on other sites More sharing options...
thewarriorhunter Posted February 16, 2019 Share Posted February 16, 2019 I hope so. I'm really hoping we get a Primaris open topped transport. Johanhgg 1 Back to top Link to comment Share on other sites More sharing options...
duz_ Posted February 22, 2019 Author Share Posted February 22, 2019 Quick update Been floating between various small projects post completing my commission That includes readjusting and up sizing the magnets on my Redemptor so the weapon loads actually stay on :D Maybe in this float period some Mor Dethyan maybe assembled Although I may keep their arms separate to make painting them easier :) Dracos 1 Back to top Link to comment Share on other sites More sharing options...
Dracos Posted February 22, 2019 Share Posted February 22, 2019 I also do that same thing with the backpack and shoulder pads because of the color difference in my Chapters base color scheme. duz_ 1 Back to top Link to comment Share on other sites More sharing options...
duz_ Posted March 20, 2019 Author Share Posted March 20, 2019 Still kinda meandering through my various projects My Storm Eagle is washed waiting assembly at the very least. I have until next month to complete that. ;) My Shadowspear box came in yesterday along with my second vindicare assassin so I decided I'd get to work on them. The minis go together pretty quick but the mono builds in general don't float my boat. I did do a head swap on the Cpt thought. Definitely wasnt a fan of the wrinkly old man head. Dracos, Race Bannon and Brother Quixote 3 Back to top Link to comment Share on other sites More sharing options...
thewarriorhunter Posted March 20, 2019 Share Posted March 20, 2019 Nice swap. I primed the head that came with the model but the more I think about it the more I don't want to use it. I'll probably put a Reiver head on it, or maybe get some extra infiltrator heads so the comms gear is there, and if I buy a few of those bits I'll probably swap all the helmet-less heads. All the power armor in the world isn't going to help you if you get shrapnel in your eyes... Brother Quixote, duz_ and Dracos 3 Back to top Link to comment Share on other sites More sharing options...
Claws and Effect Posted March 20, 2019 Share Posted March 20, 2019 Beaky. Helmet. That is all. In other news: I'm baaaaaaaaack! Got Shadowspear myself. About halfway through painting the Librarian already. Will probably start a new thread detailing my progress. My interest in playing RG had waned lately, but the Vanguard guys brought me back. duz_, thewarriorhunter, Dracos and 2 others 5 Back to top Link to comment Share on other sites More sharing options...
duz_ Posted March 20, 2019 Author Share Posted March 20, 2019 Welcome back C&E! :tu:Don't worry there will be many beakies, it has already crossed my mind ;) Link to comment Share on other sites More sharing options...
duz_ Posted March 20, 2019 Author Share Posted March 20, 2019 Someone requested I do a tutorial for my digicam in another thread. For completeness (and my personal reference ) I'm going to include it here too. Hi Cripple!Not sure if you've started painting yet, however I was asked to a quick tutorial on the "digicam" I developed for my RG. Some examples: Forewarning! I haven't finished my RG having started this scheme Although, I also haven't finished any other armies with easier ones Conceptually its fairly straight forward, its just tedious and time consuming. Having base coated the model black I start with applying Eshin Grey in relatively large boxes and rectangles irregularly on the modelI used a Medium / Small tipped brush to achieve these They didn't have to perfectly square, although I tried to keep it as square as possible without going insane (you also get a chance to touch these edges up with each additional layer) For expedience I avoided the torso and shoulder pads After laying down the Eshin grey 40 - 60% of the areas I applied it to (the goal isn't to be spot on each time with this), I went back and did slightly smaller and slightly different shaped rectangles with Administratum Grey Now we have essentially 3 core colours on the model (black, dark grey, light grey) I added one more lighter colour just to break things up a bit more For that I used Ulthuan Grey or Corax white (its been a while I've forgotten ) with a small brushWhen adding this final layer of colour I used it very sparingly usually crossing over 2 or more of the "base" colours to break them up The goal of this one is to break the tedium a bit Once all those layers are down I then went back with BlackWith a small brush I went back to add "squares" of black similar to the whites above I was aiming to achieve 2 things here, 1 square up any lines and 2 create the digital effect in the otherwise rectangular patters. As above I would often hit 2 colours at the same time with the black creating a black rectangle within a rectangle Occasionally I would just do a small square on the edge of one colour After that I considered the camouflage done and would wash the model and do the other details. In retrospect I'm not sure if washing the model (at least with standard nulin oil) did any justice to it, it certainly dulled it down and grittied it up though The drop pod use the similar technique, but with larger rectangles.The size of the rectangles you have to go by feel. For speed and sanity's sake you want them as large as possible without them looking disproportionate, also you want be able to tell once they're on the table top if they're too small. Having died doing that to so many models I went to a more dazzle style pattern on my Rhinos and Flyers. This is a lot easier as you just make irregular polygons on the model using masking tape. I used the same colours here except for the final light colour, this could probably be easily replicated on infantry models too.... and now I've said that I wonder if I should do that on my RG vanguard... Hope that helps! Race Bannon and Dracos 2 Back to top Link to comment Share on other sites More sharing options...
thewarriorhunter Posted March 20, 2019 Share Posted March 20, 2019 I don't think I hate myself that much... Dracos, Race Bannon and duz_ 3 Back to top Link to comment Share on other sites More sharing options...
duz_ Posted March 21, 2019 Author Share Posted March 21, 2019 Sometimes I wonder too... for some reason I decided I'd build a Storm Eagle too :ermm: Link to comment Share on other sites More sharing options...

Recommended Posts
Create an account or sign in to comment
You need to be a member in order to leave a comment
Create an account
Sign up for a new account in our community. It's easy!
Register a new accountSign in
Already have an account? Sign in here.
Sign In Now