Rogue Crusader Posted January 27, 2017 Author Share Posted January 27, 2017 I'm toying around with some options for the Command Squad. I wanted to see how the skull reliquary would look on the command unit but removed the spire and went with a smaller rear shrine. Because the squad has so many different load out options the rider arms will be magnetized so I can swap out the weapons. I wanted to place a good amount of equipment and bags on the bike so that it looked a bit heavier and more elite than the standard squad. I'm not sure if maybe I should move the large bags to the rear and the small ones to the front. I'm still exploring options so if anyone has suggestions feel free to post away. Link to comment Share on other sites More sharing options...
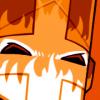
Bjorn Firewalker Posted January 27, 2017 Share Posted January 27, 2017 (edited) As the skull occupies the space where the headlight would go, have you fitted appropriate lights in the skull's eye sockets? Is the "skull" just a glass sculpture in front of the headlight? Or do you find the headlight unnecessary? Edited January 28, 2017 by Bjorn Firewalker Link to comment Share on other sites More sharing options...
Rogue Crusader Posted January 27, 2017 Author Share Posted January 27, 2017 I think that the headlight probably isn't needed, Space Marine's have a pretty advanced sensor suite built into their helmet that lets them see in low light or night time conditions which would be like driving with an advanced set of night vision googles where it might be better to have no head light at all. Alternately maybe the skull is just an ornate cover for the head lamp that flips open when needed? The obvious answer however is that the burning flame of their righteous zeal illuminates all before them so that no heresy can escape the Emperor's wrath. ;) Bjorn Firewalker 1 Back to top Link to comment Share on other sites More sharing options...
Bjorn Firewalker Posted January 28, 2017 Share Posted January 28, 2017 The obvious answer however is that the burning flame of their righteous zeal illuminates all before them so that no heresy can escape the Emperor's wrath. ;) Well said. Link to comment Share on other sites More sharing options...
Rogue Crusader Posted January 28, 2017 Author Share Posted January 28, 2017 Bike Chaplain #2 WIP, he needs some attention with greenstuff and skulls will be added to the front fender but otherwise he's pretty much done. I used a hooded interrogator head so he'd differ a bit from the first chaplain. Now I can get busy fixing up the rest of the command squad. Link to comment Share on other sites More sharing options...
Rogue Crusader Posted February 4, 2017 Author Share Posted February 4, 2017 I now have 10 command bikes converted that are just waiting on the riders to be added and I've built another 12 of the standard bikes which have riders but are waiting on the special weapons. I'll try and add a group shot shortly. One of my friends is a freelance sculptor and I had him do a shoulder pad that I'll be duplicating in resin and using for the command squad. Normally I'd do this in 3d and have it printed but pairing the cross to the curvature of the pad can be a bit tricky so I opted for an old fashioned hand sculpt and I think it's looking good. Honda and Marshal Mattias 2 Back to top Link to comment Share on other sites More sharing options...
Bjorn Firewalker Posted February 4, 2017 Share Posted February 4, 2017 The pauldron looks great. Good luck with the installation and the painting. Link to comment Share on other sites More sharing options...
Rogue Crusader Posted February 10, 2017 Author Share Posted February 10, 2017 I picked up Celestine and her guardians on ebay as I didn't have much need of the other two models. When she was initially previewed I didn't care much for her model based on the pics but when I saw one firsthand at the store it changed my opinion as it looks so much better in person. I'm not sure if it's the studio paint job or the angles they chose for pics but it wasn't overly flattering. However viewing it in person it's really beautiful model and I knew it was something I needed to pick up. It looks like she'll be good in game as she can be a pretty effective tar pit unit. I doubt I'll be playing many games large enough to make use of the formations in fall of Cadia (although I certainly have enough models to). Building her was a bit tricky as there's some wickedly small parts, there's a lot of very fine parts compared to other 40k stuff and it took a lot of extra care to get her assembled. I dropped the shoulder pad for one of the Germinaes and literally spent 30 minutes crawling around on the floor before I found it. A lot of the recent GW kits have been very dynamic and look amazing when they are done but they have gotten quite complex in assembly and you have to do it in order or you can't get certain parts to fit later. The heads on these are in a fixed position and they have a funky way of attaching to a strand of hair that is molded as part of the front torso which isn't illustrated very well in the directions. So make sure you fit the head to the front piece before adding it to the rear body or you'll never get the head into proper place. Being mounted on the flowing ribbons looks amazing for display but it's also very springy and I'm a bit concerned about how it'll hold up to game play and transport, the iron halo is also held on by an incredibly thin piece which I have concerns about. Awesome display model, just not sure how it'll do on durability. I also picked up a 2nd Stormhawk/Stormtalon kit for some air support. I'm not certain which build I should go with. I currently have one Stormhawk built, which I built simply because I liked the look but for gameplay does either build work better or are they roughly the same? One of my friends typically uses a Helldrake and Nephilim in a 1k point list so I'll need a counter to air units. I also have a stalker available but not sure if I'd be better off with my own air units. I can always buy additional hawks/talons or more stalkers if it'll help. I'm a couple editions out of the loop and air units weren't really a factor before so I'm not sure what I should expect to deal with in an average list. 1k/1200/1500/1850 Link to comment Share on other sites More sharing options...
Acebaur Posted February 10, 2017 Share Posted February 10, 2017 I'm really digging the skull in place of the headlight, where did you get that piece from? Also are those backpack vents on the exhaust? I'm totally stealing that idea as it looks great! Link to comment Share on other sites More sharing options...
Rogue Crusader Posted February 10, 2017 Author Share Posted February 10, 2017 (edited) I'm really digging the skull in place of the headlight, where did you get that piece from? Also are those backpack vents on the exhaust? I'm totally stealing that idea as it looks great! The skull headlight is from the GW city fight terrain, the Basilica Administratum building has several flying buttress pieces which are topped with the arched skull. The exhausts are from the Ravenwing Command bikes, I made resin copies of them then removed the tips with a jewelry saw and transplanted them onto the old style bikes. They're available as bits on ebay, or you could make a greenstuff press mold of them pretty easy using Instantmold. https://www.coolminiornot.com/shop/instant-mold.html https://www.youtube.com/watch?v=u1Z1xwjTo-M Edited February 10, 2017 by Rogue Crusader Link to comment Share on other sites More sharing options...
Rogue Crusader Posted February 13, 2017 Author Share Posted February 13, 2017 (edited) The Brethren style shoulder pad that I commissioned showed up today and I did some test fitting with sticky-tac. Next step will be to mold it and make some casts in resin. Once I have it in resin I can heat them up in hot water and bend them to make a tighter fit, currently there's just enough of a gap that I could add capes underneath to match the style of the official models. Sean does great work and I'm really happy with how the sculpt came out And every good mounted knight needs a lance. Converted from the original Chaos Warriors banner pole and weapon shaft from the Deathwatch power mauls. Idea borrowed from Titan136 Edited February 13, 2017 by Rogue Crusader TheOneTrueZon and AndrewChristlieb 2 Back to top Link to comment Share on other sites More sharing options...
Rogue Crusader Posted February 13, 2017 Author Share Posted February 13, 2017 (edited) Test fit with the lance, trying out different arms. Edited February 13, 2017 by Rogue Crusader Link to comment Share on other sites More sharing options...
Rogue Crusader Posted February 14, 2017 Author Share Posted February 14, 2017 It took the better part of 3 weeks but the pair of command squads are finally ready to start getting some paint. Each model has one arm set up with a magnet so that I'll be able to swap between Grav guns and Power Weapons. It'll take me about a week before I'm done casting enough copies of those parts and the Brethren pads but in the meantime I can start painting the bikes and riders. To round out the rest of the force I have another 12 troop bikes together awaiting their rider arms and 3-4 attack bikes that are currently unbuilt. Squad 1 Squad 2 Group Marshal_Roujakis 1 Back to top Link to comment Share on other sites More sharing options...
Bjorn Firewalker Posted February 15, 2017 Share Posted February 15, 2017 The saddlebags are a good addition to the bike models- something a real-world biker may add to carry ammunition, provisions, equipment, and anything else he may need. (Failure to let in-game characters act as if the game world is real, is one major criticism I have with many franchises.) Good job. Marshal_Roujakis 1 Back to top Link to comment Share on other sites More sharing options...
Rogue Crusader Posted February 16, 2017 Author Share Posted February 16, 2017 I'd seen some of the WW2 bikes that US soldiers drove and they were loaded to the gills with bags, guns, and grenades, that was part of why I wanted to load these up with a lot of gear. I still think they may not have enough lol. Years ago I'd converted a Marshall from BT bits and the marine commander kit. It wasn't a bad model but looking over some of the new Sternguard bits I realized I could do better so I ripped him apart this evening and rebuilt him, better, faster, stronger. I'm still debating about which of the two should pad options to use. The Brethren pad would help tie it together with any other Brethren models I use in command squads or honor guard but I also like the super detailed eagle pad as it gives both shoulders the raised stud lip and if anyone is going to be blinged out and ornate it'd be the Marshall. Original Rebuilt Version Brethren Pad Eagle Pad Rear View Brother Chaplain Ryld 1 Back to top Link to comment Share on other sites More sharing options...
Rogue Crusader Posted February 18, 2017 Author Share Posted February 18, 2017 I'm toying around with some different base sizes, Since the bikes are older models they have the narrow old bike bases. (far left in the pics) I ordered a couple of resin bases from Dragonforge to see how their wider base stack against both the old and newer style. It's very close in size to GW new bike base the GW base is about 1-2 mm wider and it's slightly more tapered at the end but otherwise they are the same. Vs the old base it's considerably wider (by almost 30%) In game play that means I can fit 3 old style bases into the same space as just 2 of the newer ones which might have a slight impact on close combat as the models can't pack in together quite as tightly. But for shooting it shouldn't have any significant impact. In terms of presentation I do think the larger bases may come off as slightly more imposing. Any thoughts on which option you'd prefer? I also picked up one of the large attack bike style bases from Dragonforge. Empty it looks absolutely gigantic next to the other bases but much better once the attack bike is in place. My only thought is maybe it's just a bit too long? Would it be worth the additional time and effort to shorten it by about 10mm? Old narrow bike base Wider Dragonforge base Attack Bike on Dragonforge large bike base Link to comment Share on other sites More sharing options...
Bjorn Firewalker Posted February 18, 2017 Share Posted February 18, 2017 Years ago I'd converted a Marshall from BT bits and the marine commander kit. It wasn't a bad model but looking over some of the new Sternguard bits I realized I could do better so I ripped him apart this evening and rebuilt him, better, faster, stronger. I'm still debating about which of the two should pad options to use. The Brethren pad would help tie it together with any other Brethren models I use in command squads or honor guard but I also like the super detailed eagle pad as it gives both shoulders the raised stud lip and if anyone is going to be blinged out and ornate it'd be the Marshall. Original Rebuilt Version Brethren Pad Eagle Pad Rear View Your models look good. I wonder if the alternate pauldrons have special meanings? Is the "Eagle pad" reserved for the Chapter Master, as he's the embodiment of the Emperor's will? Is the "Brethren pad" reserved for veterans of a specific campaign or crusade, or those who fought against Chaos Space Marines or a specific type of enemy? Link to comment Share on other sites More sharing options...
TheOneTrueZon Posted February 18, 2017 Share Posted February 18, 2017 I like the big base for the attack bike. It visually balances out the model as a whole. A bit more real estate, sure - but that is merely more opportunity for setting a scene. Like having it launch off an incline, or running over someone / thing. Link to comment Share on other sites More sharing options...
Marshal Mattias Posted February 19, 2017 Share Posted February 19, 2017 I like those larger resin bases a lot - it really adds something to the model. It actually gives you some room for some tufts/debris etc, which the standard pastic bases do not. Link to comment Share on other sites More sharing options...
Rogue Crusader Posted October 9, 2017 Author Share Posted October 9, 2017 I'd posted my Primaris scale Emperor's Champion in a separate thread which showed off a couple of the 3d parts that I printed. My initial pieces were a sword and battleaxe, I also have a warhammer underway and just finished up a lance to replace the previous kitbashed ones. The hand came out a bit large which I'll fix and then reprint a corrected version. I should have the hammer test printing later tonight. Here's pics of the lance, green version is the raw 3d print, grey version is with some primer added. Once I have the scale for the hands dialed in and everything cleaned up I'll make resin casts of the parts. sockwithaticket 1 Back to top Link to comment Share on other sites More sharing options...
Firepower Posted October 9, 2017 Share Posted October 9, 2017 Super jealous of the lance. :p Link to comment Share on other sites More sharing options...
TheOneTrueZon Posted October 9, 2017 Share Posted October 9, 2017 Christmas comes early. I am enthused. Link to comment Share on other sites More sharing options...
Rogue Crusader Posted October 9, 2017 Author Share Posted October 9, 2017 Thanks :) I'll planning on making them available on my website in about a month. I need to make a few final tweaks before they are done, so if you have any thoughts about the scale or detailing please fire away with the critique, that way I can make changes based on feedback before everything is finalized. Now to go back and fix all the links to the broken pics, stupid photobucket. Link to comment Share on other sites More sharing options...
SydonianDragoon404 Posted October 10, 2017 Share Posted October 10, 2017 Amazing work. I don't have much use for the lances because I ended up pilfering/modifying some of my own, but hot damn if they're not pretty. Now others who want to do proper motorcycle lancer cavalry won't have the same problem I did! Link to comment Share on other sites More sharing options...
Rogue Crusader Posted October 12, 2017 Author Share Posted October 12, 2017 Some custom saddle bags. Marshal Mattias, Psykic_scribe and TheOneTrueZon 3 Back to top Link to comment Share on other sites More sharing options...

Recommended Posts
Create an account or sign in to comment
You need to be a member in order to leave a comment
Create an account
Sign up for a new account in our community. It's easy!
Register a new accountSign in
Already have an account? Sign in here.
Sign In Now