Tichinde Posted July 4, 2017 Share Posted July 4, 2017 Part 1 - Intro and adventures in Basecoating well, now that i've painted a few of these guys I figured I should do a tutorial on how I have been doing them. I saw the nice shiny metallic red that Forge World did for theirs and loved it (in another life I'd painted a lot of Blood Angels and really didn't want another red chapter or have access to an airbrush) anyway, I will be providing a step by step guide on how to pain one of my Thousand Sons Khenetai Blade Occult the model is the forgeworld torso and arms with 40k Rubric legs, tabard and "thigh plates" with the Rubric shoulder pads and an Achean pattern helmet (the fluff says these guys were "Guardians of the 5 cults", and wore armour "forged and shaped by the Legion's blind artificers" so the Rubric parts really help them stand out from my normal troops (who also use a fair amount of Rubric bits.) moving on....: First up here he is (this guy will be the squad leader so I gave him an Achean Helmet and will reverse the colouring on his shoulder pads, more on that later): the base coat will be a 3 stage process (try not to put them on too thickly and this is just the stuff I used, I'm sure it would work with others :-) ): starting with the Black: then the gold (at this point you don't have to cover it all in gold, you can leave some lightly dusted for shading but most of it should have a little gold on it): and finally the metallic red: for some reason known only to the gods of painting and hobbying the metallic red occasionally comes out flat (see Marine on the right in the pic below) but this is not an issue as when we add the clear red later the results are the same presumably due to the layered basecoat: next up we need to paint all the bits we want red at the end with this: its a bit like painting with syrup but the results are worth it as it brings out a perfect candy red (you can always thin it down and apply it in "two thin coatstm " but I don't bother): here It is applied to the shoulder of our subject (after I did this I remembered I'm supposed to be painting the pads white but hey, you get the idea): and just to highlight what I was talking about here is the "flat" red getting the same treatment: and here he is ready for part 2 (if you want, you can shade the recesses with Agrax Earthshade or Nuln Oil but its up to you): Link to comment Share on other sites More sharing options...
Tichinde Posted July 4, 2017 Author Share Posted July 4, 2017 Part 2 - Stripes! So to give a little hint at their future I always try to add in a little "blue and yellow" somewhere on the miniature, this usually means the banding or "stripey bits" and our tutorial guy has plenty! so this is what I will be using for this bit: first off, paint all the bits that will be blue and yellow with Thousand Sons Blue (obvious choice): Don't worry too much about going onto the red bits, we'll deal with that later. Next up, paint alternate stripes with Ahriman Blue: then the ones that you didn't paint with Ahriman Blue paint them Averland Sunset: and then a layer of Yriel Yellow (try and be neat but you can tidy up with the blue any big mistakes and the upcoming wash is very forgiving): Next, use a fairly heavy wash of Agrax Earthshade: once dry, highlight the edges (or spot highlight) with Pallid Wych Flesh for the Yellow and Baharroth Blue for the blue (I wasn't the neatest on this one but I got away with most of it): Next up, White bits! Link to comment Share on other sites More sharing options...
Tichinde Posted July 4, 2017 Author Share Posted July 4, 2017 Part 3: Mighty Whites! While waiting for the various blues and yellows to dry I was using these paints (my white has seen better days and may well get replaced soon) to get the tabard and shoulders done (and to set them apart from my other Achean clad guys, I decided to paint the "face" the same way as I tested on my recent Primaris): first up, Celestra grey all round (again, don't worry too much about getting it on bits that will be gold later): for the next step you could probably get away with just the recess shading but I just do the lot with Drakenhof Nightdshade (this is basically Duncans recipe for the tabards on the Rubrics If I recall): Next up is the Uthuan Grey. I'd recommend doing this in two thin coats (or as many as you like and don't take it to the very edge): Then do the exact same with the white (i'm fairly sure I have these the right way round but it's easier to tell in real life!): Next up, Part 4: I love Gold! Link to comment Share on other sites More sharing options...
Tichinde Posted July 4, 2017 Author Share Posted July 4, 2017 Part 4: Goldfingers so, the downside of using the Rubric parts is that they have a lot of bits that I paint gold (when I come across one of guys with the standard Mk IV legs or torsos I breathe a sigh of relief) anyway, now that the easy part is done this bit you do need to take a bit of time with. I didn't take a photo of the paints but its: Retributor Armour, Riekland Fleshshade, Liberator Gold and Stormhost silver. the bits you need to watch are the edges near the white and stripes, don't worry about the red bits as you can deal with that later (I always enjoy this bit as the miniature starts to come together): next, carefully wash the gold with the Riekland Fleshshade (you could use Agrax or Nuln oil if you wanted a different shade): then I sort of half edge highlight/half drybrush the Liberator gold: Then the same sort of thing with the Silver: Also doing the eyes and anything that may be a jewel or get a wash later (in this case part of the left shoulder and knee): I also use the silver to do a fine edge highlight on the helmet and red armour edges (works well for chips/scuffs too if you get over enthusiastic) and that's basically it. next up, Part 5: finishing touches Link to comment Share on other sites More sharing options...
Tichinde Posted July 4, 2017 Author Share Posted July 4, 2017 Part 5: 1 down, 999 to go. all thats left is some detailing (and the swords, more on that later): you can also use the clear red to tidy up any bits the gold or silver has gotten to it shouldn't have. first up, I used a blue wash or glaze on the shoulder and knee and a green wash (I think it was Orc Flesh wash) for the eyes (the modern day equivalents should work fine): Then I use Nuln oil to paint the armour joints (might need a few coats) and highlight with Silver or boltgun: the Scarab was Metallic green, washed with Orc flesh and highlighted with sliver: and Finally liberal application of transfers (courtesy of FW): For some reason I always leave the "foot trim" til last, but its the same as the rest of the gold. the swords I think I will do a green force sword effect but I hadn't decided last night when I did this. once he's all done I'll post here. happy Painting! Tich. Link to comment Share on other sites More sharing options...
BadgersinHills Posted July 5, 2017 Share Posted July 5, 2017 Great tutorial, thanks for posting it. Link to comment Share on other sites More sharing options...
Tichinde Posted July 6, 2017 Author Share Posted July 6, 2017 Went with a green, and found a spare Ahriman backpack for him (painted using the same techniques as mentioned previously): Link to comment Share on other sites More sharing options...
Tichinde Posted July 19, 2017 Author Share Posted July 19, 2017 Cloak attached: (I really need to replace that white....) Link to comment Share on other sites More sharing options...
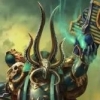
Tichinde Posted July 30, 2017 Author Share Posted July 30, 2017 Part 6 - All Your Base Are Belong To Us So when I began this project I knew I'd need to find a suitable base (and because I'm lazy and not too skilled at making bases other than simple additions and sand) I chose to find some resin bases for the miniatures. currently I have used the following which I thought represent the various landscapes of Tizca quite well: started off with Micro-art studio Arcane Ruins: http://shop.microartstudio.com/arcane-bases-round-40mm-2-p-891.html (these will be seen on the terminators when I get round to them and you can see one on the Space Wolf Contemptor with a few additions) then for most of the Tactical marines I am using these: https://tabletop-art.de/Ancestral-Ruins then I discovered Dragonforge (best ones so far and I would have probably used for all if i'd known about them!) using the original Ancient Ruins set (Osiron base and some tactical marines): http://www.dragonforge.com/Painting%20service/for%20sale/base_sets/sci-fi/ancient%20ruins.htm and the Occult-7 set (used for Breachers and upcoming robot): http://www.dragonforge.com/Painting%20service/for%20sale/base_sets/sci-fi/occult-7.htm they also do a nice Egypt set :-) then I add some quartz bits and the odd helmet/weapon/book/candle and paint them using the same colour palette just to bring them all together I have some Scibor ones to try out too. anyway, the colour I chose to paint was based loosely on artwork like this: lots of polished white marble/stone, gold accents/statues and some greenery (but not too much) so here is what I did: the tall pot is basically a light grey that ulthuan grey would work just as well, same with the bone undercoat, anything similar would do. start off with the white basecoat: then, once dry hit it with the bone: once dry, a generous wash of agarax earthshade: the rubble/sand/bits in between the rubble get a darker brown wash: Dry brush the lot with the light grey: then the same with the white (I tend to use a bit more to emphasise the edges): then, to break up the white, some rubble can be painted dark grey or gold (same recipe as previous) and the base rim any colour you like (I opted for dark bronze, Tin Bitz iirc): and that's it. some of the bases have lettering or patterns either raised (gold) or etched (blue glaze) and using the process outlined above (I'm using a similar one for the larger terrain pieces so it all ties together) here are some more examples (mostly WIP): and finally to bring it all together here is the completed Khenetai Blade occult Blade Master: you can follow the rest of my progress in my WIP thread in the Forge. Thanks, Tich. Link to comment Share on other sites More sharing options...
Wassa Posted January 24, 2019 Share Posted January 24, 2019 So if I just wanted metallic red all over for say Blood Angels: Spray it black (is this needed if we're spraying it gold?) Spray it gold (is this needed if it's all going to red or is it to give it more of a shine?) Spray it with Tamiya TS-18 Metallic Red Cover it with Tamiya X-27 Clear Red Link to comment Share on other sites More sharing options...
Tichinde Posted January 24, 2019 Author Share Posted January 24, 2019 I haven't tried the metallic spray on its own, its possible you can get away without using the gold, I used it just as a backup (if I made a mistake I can paint it back to gold then clear red over the top) and I wasn't sure how retributor armour spray worked as a basecoat on its own so used black first. blood angels could work quite well with black - metallic red spray - clear red. just don't make any mistakes :-) Link to comment Share on other sites More sharing options...
Soulhunter1995 Posted January 24, 2019 Share Posted January 24, 2019 I`ve been using this recipe for my blood angels and I love it :D it's very pretty, although my skills leave alot to be desired :P Link to comment Share on other sites More sharing options...
Tichinde Posted January 24, 2019 Author Share Posted January 24, 2019 If I ever get round to doing a "smash captain" in honour of my original 2nd Edition Blood Angels I'll give it a go :-) Link to comment Share on other sites More sharing options...
Soulhunter1995 Posted January 24, 2019 Share Posted January 24, 2019 Please do :D I should probably paint my Captain McStabby Face soon :P Link to comment Share on other sites More sharing options...

Recommended Posts
Archived
This topic is now archived and is closed to further replies.