TiguriusX Posted November 2, 2017 Share Posted November 2, 2017 With the End Times upon us I have finally made the leap from the digital world (*cough vassal *cough and PC games) and decided to try the hobby side of WH40K! My kids will be joining me and learning to model as well. I plan to let them pick the pieces and I will do the gluing for them at first (they are 7 and 5 right now). Painting is on my radar after an army is assembled. . Tried to read all the articles and watch all the youtube tutorials for beginners but dang...it still feels overwhelming Put my first ever model together (I'm calling him Tron in my head for now). Mold lines were probably the hardest thing to deal with as a beginner. I didn't make headway with a scraping tool and am using the hobby knife to scrape/slice. Learning curve is steep and I took some gouges out along with the mold lines. I was nervous cleaning the mold lines off this model's head I also think I removed the top tooth off all my chain swords when removing from the sprue (oops). I find myself confused regarding Grey Hunter assembly due to WYSIWYG and the current Space Wolves Index. Chainswords are no longer basic equipment for a GH but a free "may take" option. I was going to model a bunch of CS/BP guys to serve as either GH/BC anyways so I can make a handful of them safely. However, I do like the models with 2 hands on a bollter. Do we need to show CS on every one of our GH (eventually I would like to do leagues/tournaments) I was even considering 1 hand bolter and 1 hand CS (true grit old school rules!) Any feedback is appreciated. Silwerulv 1 Back to top Link to comment Share on other sites More sharing options...
Gemini Posted November 2, 2017 Share Posted November 2, 2017 It's been my LIMITED tournament experience that if EVERY model in the unit in the list has them, and you point it out to your opponent then 'some with some without' will fly. IF you have only paid points for X number then ONLY X number need to be on the table top. I've also done lots of BP/CS guys and then attached the bolters behind and below the back pack 'maglocked' into place. They're not noticeable if I want to call them Blood Claws but they're also WYSIWYG for full loaded out Grey Hunters. Right here where 'Cypher' has his sword tucked. TiguriusX 1 Back to top Link to comment Share on other sites More sharing options...
Wraithwing Posted November 5, 2017 Share Posted November 5, 2017 There’s lots of sheathed knives and combat blades on the Space Wolves spruces. Where a mini has a one handed Bolter, I give him a chainsword. Where he has a two handed Bolter, I give him a combat knife. As the rules are the same for both melee weapons, I figured my opponent won’t mind. TiguriusX 1 Back to top Link to comment Share on other sites More sharing options...
TiguriusX Posted November 6, 2017 Author Share Posted November 6, 2017 (edited) Thanks for the feedback guys. I've decided I'll turn this thread into my journal on this hobby path as well as comments/interaction along the way. I spent the weekend learning foundation skills First on my list was the pin vise and magnetizing. I actually started using my power drill before forcing myself to use the pin vise more. I actually prefer the pin vise now that I understand it better. The power drill left fine powder everywhere. The pin vise chunks are easier to clean up. I had no idea hobby magnets were their own separate industry and had to learn the basic sizes and the consensus was as follows: 1/16" x 1/32" and 1/8" x 1/16" are the main items I need for power armor, dreadnought and terminator projects. I got an entry level kit of 1/16 1/32 strength 40 magnets and drill bits and just practiced. Had to figure out the best way to get a single magnet off the stack into the hole. Figure out how to get the glue. I messed up so many times before I got the routine down it isn't even funny. I even messed up the polarities multiple times and had to dig out my glue magnets. But in the end I finally developed the skill and started enjoying it. I went on a magnetizing spree and did every item within reach this morning. I did wolf claws, storm shield, thunder hammer, power ax (both arm parts) I even did a combi weapon so I could flip between CP and CM if needed (that was a tight fit but it made it) The only magnet job I was unhappy with was the storm bolter arm. The weight of the stormbolter makes it the only arm I can't position as desired. It drops like a rock. The skill I started working on is preparing bases. My 7 year old daughter is very interested in this step so we each did 1 base for a test run. I used Citadel Textured paint (Stirland Mud) and want to see how it turns out. I might put grass/snow flocking I have from the hobby store as well but I think I need to experiment a bit first. I also need to figure out if I should put models on before basing or just magnetize every single model to a base via their feet. I just ordered 200 more magnets of both sizes (N52 strength this time) so I have plenty of options I might be going a bit overboard with magnets but it is a fun skill. If anyone has experience and has advice on things to avoid please feel free to share. I feel I'm spending more time watching youtube videos right now than actually doing the hobby. I have completed 1 entire pack of GH so far (including mistakes like putting mismatched shoulder pad markings on the left arm...doh) I still need to assemble 3 more boxes of terminators and 3 more grey hunter boxes. I am going to use the GHs as long fangs and hero characters. I think I will magnetize the torsos and legs so I can put them on a bike or thunderwolf or even slap a jump pack as needed. Edited November 6, 2017 by TiguriusX Link to comment Share on other sites More sharing options...
Gemini Posted November 6, 2017 Share Posted November 6, 2017 (edited) SOMETIMES I can get a slippery magnet (like your storm bolter arm) to stiffen up by putting a TEENY amount of super glue on the surface and touching it with my finger. ALMOST NONE! That will add a bit of texture to the magnet and that friction can help stop the sliding. I also keep one of those telescoping magnets on a stick by my desk when I'm working on things. I'll stick the small magnet to the stick magnet and mark the exposed face of the small magnet with a sharpie. This guarantees that I am watching my polarities as 'marks always goes to the center of the body' or another way to look at is 'marks never go to marks'. Using the same magnet makes sure ALL of my polarities always line up. It's fun when my six year old sticks space marine arms to a dreadnought body Edited November 8, 2017 by Gemini TiguriusX 1 Back to top Link to comment Share on other sites More sharing options...
TiguriusX Posted November 10, 2017 Author Share Posted November 10, 2017 I'm slowly progressing through the stages of the hobby and learning not much gets done during the week (work....kids...etc) I did however find time to prime my first models ever. I over analyze things and you won't imagine how much stress and thinking I had about which primer to use. The FLGS guy recommended army painter as a tradeoff between cost and quality. I've read online some people even use basic krylon cans. I finally jumped in and said here we go! Got an old blanket, opened the garage and primed my first "volunteers" Immediately after spraying good old Tron I thought I failed. His face was runny and there was no detail. However, after I sprayed the others and came back to look at him I saw the primer was drying and he looked just fine This weekend is time for the actual paints. I've gone with the Citadel line of paints and am hoping to make a dark grey color scheme (not a fan of the light blue) -Administratum Grey -Eshin Grey -Dawnstone -Nuln oil -Agrax earthshade Will see which combo among those I like Link to comment Share on other sites More sharing options...
Brother Hellion Posted November 10, 2017 Share Posted November 10, 2017 SOMETIMES I can get a slippery magnet (like your storm bolter arm) to stiffen up by putting a TEENY amount of super glue on the surface and touching it with my finger. ALMOST NONE! That will add a bit of texture to the magnet and that friction can help stop the sliding. I also keep one of those telescoping magnets on a stick by my desk when I'm working on things. I'll stick the small magnet to the stick magnet and mark the exposed face of the small magnet with a sharpie. This guarantees that I am watching my polarities as 'marks always goes to the center of the body' or another way to look at is 'marks never go to marks'. Using the same magnet makes sure ALL of my polarities always line up. It's fun when my six year old sticks space marine arms to a dreadnought body I've had some experience magnetizing models and frankly I find using super glue to be ineffective. Often the magnets fall out due to not enough glue or taking too long to harden. If you can get some, try a two part Epoxy. These harden way quicker then superglue and will hold the magnets in with just a thin film over the magnets surface to keep in place. Start by drilling a hole to match the size of your magnets. Then squeeze a drop of each part of the epoxy on a paper plate. Mix very quickly till they turn milky white. Apply mix into the hole and drop appropriate magnet side in. If you want to be sure it stays put, smear a small dalop of the mix over the magnet to create a very thin film. Allow to dry from five to fifteen minutes depending on the weight of the magnets and the amount of epoxy used. I can't stress the importance of reading the directions on the tubes for first time users cause this stuff hardens Very quickly and its not something you want on your skin. Period. I've been using epoxy for years on most of my magnetizing needs due to its effectiveness and durability. Link to comment Share on other sites More sharing options...
TiguriusX Posted November 11, 2017 Author Share Posted November 11, 2017 I only magnetized about a week ago so I can't tell if it will hold up long term but I like the fit I have now. I drilled a tight fitting hole for the magnet and inserted it without glue to make sure it was deep enough to be flush. I then put a tiny drop of crazy glue on the magnet itself and carefully placed it only partially into the hole without trying to push it in. I gently slide my magnet stick off leaving my target magnet partially in the hole I then use the flat side of my plastic scraping tool to firmly press the magnet into the hole. A tiny amount of glue may come out during this process but I remove my plastic tool and wipe it off quickly. So far that technique is giving me a nice snug fit that I "think" will hold up long term Stoic Raptor 1 Back to top Link to comment Share on other sites More sharing options...
TheLastHuzzah Posted November 11, 2017 Share Posted November 11, 2017 You should be fine with what you are doing. I've had a bit of an issue with big magnets (3/8"or so) used on stormraven wings,but it was old glue and there is not quite enough surface area. Link to comment Share on other sites More sharing options...
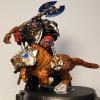
TiguriusX Posted November 17, 2017 Author Share Posted November 17, 2017 (edited) Semi productive week. I put painting on hold and focused on assembling and priming my next batch of models. I also did a ton of magnet work I am almost done with 1 box of GHs and 2 boxes of terminators Tron is an Eshin Grey test model. I like how dark it is. The models behind him are for my kids to paint testing Administratum Grey. You may also notice GH Tron has his arms at a different angle now...there was an accident. My kids were playing with him and knocked him off the table. His arms snapped nicely where they were glued. Not a problem. Inspired me to magnetize him instead. I have a ton of magnetized models now. They are like mini action figures. My son LOVES them. He likes to put different weapons on them and play. Speaking of my son...if you remember me from years ago or read my profile that is my little miracle dude. This was his favorite guy he assembled from the parts I had ready I enjoy magnet work. Now that I have some basic techniques down I just set up an assembly line and do a bunch at once I magnetized all the arms for the terminators and am doing the same for the heads (I like the ability to turn the heads slightly for different poses). The hardest part in this process was magnetizing all the arm options and priming them. I actually didn't put enough tack under them and had my first primer accident with a cyclone missile launcher. The primer pooled and made a gunky mess where it was flat against the surface I used. I scraped it off as best I could but it left quite a mess behind. Lesson learned! I have started assembling my heavy weapons and will be putting long fangs together next Edited November 17, 2017 by TiguriusX Link to comment Share on other sites More sharing options...
Dantay VI Posted November 18, 2017 Share Posted November 18, 2017 Wow, you are off to an impressive start. Glad you are picking up tips as you go too. For mould lines, I have often found the back of the blade is suitable for taking these off and is goo for not causing the gouges. Also flat cutters are awesome to avoid that annoying "dimple" from standard cutters. Magnets are awesome. The only thing I do really is tack a magnet down and put a small drop of thin paint on top. then let the magnet I want to use drop on it. Carefully prise apart and you should be left with a small amount of paint on the 2 magnets so you know which way to stick them I also drill double the width of the magnet and stuff the cone section with putty to ensure the magnet sits flat. On larger models I will paint the jointing area, as I am useless at getting bits lined up. A bit like this 20170113_155022 by Danny Taylor, on Flickr 20170113_155151 by Danny Taylor, on Flickr If you magnetise the space marines at the shoulder, it might be worth remembering to fill the bodies with putty so there is something for the magnets to hold against. As for paints, which Army painter did you pick up? Eshin is super dark, a wash of that will then look black. For my dark grey, I personally like going for Sandard Mech grey over a black primer. I also use Vallejos panzer dark grey which his lightly darker too. Lastly, it is awesome that your kids are getting in to 40K too, my friends kids were the same and he has never regretted it (except when they beat him) Nice start!! TiguriusX 1 Back to top Link to comment Share on other sites More sharing options...
TiguriusX Posted November 19, 2017 Author Share Posted November 19, 2017 (edited) Painting day has me reconsidering the darker grey scheme. I did my first washes and it REALLY made the lighter armor stand out. Here is how my test models look from primer to current stages. Eshin Grey on the left. Black primer on the right. Model with just primer (someone asked what paint I am using earlier. I have ARMY PAINTER matte black as primer. The rest is Citadel paint. The FLGS said since I am new to the hobby the army painter can is about the same and saves me $8). Base coat of Eshin Grey. My 7 year old daughter actually painted this guy (she is getting better than me). This is my son using dawnstone. At this stage with just a base coat I prefer the darker Eshin Grey...however I was about to learn something. Wash of Agrax Earthshade and I said meh...not much different. Wash of Agrax Earthshade on the Dawnstone and I said HOLY CRAP that looks nice. I am strongly considering this as my color scheme now (still need to do highlighting on the test models but damn that looks good). Good enough to slightly change the angle and add another photo heh Edited November 19, 2017 by TiguriusX Link to comment Share on other sites More sharing options...
Dantay VI Posted November 19, 2017 Share Posted November 19, 2017 This how it can look using dawnstone Hidden Content dun2 by Danny Taylor, on Flickr dun3 by Danny Taylor, on Flickr dun4 by Danny Taylor, on Flickr dun5 by Danny Taylor, on Flickr but I go darker with Standard mech grey Hidden Content 20170722_215631 by Danny Taylor, on Flickr 20170722_215853 by Danny Taylor, on Flickr 20170610_213852 by Danny Taylor, on Flickr 20170305_204404 by Danny Taylor, on Flickr Mech grey comes in a rattle can which is useful TiguriusX 1 Back to top Link to comment Share on other sites More sharing options...
TiguriusX Posted November 20, 2017 Author Share Posted November 20, 2017 I find myself doing the assembly part of the hobby most nights before bed when everyone else is asleep. Making much more progress assembling than I am painting. Tonight I finished up a set of Long fangs Couple of notes on these guys. My magnetization skills failed me with the backpacks and weapon combos. I attempted to make them modular but there are too many hard to align targets. Every single head and leg is magnetized. I can swap out specific torsos and weapon combinations as needed. The plasma cannons (6 more to assemble) and lascannon (4 more to assemble) are permanently attached to the torsos. The ONLY guy who has removable arms is the missile launcher (6 more to assemble). I am going to buy torso bits ($9-11 is what I am finding on ebay right now) and just swap out the heavy weapons as needed in my lists and future codexes as point changes change (I remember a time missile launchers were 10 points and super cheap instead of costing the same as a lascannon) Link to comment Share on other sites More sharing options...
TiguriusX Posted November 20, 2017 Author Share Posted November 20, 2017 I tried my first attempt at "highlighting" and it was a train wreck. I don't have fine control and the brushes I have may be too big (do I need to buy a special one?). It basically ruined the test model and I painted him all in the attempted highlight color (it was Tron in the dark eshin grey and I was attempting to highlight in dawnstone). The failure simply resulted in painting him all over such that he is consistent with the light grey armor scheme I am favoring... so not a total loss. Which leads me to a logistics question so I can plan ahead Anyone know the details on painting requirements to participate in tournaments? I know ITC is a major circuit and has "all models in their army must be painted to a 3 color minimum and based. Primer counts as a color" in their rules. I currently have black primer -> dawnstone -> agrax earthshade and I'm comfortable with that process Does a wash count as a color? Eventually I will attempt shoulder pad colors...decals...and maybe even heads. But for now I "think" I have minimum 3 technique and can start mass painting so I can actually play a game. I just don't know if the wash counts towards the 3 color rule. Eventually I will attempt shoulder pad colors...decals...and maybe even heads. But for now I "think" I have minimum 3 technique and can start mass painting. I just don't know if the wash counts towards the 3 color rule. Link to comment Share on other sites More sharing options...
Dantay VI Posted November 20, 2017 Share Posted November 20, 2017 (edited) I do not think wash will count as a colour because it is a tint. Problem with primer is that you will be covering it up, so who is to say you didn't prime in dawnstone and the reason primer is allowed is because you can get the primers in you army's colour. Your 3 colours would be dawnstone, red and yellow, gold, or black. Dawnstone for armour, red red yellow and black for the shoulder pad markings (red/yellow for the claws, black/ red for the hunters & yellow/black for the Wolf Guard). You also have your colour for the great company shoulderpad (white for the redmaws, yellow for Ragnar, red for Harald etc) Also can we see the train wreck? It can often help us see where advice may be needed, rather than just guess at "thin your paints". Also a detail or a fine detail brush can be handy depending what you are doing. Are you edge highlighting, blending for highlights, are you drybrushing for effect? I apologise if I am coming off as harsh.... For speed, drybrushing might be the way to go for you. Although this video, he is using dark angels as an example, it should be easy to do, with greys instead. Edited November 20, 2017 by Wolf_Priest _Dantay. Link to comment Share on other sites More sharing options...
TiguriusX Posted November 20, 2017 Author Share Posted November 20, 2017 I do not think wash will count as a colour because it is a tint. Problem with primer is that you will be covering it up, so who is to say you didn't prime in dawnstone and the reason primer is allowed is because you can get the primers in you army's colour. Your 3 colours would be dawnstone, red and yellow, gold, or black. Dawnstone for armour, red red yellow and black for the shoulder pad markings (red/yellow for the claws, black/ red for the hunters & yellow/black for the Wolf Guard). You also have your colour for the great company shoulderpad (white for the redmaws, yellow for Ragnar, red for Harald etc) Also can we see the train wreck? It can often help us see where advice may be needed, rather than just guess at "thin your paints". Also a detail or a fine detail brush can be handy depending what you are doing. Are you edge highlighting, blending for highlights? The highlight train wreck was already corrected. I painted the entire model dawnstone. I can show you the backpack which I left in the original darker color. This is the Tron model. He is shown above in the Eshin Grey. I attempted to do do dawnstone highlighting of knee pads and armor panels and the paint just went EVERYWHERE haha. Instead of hightlighting it just looked like a mess. So I said what the hell and just kept painting him so he matches the other models with dawnstone. I was attempting to follow this tutorial (3:55 mark when he begins highlighting) I know I failed with the brush b/c I couldn't get them to stay a nice fine point. The best highlighting was on the backpack so I actually left that for now And here are the brushes I tried using. Link to comment Share on other sites More sharing options...
Dantay VI Posted November 20, 2017 Share Posted November 20, 2017 It looks like you put all the bristles into the pint. That can cause the bristles to splay out as the paint hardens up in there. My wife also got me a cheap set of brushes and I found that they over diluted my paints, seemed to magically turn my paint to water, sometimes slightly more expensive brushes can be better. I am not saying your brushes are cheap... I would get them cleaned up as best as possible. I would also not paint direct from the pot as it is too thick. I reckon brybrush is definitely the way to go here, because you have so many sharp edges and details for it to pick up. I know folks say it works wellwith fur, but its also great for the armour, I have done this loads of times for mine, can use any kind of brush for it. I use my wifes little flat make up brushes. I would give the model a base coat of eshin and then drybrush with mixes of eshin and dawnstone and do a final drybrush of dawnstone, you can always use agrax to go over it again to tie the greys together and then just catch the very edges with dawnstone to make them pop. Link to comment Share on other sites More sharing options...
TiguriusX Posted November 20, 2017 Author Share Posted November 20, 2017 My brushes are definitely cheap haha. I have no idea what painting tools i need or differences between brushes. The FLGS said get natural bristles. I bought an assorted pack at the local craft store for $5 Ironically i prefer using my kids ild water color brushes when painting If there is a specific type of brush for highlighting let me know. Link to comment Share on other sites More sharing options...
Dantay VI Posted November 20, 2017 Share Posted November 20, 2017 Natural bristles can be better A short video on what brushes do. Althoug they recommend a brand of make up brush, really most will work the same :) https://www.youtube.com/watch?v=x0uK54iGxuk Link to comment Share on other sites More sharing options...
Deadnaughty Posted November 20, 2017 Share Posted November 20, 2017 Looking at the backpack I think it might be a 2 fold problem. The lines are to wide and paint seems to have gotten into recesses which shouldn't be happening Could be your brush is to big and your applying to much pressure. If your brushes are having trouble keeping a sharp point you probably want to invest in some new brushes, others have offered help with that. I'll just add that the people at a local crafts-store can help. Since you mentioned Army Painter spray, I use the Army Painter brushes. Doing almost everything with the Regiment size, tho smaller might be better if your learning to highlight. Make sure your paint is not so thin that it runs when you apply it to the model (obv can't do a tight line then) and to apply the bare minimum of pressure. Its better to pass over it and be going so soft you didn't leave any paint and having to go again then apply to much and get big wide lines like you got on the backpack. I think the pressure is where you went wrong because the line goes through into the holes on the back of the backpack. If you barely touch the top that shouldn't happen. TiguriusX 1 Back to top Link to comment Share on other sites More sharing options...
TiguriusX Posted November 20, 2017 Author Share Posted November 20, 2017 Think I need to invest in a good detail brush as well as a dry brush to work on highlight techniques Next on my list are the weapons (bolters...plasma cannons...power weapons etc) and faces Link to comment Share on other sites More sharing options...
Rune Priest Jbickb Posted November 21, 2017 Share Posted November 21, 2017 On your tournament paint requirements, it varies TO to TO, but most require a 3 color minimum. Ask your local community to clarify. Link to comment Share on other sites More sharing options...
TiguriusX Posted November 25, 2017 Author Share Posted November 25, 2017 Not much done due to holidays I did finish brainstorming my list http://www.bolterandchainsword.com/topic/341711-2k-point-foot-slogging-army/ I need 2 more boxes of ven dreads and something to represent Njal (are you allowed to make your own?) I'm using goblin wolfrider wolves with armor plated heads to represent my cyber wolves I also got a new detail brush set (omg these brushes are so tiny) and am picking up a bunch of colored paints today. Seriously I have like 25 on my shopping list right now. Reds and yellows for shoulder pads. Blues and whites for plasma. Gold and black for bolters. Sooooo many ugggh. Hoping to make some painting progress in the coming weeks. My kids are excited to paint faces as well. Link to comment Share on other sites More sharing options...
TiguriusX Posted November 26, 2017 Author Share Posted November 26, 2017 I almost lost myself to the rage of the wulfen during my shopping spree. I eventually came home with 25 more pots of paint. No excuses now...time to slather on additional colors and do detail work and faces I still need to decide on my shoulder pad scheme. Haven't decided if I follow the yellow/red or not....but I have the paints! Averland sunset and mephiston red were part of my purchases. Speaking of mephiston red....I hate that name and really didn't want to buy it That is a common SW player hang up right? Link to comment Share on other sites More sharing options...

Recommended Posts
Create an account or sign in to comment
You need to be a member in order to leave a comment
Create an account
Sign up for a new account in our community. It's easy!
Register a new accountSign in
Already have an account? Sign in here.
Sign In Now