Joukernaut Posted June 14, 2018 Share Posted June 14, 2018 Udate!! All the power armour is base coated leadbelcher, washed with null oil, dry brushed iron breaker, dry brushed rune fang steel, dry brushed necron compound, then glazed with a very thin Guilliman glaze. So far I'm not too unhappy with the results. I'm debating wether I should go back and do another layer of the glaze to intensify the blue. Unfortunately my phone camera is clogged with dust. Next time I'll try to use my regular camera. Here's all the squads: On to the details!!! Link to comment Share on other sites More sharing options...
Danarc Posted June 14, 2018 Share Posted June 14, 2018 Maybe the light is a little strange and it doesn’t help, but I like the way you made the silver. It seems like old middle age armour. Very nice. Link to comment Share on other sites More sharing options...
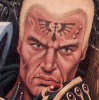
Kriegsmacht Posted June 14, 2018 Share Posted June 14, 2018 Your Knights looks great. Not to be an ass since you did a great job painting them but in the last pic is that a mold line on the front knights helmet or is that suppose to be there? Link to comment Share on other sites More sharing options...
Joukernaut Posted June 16, 2018 Share Posted June 16, 2018 Nope, that is a mould line unfortunately, I noticed it myself as well . It looks like I was lazy scraping them and unfortunately dry brushing is not very forgiving for mould lines. This is the first time I've dry brushed marines. I layer my ultramarines, but it takes forever so I figured I'd try something different for the grey knights. Link to comment Share on other sites More sharing options...
Captain Semper Posted June 16, 2018 Author Share Posted June 16, 2018 This is so impressive man - all those GKs together! Keep walking! :) UPDATED TO THIS POINT! Link to comment Share on other sites More sharing options...
Kriegsmacht Posted June 16, 2018 Share Posted June 16, 2018 @Joukernaut They still look great. I know what you mean though about not noticing things. After putting basecoats down on metal miniatures I realize i forgot to scrap off on piece of those stringy metal things. Can be annoying. lol Link to comment Share on other sites More sharing options...
skinomyteeth Posted June 17, 2018 Share Posted June 17, 2018 Go Joukernaut! That dry-brushing is really great - but I guess it would after doing it on so many models It's made me think about doing a final dry-brush highlight - which I wasn't going to do initially. I have started a soft dark wash of the knights which has gone ok after an initial few where I was a bit heavy handed - i am now carefully shading select recesses with the smallest detail brush possible. My blue shading of the swords didn't go well. It made the crisp grey/white look become a bit comic-book, so I'm going to repaint the 4 test swords. No biggy but for some reason it feels like a set-back as my 'vision' didn't work and I was really keen. I guess the airbrush layering went better than I could have hoped and all additions are starting to 'ruin' the subtle smooth matt look. Great work Joukernaut. Keep it going! Link to comment Share on other sites More sharing options...
Captain Semper Posted June 19, 2018 Author Share Posted June 19, 2018 THIS IS THE CUT-OFF FOR THE WEEKLY UPDATE - EVERY VOW OR COMPLETION REPORTED BEYOND THIS POINT WILL COUNT FOR NEXT WEEK'S UPDATE! UPDATED TO THIS POINT! Link to comment Share on other sites More sharing options...
Captain Semper Posted June 21, 2018 Author Share Posted June 21, 2018 http://fortressofunforgiven.homestead.com/ETL_VI_Top_Banner_.jpg ETL VI - WEEK 7 UPDATE Link to comment Share on other sites More sharing options...
skinomyteeth Posted June 21, 2018 Share Posted June 21, 2018 Shading, the balls-up blue sword hilts and test basing. Link to comment Share on other sites More sharing options...
Icosiel Posted June 22, 2018 Share Posted June 22, 2018 Damn! I've just learned of this! As a new player, I wish I'd paid attention to this earlier! I have so many Grey Knights that I am painting.Oh well. Next year! Link to comment Share on other sites More sharing options...
Captain Semper Posted June 26, 2018 Author Share Posted June 26, 2018 Well done skin! :tu: This is a tremendous task you have undertaken! THIS IS THE CUT-OFF FOR THE WEEKLY UPDATE - EVERY VOW OR COMPLETION REPORTED BEYOND THIS POINT WILL COUNT FOR NEXT WEEK'S UPDATE! UPDATED TO THIS POINT! Link to comment Share on other sites More sharing options...
Captain Semper Posted June 27, 2018 Author Share Posted June 27, 2018 http://fortressofunforgiven.homestead.com/ETL_VI_Top_Banner_.jpg ETL VI - WEEK 8 UPDATE Link to comment Share on other sites More sharing options...
Captain Semper Posted July 3, 2018 Author Share Posted July 3, 2018 C'mon guys - lets see some progress! THIS IS THE CUT-OFF FOR THE WEEKLY UPDATE - EVERY VOW OR COMPLETION REPORTED BEYOND THIS POINT WILL COUNT FOR NEXT WEEK'S UPDATE! UPDATED TO THIS POINT! Link to comment Share on other sites More sharing options...
skinomyteeth Posted July 4, 2018 Share Posted July 4, 2018 Ok, here goes - these 12 are shaded --- 8 left to shade Then all 20 need to be dry brushed (head and chest only) then based in martian ironcrust. This shading took ages as I had to cleanly hit the recesses with a super small brush --- shading the entire mini ruins the airbrush layers and the soft grey colour. Going forwards I think that I might try and shade before the final 2 coats of airbrush - but it may not work: gotta test it. Link to comment Share on other sites More sharing options...
skinomyteeth Posted July 4, 2018 Share Posted July 4, 2018 Just to show the difference between non-shaded vs shaded: Shading in it's full glory: This is my test dry brush highlighting vs shaded only mini Not sure it works with this bright white, may do 2 layers - a light grey then a very soft white. Link to comment Share on other sites More sharing options...
Captain Semper Posted July 6, 2018 Author Share Posted July 6, 2018 http://fortressofunforgiven.homestead.com/ETL_VI_Top_Banner_.jpg ETL VI - WEEK 9 UPDATE Link to comment Share on other sites More sharing options...
Joukernaut Posted July 7, 2018 Share Posted July 7, 2018 Vacation starting today! Starting tomorrow, I’m painting every evening! I should be able to make some good progress on the greyknights. Updates soon to follow. Nice work skinonmyteeth, the shading is definately worth it and so is the additional drybrush. They look great! Link to comment Share on other sites More sharing options...
Captain Semper Posted July 8, 2018 Author Share Posted July 8, 2018 Great, that's the spirit! :tu: Remember we're on Week 10 already! ;) UPDATED TO THIS POINT! Link to comment Share on other sites More sharing options...
Captain Semper Posted July 10, 2018 Author Share Posted July 10, 2018 THIS IS THE CUT-OFF FOR THE WEEKLY UPDATE - EVERY VOW OR COMPLETION REPORTED BEYOND THIS POINT WILL COUNT FOR NEXT WEEK'S UPDATE! UPDATED TO THIS POINT! Link to comment Share on other sites More sharing options...
Captain Semper Posted July 11, 2018 Author Share Posted July 11, 2018 http://fortressofunforgiven.homestead.com/ETL_VI_Top_Banner_.jpg ETL VI - WEEK 10 UPDATE Link to comment Share on other sites More sharing options...
skinomyteeth Posted July 11, 2018 Share Posted July 11, 2018 Joukernaut! You're back. Thank you. Followed your lead on the dry-brushing. It looks good but detracted from my aim, which was to have the warp-charged sripts on the armour stand out (I'll show that below). Time for an update: this morning, all 20 finally shaded. Phew. Took ages and was quite stressful. Glad it's done. First 4 done!!! Here I tried dry-brushing highlights - looks OK, but something was not right about it. Based with martian ironcrust. Really love that textured basing. Was a little too bright so I washed with a darker colour. So I did a test - dry brushed the warp-charged writing and compared to the first round of models. Liked it much better so decided to drop the general dry-brush. The second four - really happy with how they turned-out. So here we go: First eight done - 12 more to go... Link to comment Share on other sites More sharing options...
skinomyteeth Posted July 13, 2018 Share Posted July 13, 2018 Another update - final 12 done today! Here we go: all 20 And here they are in their squads Phew. Exhausted... but happy. Link to comment Share on other sites More sharing options...
Joukernaut Posted July 13, 2018 Share Posted July 13, 2018 I’m not sure how to upload pics from my cellphone, so no pictures yet, but I’ve been making good progress on blocking colours so far. I’ve done a basecoat of gold, blue, white and most of the reds, it’s starting to look like an army. Still over a week of holiday to go Link to comment Share on other sites More sharing options...
skinomyteeth Posted July 14, 2018 Share Posted July 14, 2018 Keep going! Good luck. Post some of the interim pics too once you get back. Link to comment Share on other sites More sharing options...

Recommended Posts
Archived
This topic is now archived and is closed to further replies.