TiguriusX Posted August 13, 2018 Share Posted August 13, 2018 My 2K point army of Wolves + Knights + Assassins Games 1-3 will follow as separate posts Link to comment Share on other sites More sharing options...
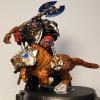
TiguriusX Posted August 13, 2018 Author Share Posted August 13, 2018 Game 1 against Blood Angel / Raven Guard / Astra Militarum His list We played ITC mission #1 Search and destroy deployment Secondary Objectives Mine -Old school -Head hunter -Recon His -Head hunter -Kingslayer (my knight gallant) -Old school And now for the game! I put all 3 assassins in reserve I decide to put the WG on the board and rely on cover to keep them alive. I will need them desperately to flush his scouts Shield dreads up front...Bjorn nearby Gallant on the far right *I make a major mistake here due to my inexperience with my brand new knights (0 games played with them...finished gluing them together the night before tournament) I know there is a stratagem to let me attack infantry in a building. Assuming there are no restrictions on this I put my Gallant in this position to clear the scouts from a building He uses his scouts to claim a ton of board space outside of deployment The units on TOP of buildings are actually inside ruins safe from any gunfire and claiming multiple objectives Helverins I put safe out of LOS in case I don't get first turn They can move 14" and shoot 60" so I have plenty of movement to round the corner Long fangs have nice lines of sight and I can claim the objective by putting PL and WGPL on different levels On his side of the board is his shadowsword plus support characters hiding from me I win the roll to go first but have nothing to shoot at His scouts are all inside ruins out of LOS and his tank is in the corner behind so much terrain I can't see him My helverins move to set up turn 2 #1 gets close to the objective in case the LF get wiped out so I can still claim it #2 moves up to pursue the scouts if they exit the building and has the option to get in the fire lane with the shadowsword Bjorn and a shield dread hug the wall for cover and the gallant heads to the scouts in the building *remember the gallant is all a mistake at this point Dread #2 advances and pops smoke as bait in the middle I still have nothing to shoot at... I do however have a charge phase trick available. His scouts near Bjorn are right against the wall. Rules allow us to fight through walls up to 1" I make the charge with both Bjorn and shield dread Bjorn kills 4/5 scouts (double 1 for one wound roll) He pulls enough guys to prevent my shield dread from fighting at all I then get ready to use my gallant on the scouts in the building. I read the stratagem and tell him nope...apparently the rule only works if the infantry is above ground level. Know your rules noob! I fail to kill anything on turn 1 (no first blood...no kill 1 point) On his turn he shows me why Vostroyan is good on his tank. He gets extra range on his guns. He finds where my LF range of 48" ends and then parks just outside of that He drops his aggressors midfield and races his librarian biker within null zone range of Bjorn and the shield dread The HB scout survivor moves back a bit as well He then redeploys Smash Captain #1 using a BA stratagem near his librarian biker to setup a charge on Bjorn/Dread In his psychic phase he does get null zone to go off He then fires his shadowsword at my gallant First time I ever played one...OMG it has a ton of guns on it -7 volcano cannons manage to hit and wound I spend 1 CP to improve my ion shield to 3++ and save 7/7 shots He also lands 2 lascannons and I fail both saves I use a CP to change it to 1 failure only He rolls 6 for his damage He also fires a bucket load of heavy bolters (that extra range barely reaches me) I take 3 more damage from the HB The heavy bolter scout uses helfire shells to put 3 more damage on the gallant and drop it to Tier 2 In the charge phase Smash Captain #1 comes flying in to party and splits his attacks between Bjorn and the shield dread Bjorn eats 3 TH (and we all know he has no invulnerable) 9 damage would kill him but I make 3 FNP rolls and survive with 2 wounds The shield dread makes all his saves Bjorn returns the favor and kills captain smash He spends CP to fight again and splits attacks once again putting more on the shield dread this time He whiffs his 2 attacks on Bjorn and the shield dread ends up with 1 wound remaining We took a beating but killed the smash captain My WG jump out and head towards the scouts On my turn the shield dread and bjorn round the corner to get in the face of the librarian biker The gallant is slow due to Tier 2 but he follows as well The middle shield dread heads after the Aggressors I drop my culexus to kill the scouts the gallant was unable to. I don't need my culexus because the librarian will not survive this round Still not much to shoot b/c scouts are in cover I roast the HB scout with Bjorn's heavy flamer and put 2D on the shadowsword with the LC We all charge the librarian and intend to sling shot around him Bjorn goes first because he has more wounds and is likely to survive bolters Bjorn kills the librarian in combat However, my opponent spends CP to make the Librarian fight after death to try and kill off the shield dread I make all my saves On his turn his scouts move out to fight The scouts near the WG move out to engage as well He drops Smash Captain #2 with the no overwatch relic I have a knight stratagem that lets me shoot if you deep strike within 12" (the entire reason I chose Cadmus) I manage to get the melta gun through his 3++ but he uses a CP to prevent it He opens fire with the shadowsword again I save 6/7 volcano cannon shots and eat 8 more damage (4 wounds left) In the middle of the field the shield dread eats 111 shots from the aggressors He gets just enough to perfectly kill the dread on his last roll In the charge phase he goes after the culexus with his objective scouts and can't make enough 6s He also surrounds the WG after shooting at them He cuts the WG down to the final man Shrike and scouts go after the vindicare I put in an ideal sniper spot They are unable to kill him The main attraction has no picture Captain Smash #2 goes after the gallant and tries to finish off the final 4 wounds I make 2/3 5+ armor save rolls and have 1 W remaining I stomp 9 wounds back onto him and erase the BA captain On this turn I make a poor decision and forget the score and scope of the game Bjorn and friends are barely alive but continue their march towards the shadowsword They successfully kill another unit of scouts that were hiding behind the cargo crates and slingshot further forward. The real question is why would I want to do that... I also move this helverin to take the objective and fire potshots at the shadowsowrd These were all poor decisions I completely forgot there was a primaris psyker hanging out with the shadowsword. On his turn the psyker steps out and smites the shield dread away His shadowsword then blows away Bjorn and the helverin with all the guns it has available Finally his aggressors put 90 bolters into the gallant and are able to finish off the final wound He earned most of his secondary points this round with all those kills Game ends due to time after this Final score is 14:19 I lose round 1 My thoughts from game I am learning to respect the flexibility of scouts in ruin heavy games You start the game with objectives under control or good terrain secured I also need to get rid of tunnel vision. There was no reason to keep marching my valuable units into danger. I should have pulled back and kept in cover I was actually winning the primary mission and giving up all those secondary points hurt me bad I also made a poor decision with my WG. I was debating whether to hunt the single scouts or double scouts. I shouldn't have taken the risky target. If I had overwhelmed the single unit I could have pushed forward with everyone else. The fact I thought my gallant could hit them also contributed to this mistake Link to comment Share on other sites More sharing options...
PeteySödes Posted August 13, 2018 Share Posted August 13, 2018 Hey man sounds like a good game at least. Biggest thing is recognizing any mistakes and correcting them. With the ones you made too once you learn them you can use them against people. One of my favorite things is taking stuff like shield dreads and getting the opponent to forget themselves. Its actually really easy to do once they get frustrated at some of our units. Once they do what you set out to do, throw them in a disadvantageous position and watch them move. Link to comment Share on other sites More sharing options...
TiguriusX Posted August 13, 2018 Author Share Posted August 13, 2018 Game 2 against Blood Angels Before I share his list a few pre-game comments This BA is my friend who started the hobby with me. Our daughters are the same age and we squeeze in some 40K matches whenever they have play dates. I dragged him to his 1st tournament and we joked that we came all the way out here just to play eachother His list is slightly hodge podge because at our FLG they are casual about models but I told him to be close for a tournament He brought what models he had and tried to make it work Also...you may notice my converted dread looks awfully similar to his furiosos. They were an ebay batch purchase he did early on. I took 1 and converted it and he has become Captain America. Now...on to his list ++ Battalion Detachment +5CP (Imperium - Blood Angels) [44 PL, 678pts] ++ + HQ [13 PL, 245pts] + Captain [6 PL, 116pts]: Jump Pack [1 PL, 19pts], Storm bolter [2pts], Thunder hammer [21pts] Lemartes [7 PL, 129pts] + Troops [13 PL, 224pts] + Scout Squad [4 PL, 65pts] . Scout [11pts]: Boltgun . Scout [11pts]: Boltgun . Scout [11pts]: Boltgun . Scout [21pts]: Heavy bolter [10pts] . Scout Sergeant [11pts]: Boltgun, Chainsword Scout Squad [4 PL, 65pts] . Scout [11pts]: Astartes shotgun . Scout [21pts]: Heavy bolter [10pts] . Scout [11pts]: Astartes shotgun . Scout [11pts]: Boltgun . Scout Sergeant [11pts]: Boltgun, Chainsword Tactical Squad [5 PL, 94pts] . 3x Space Marine [39pts] . Space Marine (Heavy weapon) [38pts]: Missile launcher [25pts] . Space Marine Sergeant [17pts]: Boltgun, Power sword [4pts] + Elites [18 PL, 209pts] + Death Company [18 PL, 209pts]: Jump Pack [2 PL, 30pts] . Death Company Marine [17pts]: Bolt pistol and chainsword . Death Company Marine [17pts]: Bolt pistol and chainsword . Death Company Marine [17pts]: Bolt pistol and chainsword . Death Company Marine [17pts]: Bolt pistol and chainsword . Death Company Marine [17pts]: Bolt pistol and chainsword . Death Company Marine [17pts]: Bolt pistol and chainsword . Death Company Marine [17pts]: Bolt pistol and chainsword . Death Company Marine [17pts]: Bolt pistol and chainsword . Death Company Marine [21pts]: Boltgun, Power sword [4pts] . Death Company Marine [22pts]: Boltgun, Power axe [5pts] ++ Vanguard Detachment +1CP (Imperium - Blood Angels) [30 PL, 578pts] ++ + HQ [4 PL, 63pts] + Lieutenants [4 PL, 63pts] . Lieutenant [4 PL, 63pts]: Chainsword, Master-crafted boltgun [3pts] + Elites [26 PL, 515pts] + Contemptor Dreadought [8 PL, 165pts]: Combi-bolter [2pts], Dreadnought combat weapon [40pts], Kheres pattern assault cannon [25pts] Furioso Dreadnought [9 PL, 175pts]: Frag cannon [38pts], Furioso fist [40pts], Heavy flamer [17pts], Smoke launchers Furioso Dreadnought [9 PL, 175pts]: Frag cannon [38pts], Furioso fist [40pts], Heavy flamer [17pts], Smoke launchers ++ Outrider Detachment +1CP (Imperium - Blood Angels) [50 PL, 744pts] ++ + HQ [8 PL, 130pts] + Librarian in Terminator Armour [8 PL, 130pts]: Force sword [8pts], Storm bolter [2pts] + Elites [8 PL, 152pts] + Sanguinary Guard [8 PL, 152pts] . Sanguinary Guard [41pts]: Encarmine sword [12pts], Inferno pistol [9pts] . Sanguinary Guard [41pts]: Encarmine sword [12pts], Inferno pistol [9pts] . Sanguinary Guard [35pts]: Angelus boltgun [3pts], Power fist [12pts] . Sanguinary Guard [35pts]: Angelus boltgun [3pts], Power fist [12pts] + Fast Attack [26 PL, 371pts] + Inceptor Squad [20 PL, 270pts]: 5x Inceptor [125pts], Inceptor Sergeant [25pts] . Two assault bolters [120pts]: 2x Assault bolter [120pts] Tarantula Sentry Gun [3 PL, 37pts] . Tarantula Sentry Gun [3 PL, 37pts]: Twin heavy bolter [17pts] Tarantula Sentry Gun [3 PL, 64pts] . Tarantula Sentry Gun [3 PL, 64pts]: Twin assault cannon [44pts] + Heavy Support [8 PL, 91pts] + Devastator Squad [8 PL, 91pts]: Armorium Cherub [5pts] . Space Marine [13pts]: Boltgun . Space Marine [13pts]: Boltgun . Space Marine [13pts]: Boltgun . Space Marine [34pts]: Plasma cannon [21pts] . Space Marine Sergeant [13pts]: Boltgun ++ Total: [124 PL, 2000pts] ++ We played ITC Mission 3 Spearhead deployment Secondaries Mine -HH -Recon -Old school His -Kingslayer (gallant) -Old school -HH On to the game! I built my army as a response to long map deployment last time. I have tools to reach across the map and deploy accordingly Helverins have 60" so I put 1 on each flank Shield dreads and Bjorn are up front Gallant I decided to play casually. I know my friend has a BA assault force and will come to me. I try to fill deep strike holes and wait for him LF-LC take up a good firing position with cover 1 vindicare gets a great sniper position on the left flank crates All remaining assassins plus WG go in reserve On his side he hugs the middle LOS blocking terrain with his main assault force He spreads a few units on his flanks to prevent deep striking Once again my opponent uses scouts to seize key territory and grab an early objective lead before the game has started In general BA have amazing tactical flexibility and mobility with their stratagems My friend is getting real good at feinting 1 flank then moving large amounts of his army completely across the board where you aren't looking I am ready for his tricks Before the game begins his deathwatch go storming across the field and get into nice RUIN protection They have an easy charge movement available when it is his turn I win the roll to go first I fall back and take up defensive positions Shield dreads form up alongside Bjorn and I leave space for a heroic intervention Both shield dreads pop smoke I bring my remaining vindicare in my own deployment zone on the right flank and he has a clear shot at Lemartes My shooting phase is so-so but I do accomplish some good things Vindicare puts 2 wounds on Lemartes I kill 4/5 of his devastators and he chooses the Sgt as the lone survivor. This was a wise move as he rolled exactly his leadership after failing his first morale roll. I put a few wounds on his Furioso Bjorn kills the turret to secure first blood and a kill point On his turn the DW come roaring in to set up an easy charge He shoves the injured Lemartes up against the wall to extend his aura and reach the DW squad He keeps his contemptor behind the wall and his lone survivor Sgt jumps off the crate to hide behind LOS In his shooting phase these scouts pick off the LF TDA WG because I failed 2/3 bolter saves I find this funny b/c in game #1 of this tournament the TDA tanked a TON of mortar fire. Something like 20 shots through the course of the game (I forgot to write about it in that report) He also uses his hellfire stratagem from a scout HB and hits my Gallant I think (didn't write target in my notes) The deathwatch shooting at my LF does nothing (the regular LF make their 2+ cover saves) He declares a charge against both dreads but not Bjorn and pushes them all in I remind him about heroic intervention so he makes a bubble in the middle of the line and maintains a daisy chain to get his Lemartes aura Chainswords manage to get 1 wound on Shield dread #1 In return he kills 4 DW My friend has become very good at the assault phase and removes them from the guys close to Shield dread #2 so I don't get to attack On my turn I have shield dread #1 fall back from combat and stand on the nearby objective. I want to shoot the DW down and move forward if possible I also move the left flank Vindicare up on the crate for a clear shot at his BA Captain My WG drop into a spot vacated by his tacticals. They are out of LOS and well positioned for the next turn In the shooting phase my Vindicare puts 2 wounds on the BA captain Bjorn flames 1 DW marine and puts his LC into the scouts The right flank vindicare and helverin finish off the scouts In the charge phase my shield dread declares both DW and Lemartes as targets and rolls high. I send him up after Lemartes to punch 1" through the wall The massive axe cuts through the wall and Lemartes as if they were not there *I only did 3W to Lemartes with 2D6 damage so an assist goes to the Vindicare for his wounding shot from earlier Bjorn goes after he DG and wipes them out On his turn the inceptors find a nice clear spot in my backfield outside of the 12" intercept stratagem from the Gallant and Helverin His librarian also joins the squad and makes it so the Vindicare is the closest target for smite I got an error for posting too many images so this batrep is being cut here Link to comment Share on other sites More sharing options...
TiguriusX Posted August 13, 2018 Author Share Posted August 13, 2018 Game 2 continued The BA captain realizes a sniper is after him and jumps behind LOS with the Devastator Sgt The tactical marines take over the objective His Sanguinary guard drop in on the left flank and I use my intercept stratagem PLUS skyreaper protocol to reroll all misses After all the dice I kill 1 Sanguinary guard (the 2+ armor is too good for an AP-1 gun) The SG make their charge and put some wounds on the Helverin but it is alive The librarian meanwhile smited the vindicare and left him to die at the hands of the inceptors (tons of dice despite -2 to hit) The librarian charged into the LF but only killed 1 I pull the only model close to him and safely remove the LF from combat On my turn the Gallant heads over to introduce himself to the inceptors. On the way he meltas and stormspears the Librarian off the map. Bjorn and a shield dread push up to take on the furiouso My left flank Helverin falls back from combat My right flank Helverin pushes forward to line up shots on the furioso as well I drop my culexus so I can start earning recon points. He also has a clear shot at the BA captain and puts a wound on him leaving him with 2 The wolf guard soar over the shipping crates and land in easy flamer range of his units. I wanted to flame the smash captain but forgot he was protected I flame his tactical marines but a few survive (I wipe them out with a combination of LF-LC and other long range fire) The unit charges into the lone survivor dev sgt and captain smash My wolf claw shreds the sgt and the others pistol butt Captain smash and actually put 2 wounds through to potentially kill him A CP saves the captain The shield dreads leads the charge into the furioso and with 3D6 guaranteed overwatch hits (frag cannon and heavy flamer) I end up taking 4 hits only My friend had very poor dice this game Bjorn follows in safely on the charge and rips apart the furioso. I consolidate towards the objective and scout corpses Shield dread tries to put himself between the remaining furioso and primaris LT On his turn the contemptor comes out to play The furioso and contemptor both line up to attack Bjorn His contemptor fist smashes Bjorn to smithereens and he racks up more secondary points The BA Captain makes his move and goes after my Gallant He rolled a bunch of 1's for his charge but I reminded him about his ability to reroll the charge and he makes it in His Captain smash also has the extra damage relic so the TH hits hard He gets 2 TH hits through and I eat 8 damage (ouch) These wounds are enough to get him a ton of secondary points even though I am alive My gallant stomps the BA captain out of existence on my turn *My gallant now has 2 BA captain pelts on his wall On the other side his SG try to kill the Vindicare but I roll hot and make plenty of 4+ saves We are the last game going but there are about 30 min remaining in the round. The TO asks what the score is. I have no idea b/c my friend is marking and think I am far ahead so we can probably quit no big deal. My friend says actually I'm winning so you probably want to keep going. I am surprised and say wow...oh ok. We do a quick review of the field and realize I can pass him in points and he can't catch up if I kill his contemptor and dread and move onto that objective We basically do a speed version of my turn and I accomplish everything I need. We then call it and shake hands The game ended in pseudo round 4 but points weren't exactly accurate but "good enough" I win 16:15 It is the closest match my friend and I have had so far and he was playing with a handicap due to modelling. His skill is increasing greatly with the BA My post game thoughts I need to keep better track of the score. I am just playing without having a clue what I am doing. This will come up in game 3 as well I think I will make a serious effort to keep my own scoresheet as well during a game Besides that I don't have much to say. I am very familiar with my friend and his BA army My new additions did what I wanted them to do. The range of the helverins and vindicare gave me plenty of options What I see once again is the value of scouts. My opponent uses scouts to seize key territory and grab an early objective lead before the game has started and it keeps him on par with me I REALLY hope our new codex gives us similar abilities while also giving us the CP for "troop" because elite scouts are actually a detriment in the current game Link to comment Share on other sites More sharing options...
TiguriusX Posted August 13, 2018 Author Share Posted August 13, 2018 Game 3 against Death watch His list We played ITC mission #5 Vanguard strike Secondary Objectives Mine -Old school -KS -Recon *His army was built to give up very few secondary points...it had a major impact on me His -Old school -Kingslayer (my Helverin) -Titan slayer And now for the game! All 3 assassins in reserve I tried to give the LF cover Helverins back to avoid small arms fire but close enough to walk and get to objectives Bjorn and shield dreads formed a train so the flyers couldn't pass over and pick him off WG started in the ruins and my plan was to hop from building to building keeping out of LOS He places 3 DW Kill teams in reserve *I don't have pictures of every turn this match. After going to T3 in most games so far I wanted to make an effort to speed it up T1 I made a MAJOR mistake and was so worried about keeping bjorn safe I tucked him behind LOS and didn't get to fire. This was huge b/c I ended up leaving a Xiphon at 1 wound when all my ranged weapons were done firing. I also chose not to use a CP for a lascannon wound roll of 1. I should have used that to punch through the X1 (it was the opening shot from LFs so I figured helverins would stop it...I was wrong). On his turn the xiphons moved up and thanks to his Watch master bubble they went insane on me 9 wounds through on my gallant They killed the WL-Helverin The frustrating part here is the 1 wound Xiphon with WS5 got 6's and 5's on his reroll and hammered me despite being near dead On turn 2 I am able to take advantage of his xiphon trick. Because he needs to be within range of the xiphon he was pushed to the edge of the building. It left me a deep strike spot for the vindicares to go after him. The pair of vindicares make both their shots but he armor saves 1 of them. Only 3 wounds go through. The other funny note from T2 is I sent my wolf guard flamers after the xiphon with 1 wound. They killed it with fire and let me focus all the other heavy guns to kill Xiphon #2 On his turn the DW kill teams start popping in everywhere. He has massive range so doesn't care if he needs to be outside 12" to avoid my stratagem intercepting fire. He drops my remaining helverin to 2W with all his guns He kills 4/5 Wolf Guard He has a kill team show up in my rear and kills 4/5 LFs One of the kill teams that started on the board for him had been buliding hopping to get close and they made their move this turn They charge in at my gallant and I kill 2 with overwatch I take some damage (I guess not in notes) but live In return I stomp 5/7 guys and he has 2 of the power fist primaris left He spends CP to fight again using the Honor Your Brothers stratagem He whiffs everything and can't believe the gallant will survive In morale he rolls a 6 followed by another 6 killing the entire squad He asks if he can just spend the CP to save them instead and I look at him confused. I'm like don't you have to do that before any of the rolls? He says ok ok nevermind no big deal Meanwhile his watch master charges into the vindicares but I roll hot with my 4++ and they live I do all my morale rolls and everything lives So although I was absolutely hammered this round nothing technically died On my turn I have no real good options I decide clearing my backfield is probably the safer bet for the severely wounded Gallant (he was at his lowest tier with only 6" movement at this point) I decide to advance and if I get lucky can do full tilt into his unit....I don't get enough to make it easy Bjorn and the shield dreads push forward to engage his midfield kill teams My lone WG survivor gets the hell out of dodge and advances into a ruin I drop in my culexus to claim an objective and start the recon points flowing The vindicares are confident and fire their pistols. I need to use a CP on the wound roll but I get 2 on him. He rolls double 6 for his armor save and takes nothing Meanwhile Bjorn and a shield dread have made their charge and erase one kill team The other shield dread is left behind on the objective with a failed charge On his turn he lines up a shot on Bjorn Bjorn is blown away by the hellblasters and AP-4 leaves him with no armor save I don't roll enough FNPs and I die He then piles everything into the shield dread and manages to kill it as well However, the vindicares have been practicing their hand to hand skills since they joined my wolves and they kill the watch master in his fight phase I am running low on bodies and his kill teams are absolute all stars. I need to figure out how to score points ASAP I risk an advance with a vindicare and manage to make it to an objective This also lets me do recon and spread my other guys out My gallant limps slowly towards the backfield kill team. I have set up a 6" charge In my charge phase I send in the gallant and he survives enough OW to have 1 W remaining I then roll 1-1 for my charge I have no other moves available to me. I spend my final CP hoping for a 5 or 6 and I get a 5. The gallant makes it into combat and stomps out 2 more members of the kill team I then roll nothing but 5's and 6's and survive his attacks Meanwhile the slow dread who lagged behind catches up with the enemy and kills the captain His kill team daisy chains and kills my objective vindicare and blows the shield dread away with more hellblaster shots My hot dice run out and I fail too many 3's Meanwhile the gallant continues his run of luck and remains at 1 W as he can't hurt me I stomp out the entire squad in return Final turns come around and I have no real moves He blew my culexis away with 90+ aggressor shots and he picked off my WG as well. I have nothing with mobility to attempt linebreaker anymore I fall back hopefully out of range with the gallant and shield dread while also touching an objective He is unable to reach my gallant but has extreme range at the shield dread he can't hurt it and game ends When we tally it up I am once again surprised to see how close the score is 2 point game....and if I had simply killed a Xiphon on turn 1 that would have been a 3 point swing My thoughts from game Once again I'm playing without a close eye on the score. I need to track my own in future games Deathwatch are simply amazing. He has tactical flexibility with wound allocation tricks and rerolls he can tailor to his enemy. The rerolls changed many misses that my army relies on (high T) into hits. My opponent was also very skilled with his infantry and those kill teams had every tool they needed. It felt brutal and I am surprised we ended so close Link to comment Share on other sites More sharing options...
TiguriusX Posted August 13, 2018 Author Share Posted August 13, 2018 My recap from my 2nd ever tournament I finished 1-2 (same as my 1st ever tournament) However all of my games were much closer this time around Although I may have felt like I was getting kicked around the scores were all close I took #7 out of 13 players Opponent #1 Finished #12/13 overall with 1-2 record Opponent #2 Finished #11/13 overall with 1-2 record Opponent #3 Finished #6/13 overall with 2-1 record It was my first time ever fielding the new knight detachment. I literally finished gluing them together the night before the tournament. I had 0 experience with them and made many noob mistakes in game #1. If I had known I couldn't reach in that ruin I would have been better off simply advancing full speed through the middle of the field and wrecking shop instead of trying to be sneaky. I would have run over his aggressors and forced his tank to move within firing range of my LF to get me Alternatively...once I had survived his 1-2 punch of BA captains I should have fallen back. I had no business going after his tank. It was worth nothing in the grand scheme of the game. Overall I am happy with how my gallant performed. The main goal was to have a distraction carnifex and he soaked up more than enough to do his job. He also survived most of the knight counters my opponents threw at him and collected 2 BA Smash Captain pelts for his wall His relic armor of the sainted ion (gives him a 2+) was a lifesaver to give him a pseudo 5++ melee invulnerable save) I was not that excited about my Cadmus benefits and the Helverins were just meh to me Part of that is probably me playing them wrong as well and I should probably field test them a few more times before I make any major changes. I might be testing other house combos such as Mortan in future matches (the helverin can get -1 to be shot and a stratagem removing all modifiers will let me pound flyers more reliably) The WG flame pack was fun and I like using them. They gave me great flexibility I greatly enjoy my vindicares. It sucks when you roll 1s but they have amazing potential when working as a pair to eliminate key characters on the other team With our codex dropping soon I'm sure I will have tweaking to do eventually but for now I need more experience with this list Most importantly I had fun and my BA buddy had fun as well. It was nice going with a friend and talking 40K over lunch and the ride back. If our schedules are clear we will try it again in Sept then switch back to league for the winter As for improving my tournament performance I think keeping an eye on the score is crucial I will be keeping my own score during the game so I can better plan my turns and play towards securing a win This probably means less detail on batreps in the future as well. Maybe I will limit batreps to the casual league setting instead Link to comment Share on other sites More sharing options...
Melete Posted August 13, 2018 Share Posted August 13, 2018 Yeah those Armiger Helverins are really great against Custodes, Eldar vehicles (especially flyers), and invulnerable saves. BA and Deathwatch don’t have a lot of their favorite prey, so they’re a bit more average against those armies. Did you try the Skyreaper Protocols stratagem for your Helverins against the Xiphon? Link to comment Share on other sites More sharing options...
TiguriusX Posted August 13, 2018 Author Share Posted August 13, 2018 Yeah those Armiger Helverins are really great against Custodes, Eldar vehicles (especially flyers), and invulnerable saves. BA and Deathwatch don’t have a lot of their favorite prey, so they’re a bit more average against those armies. Did you try the Skyreaper Protocols stratagem for your Helverins against the Xiphon? yes i used sky reaper turn 1 but he made a ton of armor saves to negate it the other helverin rolled 4 for total number of shots as well round 2 bjorn and the LF blasted the full health xiphon and my flame guard roasted the other one so my helverin had nothing to do Link to comment Share on other sites More sharing options...
Melete Posted August 13, 2018 Share Posted August 13, 2018 Bjorn’s pretty good at doing that! Link to comment Share on other sites More sharing options...
TiguriusX Posted August 13, 2018 Author Share Posted August 13, 2018 Bjorn’s pretty good at doing that! ya he is...which makes my positioning mistake turn 1 so bad =[ Link to comment Share on other sites More sharing options...
Karhedron Posted August 14, 2018 Share Posted August 14, 2018 Overall I am happy with how my gallant performed. The main goal was to have a distraction carnifex and he soaked up more than enough to do his job. He also survived most of the knight counters my opponents threw at him and collected 2 BA Smash Captain pelts for his wall His relic armor of the sainted ion (gives him a 2+) was a lifesaver to give him a pseudo 5++ melee invulnerable save) I was not that excited about my Cadmus benefits and the Helverins were just meh to me Part of that is probably me playing them wrong as well and I should probably field test them a few more times before I make any major changes. I might be testing other house combos such as Mortan in future matches (the helverin can get -1 to be shot and a stratagem removing all modifiers will let me pound flyers more reliably) Glad to hear the Gallant did well. I think a lot of them will be cropping up in soup armies. A 2+/4++ may seem like overkill but when you have just one big Knight, the boost to survivability can be vital. Did you use Rotate Ion Shields much? Did you get a feel for whether the improved unvuln or better armour played the bigger part in his survivability? For other Houses, maybe check out Hawkshroud, Taranis or Krast. Hawkshroud is good as you degrade more slowly. Taranis is fun for the 6+++ and the zombie-knight stratagem. Krast is brutal for rerolling misses on the turn you charge. I do like Questor Mechanicus for their access to the "Machine Spirit Resurgent" stratagem. Terryn is also great fun for using your Gallant and a distraction-carnifex as you get an average charge range of 25.5" That means with a bit of luck, you can pull off T1 charges. Give him Landstrider instead of Ion Bulwark and suddenly he can make an average of 29.5" charge with "Full Tilt". That can get him deep into your opponent's deployment zone on T1! Screening can mess with this a bit of course but the sooner your Gallant can start putting pressure on the enemy, the better. Most importantly I had fun and my BA buddy had fun as well. It was nice going with a friend and talking 40K over lunch and the ride back. Yup, if it ain't fun, you're doing it wrong. This probably means less detail on batreps in the future as well. Maybe I will limit batreps to the casual league setting instead Totally understandable but still a shame, I have enjoyed reading your Batreps as they are well detailed and photographed. Still, don't let the reporting hold back your game-play. May the dice be ever in your favour! Link to comment Share on other sites More sharing options...
TiguriusX Posted August 14, 2018 Author Share Posted August 14, 2018 Glad to hear the Gallant did well. I think a lot of them will be cropping up in soup armies. A 2+/4++ may seem like overkill but when you have just one big Knight, the boost to survivability can be vital. Did you use Rotate Ion Shields much? Did you get a feel for whether the improved unvuln or better armour played the bigger part in his survivability? Rotate ion shields was mostly used in game 1 and i stopped 13/14 volcano cannons with it (totally worth it!) However, the 2+ armor relic was just as important (if not more) i survived some insane melee by rolling 5s against power fists and smash captain THs The regular 2+ also let me shrug off all the basic melee hits as well as buckets of bolter spam that would have chipped away at me (I think I had 140+ bolters fired at me in game 1 from the aggressors...note to self don't let them double tap) The bulwark trait and the sainted armor relic are a definite combo that should go together For other Houses, maybe check out Hawkshroud, Taranis or Krast. Hawkshroud is good as you degrade more slowly. Taranis is fun for the 6+++ and the zombie-knight stratagem. Krast is brutal for rerolling misses on the turn you charge. I do like Questor Mechanicus for their access to the "Machine Spirit Resurgent" stratagem. Terryn is also great fun for using your Gallant and a distraction-carnifex as you get an average charge range of 25.5" That means with a bit of luck, you can pull off T1 charges. Give him Landstrider instead of Ion Bulwark and suddenly he can make an average of 29.5" charge with "Full Tilt". That can get him deep into your opponent's deployment zone on T1! Screening can mess with this a bit of course but the sooner your Gallant can start putting pressure on the enemy, the better. Originally I was going to field test Mortan next The tradition turns my Gallant into a pseudo zombie because even with 1 W remaining at his lowest tier he would have a WS3 (starting WS for non-gallants). Combine that effect with Valiant last stand and you are capturing the benefits of Hawkshround/Taranis/Spirit Resurgent in limited situations but getting a guaranteed extra fight at the cost of staying around after. The Mortan specific WL trait could then be used on a helverin to increase survival (-1 to hit beyond 18") The stratagem to ignore all modifiers makes a helverin deadly to eldar/chaos/DE/DA that rely on modifiers I could double down on the same helverin and reroll with skyreaper or hedge my bets and put it on the other helverin Would benefit all my knight units and give me synergy Terryn I have been trying to avoid on purpose. It is amazing in melee but doesn't do much for my helverins and I would probably need to swap them for warglaives I took a closer look at Krast after your suggestion. Hoo boy! There is some potential there. In fact I may do this instead of Mortan it is that good My Gallant rerolling all misses makes horde stomping that much more effective. If i spend the CP for the Krast specific stratagem I get exploding 6's and have 15 dice to go fishing. Very tempting Also...I can use the Krast specific WL-trait and relic on a helverin to transform it into a BEAST!! WL-trait to reroll 1s with a BS3 is nice Krast relic to increase damage to 4 or 5 on certain targets makes it a vehicle killer wow *Edit nope....actually I can't do some of those things. I just read it closer and realized I took an ILLEGAL LIST to the league. The exalted court and relics can't be placed on armigers....doh Link to comment Share on other sites More sharing options...


Recommended Posts
Archived
This topic is now archived and is closed to further replies.