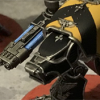
Burni Posted September 15, 2018 Share Posted September 15, 2018 I'm posting my solution to magnetising the arms on the Reaver as I've seen a few people asking about how to do it. Now, I'm no expert modeller so I don't want to call this a tutorial or say it's the best way to do it but if it helps others, then I'm willing to show my shoddy work :) I drilled a pilot hole to find the centre of the socket and also allow me to dry fit the ball and push a pin through to mark the ball at the correct place. I then used a pin vice with a 3mm bit to drill a recess for the magnet. I used 3mm x 0.5mm disc magnets - N42 spec, which seems to have enough pull. I then did the same on the balls for the weapon arms. To stop the hole getting too deep before the throat was wide enough for the magnet (due to is being a ball shape), I used a 4mm bit from my DIY kit to open it up a bit. I'm happy with the results but the positioning of the magnet in the ball is very tricky. Its almost impossible to know if you're bang on and mine varied a bit. So when the arms are in, they don't match. One points slightly up and the other down. It looks fine but it is a random element. Be prepared for that or work out a way to do it better (and tell me!) Anyway, I hope this helps someone. The Reaver is a lovely kit (like the Warlord) and I'm looking forward to Warhound in a few weeks time! Link to comment Share on other sites More sharing options...
Cpt. Bannockburn Posted September 15, 2018 Share Posted September 15, 2018 Great idea with the pilot hole from the top. Might I suggest also magnetizing the actual weapons at the elbow joint? This way you can swap sides freely for them as well. I'm still waiting for my order from two weeks ago :( Link to comment Share on other sites More sharing options...
Orpheus Black Blood Posted September 15, 2018 Share Posted September 15, 2018 I've seen a video where used a 5x1mm magnet on the shoulder an a 2x1mm on the arm. I think with the 5mm magnet you can't miss the other one. Good idea by the way! I have to drill mine too. Cheers Link to comment Share on other sites More sharing options...
Vogon Posted September 16, 2018 Share Posted September 16, 2018 Thanks fro the pictures. I’ll be doing this myself as soon as I make some space on my hobby table. Cheers Vogon Link to comment Share on other sites More sharing options...
Burni Posted September 16, 2018 Author Share Posted September 16, 2018 Great idea with the pilot hole from the top. Might I suggest also magnetizing the actual weapons at the elbow joint? This way you can swap sides freely for them as well. I'm still waiting for my order from two weeks ago :( . That’s definitely the way to go for maximum flexibility. I was worried about how much movement would be in it with two mag points though. In the end, as I intend to have a least two Reavers, I decided I could build left and right weapons from the two boxes. The 5mm magnets are a good idea though Orpheus. Would need careful drilling but could work better. Not sure if I have a bit that big at the mo though! Link to comment Share on other sites More sharing options...
Parweke Posted September 16, 2018 Share Posted September 16, 2018 Great idea with the pilot hole from the top. Might I suggest also magnetizing the actual weapons at the elbow joint? This way you can swap sides freely for them as well. I'm still waiting for my order from two weeks ago :( Where did you ordered? I made mine on 23rd August and still havent received my magnets.(spider magnets, ebay) question for burni, why not just magnetise the weapon and bottom part of the arm? Link to comment Share on other sites More sharing options...
Burni Posted September 16, 2018 Author Share Posted September 16, 2018 The upper arm for the fist is completely different otherwise that would be the easiest way to go. So if you’re just going to do a shooty Reaver, that would be ideal. Link to comment Share on other sites More sharing options...
Captain Idaho Posted September 16, 2018 Share Posted September 16, 2018 This is exactly what we want here on the B&C; hobby support for each of us. I will try some of your methods to magetise my own Reaver which should be here by my birthday. Link to comment Share on other sites More sharing options...
Cpt. Bannockburn Posted September 17, 2018 Share Posted September 17, 2018 Where did you ordered? I made mine on 23rd August and still havent received my magnets.(spider magnets, ebay) My magnets are all here, it's the Reavers that are missing after I cancelled my order from GW (who weren't able to send them to their own store for pickup on release day) and apparently now they're sold out in my usual webstores. Link to comment Share on other sites More sharing options...
Parweke Posted September 17, 2018 Share Posted September 17, 2018 Oh, I misunderstood. My Reaver arrived on friday. will start building today Link to comment Share on other sites More sharing options...
jeffersonian000 Posted September 17, 2018 Share Posted September 17, 2018 The upper arm for the fist is completely different otherwise that would be the easiest way to go. So if you’re just going to do a shooty Reaver, that would be ideal.The arms should probably be magnetized top and bottom, with the Melee arm also magnetized top and bottom (or at least top), so you can future proof all of the weapon options. The Carapace mounts is the odd one, as it appears to be Apoc Launcher specific, however, we don’t know if the Warhound arms will be long enough to fit on top of a Reaver without a spacer. The question is, should we magnetize the Apoc Launcher Mount top and bottom to future proof Carapace weapons? SJ Link to comment Share on other sites More sharing options...
Burni Posted September 17, 2018 Author Share Posted September 17, 2018 The apoc launcher and socket have GW designed 5mm magnet holes so I’m comfortable trusting them that future Reaver carapace weapon will be interchangeable via magnets. Having tried a few models in the past with multiple magnets on different arm parts, I’m not confident in my skills to not make it too loosey goosey and wobbly. So I’m willing to give up some flexibility for a better end result imho. But yes, if you can do a good job with multiple magnets, that’s definitely the best way. Link to comment Share on other sites More sharing options...
jeffersonian000 Posted September 18, 2018 Share Posted September 18, 2018 Well, I only magnetized the bottom of the Apoc mount, figured if I need spacers later I can make spacers later. My bother and I both have GME sets and the new Reaver kit, which we have been discussing on how best magnetize where. He is of the “shoulder magnets/second Reaver to mirror match weapons” school, while I am of the “magnets everywhere on the off chance I need them” school. He might be right, we’ll see. SJ Link to comment Share on other sites More sharing options...
RipOffProductions Posted September 19, 2018 Share Posted September 19, 2018 another reason to magnitize at the "elbow" is that the Reaver's guns fit pretty well as proxy Warlord carapace weapons: (Source) Link to comment Share on other sites More sharing options...
Burni Posted September 19, 2018 Author Share Posted September 19, 2018 Heh! That looks pretty good Link to comment Share on other sites More sharing options...
jeffersonian000 Posted September 19, 2018 Share Posted September 19, 2018 Technically not a proxy, as traditionally Reaver arm weapon ARE Warlord carapace weapon selections. SJ Link to comment Share on other sites More sharing options...
Burni Posted September 19, 2018 Author Share Posted September 19, 2018 Just to update this. I’m now convinced Orpheus’ comment about 5mm magnets in the sockets is the way to go. These 3mm just don’t seem strong enough. I can wobble the arms out fairly easily. So next Reaver will be using 5mm. Sadly it’s too late to change this one as I can’t get to the sockets to widen the drill holes now it’s on the base. Link to comment Share on other sites More sharing options...
jeffersonian000 Posted September 19, 2018 Share Posted September 19, 2018 I ordered 300 of the 5x1mm disk neo magnets off Amizon for about $14US, pretty easy to get them cheap. SJ Link to comment Share on other sites More sharing options...
Orpheus Black Blood Posted October 21, 2018 Share Posted October 21, 2018 Just to update this. I’m now convinced Orpheus’ comment about 5mm magnets in the sockets is the way to go. These 3mm just don’t seem strong enough. I can wobble the arms out fairly easily. So next Reaver will be using 5mm. Sadly it’s too late to change this one as I can’t get to the sockets to widen the drill holes now it’s on the base. How would you attach the 5mm magnets to the shoulders? Cheers. Link to comment Share on other sites More sharing options...
Fajita Fan Posted October 21, 2018 Share Posted October 21, 2018 I glue the arms into the shoulders and then magnetize the weapons to the wrists. This lets me swap weapons between left and right pretty easily, the only one I did at the shoulder was a left powerfist/laser blaster. Link to comment Share on other sites More sharing options...


Recommended Posts
Archived
This topic is now archived and is closed to further replies.