Knightsword Posted October 24, 2018 Share Posted October 24, 2018 Could you give me some detail on how you got the rider sorted out? That's one of my current concerns about converting up some Thunderwolves, as, even though I don't mind Stormcast models, I would want to get the riders as Power Armoured as possible, with a minimum of leftover Stormcast. Sure. So the parts used for the rider are: the main body is that of the Dark Imperium Inceptors. the arm with the shield is the top half of the Dark Imperium Inceptor cut just below the elbow to attach the Stormcast hand and wrist the arm with the lance is from the Custodes jetbike box. I made no changes to this with the exception of the Reiver shoulder being used on. the Stormcast's cloak and sword with some greenstuff to merge it to the Marine shoulders at the top. With getting the body to sit on the saddle I chose DI Inceptors because the body is literally 2 pieces including the thighs/upper legs. This made it easier to glue the 2 pieces together and then carefully scrape away the inner legs and groin to match the curve of the saddle without fear of the body breaking whilst scraping. To get the curve right I compared it to how the Stormcast rider's legs were spread apart as a guide. With the hand that holds the shield I had to keep the Stormcast hand/wrist as they it was attached to the reins piece, but since the shield hides this mostly I decided it didn't need a Marine hand grafting on. The only downsides with using the Dracoths from the Desolator box is that they only come in 2 poses (3 if you decide to buy Vandus Hammerhand for his Dracoth) and cost £40 per box of 2. If you want more dynamic poses or more variety in the poses then the Dracolines in the Evocators box is an alternative. Hope this helps. Link to comment Share on other sites More sharing options...
Kallas Posted October 24, 2018 Author Share Posted October 24, 2018 Hope this helps. Yes, thank you Link to comment Share on other sites More sharing options...
jpwyrm Posted October 25, 2018 Share Posted October 25, 2018 Here's the list i will try tomorrow. I opted for the predators in the end, we'll see how it goes. +++ Space Wolves.2 (Warhammer 40,000 8th Edition) [109 PL, 2000pts] +++ ++ Battalion Detachment +5CP (Imperium - Space Wolves) ++ + No Force Org Slot + Trophies of Fenris (1 Relic) . . Categories: No Force Org Slot Trophies of Fenris (2 Relics) . . Categories: No Force Org Slot + HQ + Bjorn the Fell-handed: Heavy flamer, Twin lascannon . . Categories: Imperium, Adeptus Astartes, Space Wolves, Character, HQ, Vehicle, Bjorn The Fell-Handed, Dreadnought Rune Priest: 2. Tempest's Wrath, 5. Storm Caller, Bolt pistol, Jump Packs, Runic sword . . Categories: Adeptus Astartes, Character, HQ, Imperium, Infantry, Space Wolves, Psyker, Rune Priest, Fly, Jump Pack Wolf Lord: Jump Packs, Storm shield, Thunder hammer . . Categories: Adeptus Astartes, Character, HQ, Imperium, Infantry, Wolf Lord, Space Wolves, Fly, Jump Pack . . The Wulfen Stone: Relic of The Fang + Troops + Grey Hunters: 4x Chainsword . . Categories: Adeptus Astartes, Imperium, Space Wolves, Infantry, Grey Hunters, Troops . . Grey Hunter Pack Leader: Chainsword . . 4x Grey Hunter w/Bolt Pistol Grey Hunters: 4x Chainsword . . Categories: Adeptus Astartes, Imperium, Space Wolves, Infantry, Grey Hunters, Troops . . Grey Hunter Pack Leader: Chainsword . . 4x Grey Hunter w/Bolt Pistol Grey Hunters: 4x Chainsword . . Categories: Adeptus Astartes, Imperium, Space Wolves, Infantry, Grey Hunters, Troops . . Grey Hunter Pack Leader: Chainsword . . 4x Grey Hunter w/Bolt Pistol + Dedicated Transport + Razorback: Storm bolter, Twin assault cannon . . Categories: Adeptus Astartes, Dedicated Transport, Imperium, Space Wolves, Vehicle, Transport, Razorback Rhino: 2x Storm bolter . . Categories: Adeptus Astartes, Dedicated Transport, Imperium, Rhino, Transport, Vehicle ++ Battalion Detachment +5CP (Imperium - Space Wolves) ++ + HQ + Wolf Guard Battle Leader: Jump Packs, Storm shield, Thunder hammer . . Categories: Adeptus Astartes, Character, HQ, Imperium, Infantry, Space Wolves, Wolf Guard, Battle Leader, Fly, Jump Pack Wolf Guard Battle Leader: Jump Packs, Storm shield, Thunder hammer . . Categories: Adeptus Astartes, Character, HQ, Imperium, Infantry, Space Wolves, Wolf Guard, Battle Leader, Fly, Jump Pack + Troops + Grey Hunters: 4x Chainsword . . Categories: Adeptus Astartes, Imperium, Space Wolves, Infantry, Grey Hunters, Troops . . Grey Hunter Pack Leader: Chainsword . . 4x Grey Hunter w/Bolt Pistol Grey Hunters: 4x Chainsword . . Categories: Adeptus Astartes, Imperium, Space Wolves, Infantry, Grey Hunters, Troops . . Grey Hunter Pack Leader: Chainsword . . 4x Grey Hunter w/Bolt Pistol Grey Hunters: 4x Chainsword . . Categories: Adeptus Astartes, Imperium, Space Wolves, Infantry, Grey Hunters, Troops . . Grey Hunter Pack Leader: Chainsword . . 4x Grey Hunter w/Bolt Pistol + Dedicated Transport + Razorback: Storm bolter, Twin assault cannon . . Categories: Adeptus Astartes, Dedicated Transport, Imperium, Space Wolves, Vehicle, Transport, Razorback Rhino: 2x Storm bolter . . Categories: Adeptus Astartes, Dedicated Transport, Imperium, Rhino, Transport, Vehicle ++ Spearhead Detachment +1CP (Imperium - Space Wolves) ++ + HQ + Wolf Guard Battle Leader: Jump Packs, Storm shield, Thunder hammer . . Categories: Adeptus Astartes, Character, HQ, Imperium, Infantry, Space Wolves, Wolf Guard, Battle Leader, Fly, Jump Pack + Heavy Support + Predator: Predator autocannon . . Categories: Adeptus Astartes, Heavy Support, Imperium, Predator, Vehicle, Space Wolves Predator: Predator autocannon . . Categories: Adeptus Astartes, Heavy Support, Imperium, Predator, Vehicle, Space Wolves Predator: Predator autocannon . . Categories: Adeptus Astartes, Heavy Support, Imperium, Predator, Vehicle, Space Wolves Created with BattleScribe (https://battlescribe.net) Link to comment Share on other sites More sharing options...
Dyre Posted October 25, 2018 Share Posted October 25, 2018 Kallas' thanks for taking the time to post your batreps, they are informative for someone coming off a long break. You've mentioned a couple times about thinking about tinkering with your transports- Transports: I’m still tossing up whether more Razorbacks would be better than two Rhino/two Razor, but I’m undecided. The Rhinos are really nice because they’re so disposable/annoying, able to just jump into the fray without particular worry about getting stuck in melee, whereas the Razorbacks would just ramp up my firepower (which is obviously useful). It’d be a relatively simple change (drop Rhinos and Inceptors, add two more AssBacks), but would leave me with some exposed footsloggers. Not sure, any comments/thoughts/ideas? What do you think about running 4 HB razors instead of 2x Rhino's and 2x AssBacks? It's a little cheaper points wise, same number of shots, 12" further range, but -1 str. Link to comment Share on other sites More sharing options...
Kallas Posted October 26, 2018 Author Share Posted October 26, 2018 Kallas' thanks for taking the time to post your batreps, they are informative for someone coming off a long break. No problem, glad you're enjoying them and finding them useful! You've mentioned a couple times about thinking about tinkering with your transports- Transports: I’m still tossing up whether more Razorbacks would be better than two Rhino/two Razor, but I’m undecided. The Rhinos are really nice because they’re so disposable/annoying, able to just jump into the fray without particular worry about getting stuck in melee, whereas the Razorbacks would just ramp up my firepower (which is obviously useful). It’d be a relatively simple change (drop Rhinos and Inceptors, add two more AssBacks), but would leave me with some exposed footsloggers. Not sure, any comments/thoughts/ideas? What do you think about running 4 HB razors instead of 2x Rhino's and 2x AssBacks? It's a little cheaper points wise, same number of shots, 12" further range, but -1 str. HB Razorbacks are ok, a little cheaper per chassis than the AC RB, but part of the list is built around giving the enemy no good infantry targets for their anti-infantry weaponry. If I were to go 4 HB RB vs 2 AC RB/2 Rhinos, then I'd have two footslogging Grey Hunter packs. Now, that's not the end of the world, as they'd more than likely be in cover and probably behind LOS blocking terrain too; further, I tend to drop one unit out early, usually turn one, anyway which means that I'm kind of aware that they're often fine. My main reservation, then, is that it telegraphs my moves a little more - two units are vulnerable, either to indirect fire or to fast units (eg, Venoms with Kabalites) nipping past my core. Starting embarked means I can keep my opponent guessing: am I going to drive up with everything, or am I going to drop units along the way, or am I going to drop everything early? It doesn't sound like much, overall, but it is a factor; perhaps not a huge one, but present nonetheless. You definitely have a valid point though, and it's worth exploring. For reference, my transport iterations are more along the line of more Razorbacks at the cost of other units, such as the Inceptors and/or Bjorn one of them, for example: dropping Bjorn and the Inceptors would let me take 4 AC RBs (more anti-infantry firepower, but no deep strike threat) and 2 LC RBs (more anti-tank firepower, but no Bjorn melee threat). Link to comment Share on other sites More sharing options...
jpwyrm Posted October 28, 2018 Share Posted October 28, 2018 Well, I played Ascension from Eternal War Missions in Chapter approved against my friend's Death Guard. He brought : Typhus 2 basic Chaos Lords Nurgle Demon Prince Tallyman 2 Deathguard squads with blight launchers 14 pox walkers 3 Plague mortar thingy 3 Plague crawlers 2 Plague drones (1 with deathroller 1 with goo flamer) Luck was a little bit more on my side but still - I crushed his army and banked 3+ pts a turn on average. Bjorn, the wolf Lord and wolf Guard battle leaders took care of the heavy hitters while the transports and Grey Hunters soaked incoming damage and the predators softened up the character's target. The whole list truly felt like a well oiled machine, I was impressed. Thank you brother Kallas for the original list and hindsight on how to use it. I'm definitely playing it again soon. Link to comment Share on other sites More sharing options...
Dyre Posted October 29, 2018 Share Posted October 29, 2018 My main reservation, then, is that it telegraphs my moves a little more - two units are vulnerable, either to indirect fire or to fast units (eg, Venoms with Kabalites) nipping past my core. Starting embarked means I can keep my opponent guessing: am I going to drive up with everything, or am I going to drop units along the way, or am I going to drop everything early? It doesn't sound like much, overall, but it is a factor; perhaps not a huge one, but present nonetheless. You definitely have a valid point though, and it's worth exploring. For reference, my transport iterations are more along the line of more Razorbacks at the cost of other units, such as the Inceptors and/or Bjorn one of them, for example: dropping Bjorn and the Inceptors would let me take 4 AC RBs (more anti-infantry firepower, but no deep strike threat) and 2 LC RBs (more anti-tank firepower, but no Bjorn melee threat). Gotcha, appreciate the insight. I think it's hard to get much better than what the list is now, and I think you've said this about the iterations in one of your batreps. You would increase your firepower but moving hurts or giving up shooting by popping smoke. Not to mention the Lasbas vs Bjorn lose the character protection and you almost telegraph what your are going to do with them as they wont want to move too much. But I dont have much recent game experience so, I'm not sure I am much of an authority. Just for reference a quick summary of my first 2k list I've put together since 2012 is as follows- Battalion: WL w/ JP TH/SS RP w/ JP Axe, Runic armor 3x5 GH squads w/ Plasma Gun 3 Inceptors w/ Assault Bolters 6 man LF Squad - 4x LCs 3x Razorbacks w/ HBs (one is for the LF squad to keep them from getting deleted turn 1) 1 Rhino Vanguard: WGBL - JP TH/SS RP - JP, Axe, Armor of Russ 5 wulfen 4 TH/SS 5 wulfen 4 TH/SS wulfen Dread Shield/Claw There are alot of changes I'm thinking about (nervous about fielding a single LF pack, getting the wulfen into combat etc.), but these are the bulk of the models I have put together so far. I've always been a fan of the Iron wolves so the list iteration jpwyrm posted speaks to me. But I'm planning on rolling with this list until CA to see how that may or may not impact Wolves. Link to comment Share on other sites More sharing options...
Kallas Posted October 29, 2018 Author Share Posted October 29, 2018 Well, I played Ascension from Eternal War Missions in Chapter approved against my friend's Death Guard. He brought : Typhus 2 basic Chaos Lords Nurgle Demon Prince Tallyman 2 Deathguard squads with blight launchers 14 pox walkers 3 Plague mortar thingy 3 Plague crawlers 2 Plague drones (1 with deathroller 1 with goo flamer) Luck was a little bit more on my side but still - I crushed his army and banked 3+ pts a turn on average. Bjorn, the wolf Lord and wolf Guard battle leaders took care of the heavy hitters while the transports and Grey Hunters soaked incoming damage and the predators softened up the character's target. The whole list truly felt like a well oiled machine, I was impressed. Thank you brother Kallas for the original list and hindsight on how to use it. I'm definitely playing it again soon. Good job Brother! Death Guard can be a tough nut to crack, and I faced them in the League. How did you find that the list got on against so many hard to kill things? The Predators are damn solid, especially when they're kept cheap - on that note, how did you feel running them without any sponsons? Was the PAC alone good enough, do you feel? I very much like that they fit into the list well, as their presence really ups the stakes on the armour front: do they shoot the transports to get at the occupants who will all be helping to protect the characters and take objectives; or do they go for the Predators, who aren't a huge investment, who will be shooting up key targets? Now that you have a game under your belt with it, how did the list feel to you? Were the characters able to strike at what they needed to? Were the Grey Hunters enough boots-on-the-ground? What did you think of the transport configuration: not enough firepower; too much invested in the Razorbacks? I'm very interested to hear what other folks think of it after piloting it! If you have the time, please let me know My main reservation, then, is that it telegraphs my moves a little more - two units are vulnerable, either to indirect fire or to fast units (eg, Venoms with Kabalites) nipping past my core. Starting embarked means I can keep my opponent guessing: am I going to drive up with everything, or am I going to drop units along the way, or am I going to drop everything early? It doesn't sound like much, overall, but it is a factor; perhaps not a huge one, but present nonetheless. You definitely have a valid point though, and it's worth exploring. For reference, my transport iterations are more along the line of more Razorbacks at the cost of other units, such as the Inceptors and/or Bjorn one of them, for example: dropping Bjorn and the Inceptors would let me take 4 AC RBs (more anti-infantry firepower, but no deep strike threat) and 2 LC RBs (more anti-tank firepower, but no Bjorn melee threat). Gotcha, appreciate the insight. I think it's hard to get much better than what the list is now, and I think you've said this about the iterations in one of your batreps. You would increase your firepower but moving hurts or giving up shooting by popping smoke. Not to mention the Lasbas vs Bjorn lose the character protection and you almost telegraph what your are going to do with them as they wont want to move too much. But I dont have much recent game experience so, I'm not sure I am much of an authority. Just for reference a quick summary of my first 2k list I've put together since 2012 is as follows- Battalion: WL w/ JP TH/SS RP w/ JP Axe, Runic armor 3x5 GH squads w/ Plasma Gun 3 Inceptors w/ Assault Bolters 6 man LF Squad - 4x LCs 3x Razorbacks w/ HBs (one is for the LF squad to keep them from getting deleted turn 1) 1 Rhino Vanguard: WGBL - JP TH/SS RP - JP, Axe, Armor of Russ 5 wulfen 4 TH/SS 5 wulfen 4 TH/SS wulfen Dread Shield/Claw There are alot of changes I'm thinking about (nervous about fielding a single LF pack, getting the wulfen into combat etc.), but these are the bulk of the models I have put together so far. I've always been a fan of the Iron wolves so the list iteration jpwyrm posted speaks to me. But I'm planning on rolling with this list until CA to see how that may or may not impact Wolves. The list looks pretty solid, although I have no experience with Wulfen (and I'm skeptical about them at the moment, due to their cost/method(s) of delivery!), and I haven't used Devastators (or Long Fangs) since...maybe ever, actually?! A few initial thoughts: Wulfen: As I said, I'm a little bit on the fence about these guys. They do have huge damage potential, and with TH/SS they're pretty damn tanky (especially by Astartes standards) - but they cost so much for just five guys, and if they're footslogging they're vulnerable or they cost a heap to transport. On The Hunt is probably the best way to run them; or maybe just shielded behind the vehicles? Wulfen Dread: I have no experience with these, and Dreadnoughts generally aren't particularly amazing but with its speed and the Blizzard Shield it could work quite nicely as a Distraction Carnifex for the other vehicles. Definitely let me know how the Wulfen Dread works out, I'd be interested to see how opponents chose their targets! Inceptors: With the Long Fangs and Wulfen assuming you outflank them), I think you have the reach down (even though both of those are predominantly anti-tank, the Wulfen can easily shred hordes, with how accurate/hard-hitting they are). Along with the HB RBs, you do have a good amount of anti-horde already; if you were to strip out the Inceptors, you could fit in a fourth HB RB which would bring less firepower but more resilient vehicles - and you would probably strip out the Rhino at the same time, which I think (very late night post-9hr Spider-Man session brain maths!) would give you enough points to upgrade them to AC RBs? If so, 4 AC RBs would be absolutely a better investment than the 3 HB RB/1 Rhino/3 Inceptors (all told: 48 AC vs 36 HB-equivalents). Command Points: Personally, I think single digit CPs is quite low for us. Assuming that you plan to use CbtS (which I heartily recommend you do), then your list is going to be down to 6CP off the bat. Even without CbtS (a melee-focused enemy, for example), you're going to burn through them very quickly with Honour the Chapter (brutal on the Wolf Lord/Wulfen), Keen Senses, Wolf's Eye, etc. For the cost of the Inceptors + Wulfen Dread/one unit of Wulfen/something, you could stuff in 3 more GH Packs for a second Battalion for those important CPs for your damage dealing units. I'm not sure which route I would ultimately recommend, and you may well want to try out the list as-is (and would certainly not be wrong to do so!). Grey Hunters/Bodies: Looking at the list, the decrease in GH numbers I don't think is a particular issue - what I do think may be an issue is the spread of your threats: that is, that you have a significant amount invested in units that cannot easily be shielded (the Wulfen) and are, ultimately, still just Marine bodies (albeit with a 3++/5+++!). I think my main point here is that your target saturation is being stretched maybe a little thin - if the enemy can target the Wulfen, they absolutely will: you've got almost a quarter of your list invested in those ten Wulfen, and T4/3++ only actually carries one so far! One of the reasons the Death Squad has been so successful so far is down to the character keyword making them nigh untargetable, or at least very difficult to get a sufficient weight of fire to target them before they can reach something important. All of that said, I have been feeling that I am getting almost a little bit too stuck in my list building at the moment: pretty much every list starts with 6x5 GH and the Death Squad, and then building from there, so I may be a little blinkered. Definitely, absolute use your list, as you wrote it - and please let me know how it goes; while it is a pretty significant deviation from my template (almost insofar as to make it entirely different), you've still got some of the most important central elements in there (embedded characters and mechanised infantry). And please note, my thoughts above are not intended to dissuade you from playing your list(s) as you feel best, simply trying to offer my honest feedback on how to optimise (as I feel may be best) - but I don't claim (or expect anyone to believe) that I am any kind of authority on the subject! Link to comment Share on other sites More sharing options...
jpwyrm Posted October 29, 2018 Share Posted October 29, 2018 Here's a rundown of the units and then an overall of the lists : Wolflord - what a beast! He shaved off 5 wounds off Typhus and destroyed the Demon Prince with Only in Death does duty ends. The Stone is also very useful to unleash the potential of all WGBL Runepriest - he protected the transport in turn one and then promptly died to Typhus after having locked the DP with armour of Russ. I made a mistake in my charge phase and it costed me. He did what was expected of him I guess. WGBL - those guys rocks! Even alone, the storm shield helps keep them alive while the rest of the gang can execute their target and come to help. With Bjorn, I'd say these are the best unit in the list. Bjorn - ... is the Boss! He stayed with the preds for two turns to leverage Kill Shot then proceed to join the centerfield mêlée and smash stuff to pulps. The lascannons are quite valuable in an army with so few AT weapons. Grey Hunters - The fact those guys cost the same as tactical squad marines but get an extra attack and Hunters Unleash is awesome. Sticking them in the transports made sure rhey would survive to reach their intended target or objective. If you choose wisely how and when to commit them, they can kill, take and hold objectives or hold important units in CC. Two of my squads and their Rhino shut down two of the plague mortars, effectively negating their impact for the rest of the game and ensuring my opponent could not recover from mt first two or three turns of scoring. Transports - I think two of each is perfect as is. With the extra storm bolters, even the Rhinos can help clear the chaff for the characters/hunters to reach the important targets behind. For now, I would keep the assault cannon on the razors - weight of fire is good especially on a moving vehicle. Predators - The PAC is a very good weapon overall. The fact that it is flat 3 dmg is probably it's greatest strength since you know exactly what kind of damage output to expect whereas a lascannon or missile launcher can always spite you with a roll of 1 or 2. On top of that, turret-less preds are relatively cheap and if my last two games using them is any indication, they tend to be ignored by my opponent so multiple use of Kill Shot is a very real possibility. The list overall felt so good it was both easy and fun to use. As I said in my last post though, it looked like I was a bit lucky, especially with armor saves. My opppnent on the other hand was plagued by bad luck. I will need to test it against my other gaming partner and his Sisters of Battles or GSC, both very strong lists that usually gets him the win. Link to comment Share on other sites More sharing options...
Kallas Posted October 29, 2018 Author Share Posted October 29, 2018 Awesome, thank you for the write up! It's nice to see Death Guard plagued by something Link to comment Share on other sites More sharing options...
Dyre Posted October 31, 2018 Share Posted October 31, 2018 Definitely, absolute use your list, as you wrote it - and please let me know how it goes; while it is a pretty significant deviation from my template (almost insofar as to make it entirely different), you've still got some of the most important central elements in there (embedded characters and mechanised infantry). Yeah, there are common central elements. I wrote the list about a month ago before I stumbled on your thread, which is why I was intrigued by your take on the army. Alot of the concerns you brought up are some that I've had myself in regards to the wulfen etc.(and my plan was to try and out flank one squad along with the incpetors and maybe a character to two depending also held in reserve. And the Wuflen dread is definitely there for a distraction Carnifex, plus I really just love that model. Lol. Link to comment Share on other sites More sharing options...
Kallas Posted November 14, 2018 Author Share Posted November 14, 2018 Hi folks, Back with another report, this time a friendly but sticking with my League list to keep putting it through its paces. I’d like to take this opportunity to apologise right now for the horrid quality of the pictures; I got a new phone after my last one broke, but I’ve not got a hang of how to take decent pictures with it yet so…the pictures are mostly basically photographic equivalents of smeared crap. Sorry! My list, for reference: Battalion: Captain ‘Wonderboy’ Obregon (Wolf Lord: Thunder Hammer, Storm Shield, Jump Pack, Warlord) Codicier Galvez (Rune Priest: Runic Sword, Jump Pack) Ancient Venegas (Bjorn the Fell-handed: Twin Lascannon) 3 Inceptors (Assault Bolters) 3x5 Grey Hunters (Bolters and Chainswords) Rhino (2x Storm Bolters) Razorback (Twin Assault Cannon, Storm Bolter) Battalion: 3x Lieutenants Cazalla, Quiros and Santillian (Wolf Guard Battle Leaders: Thunder Hammers, Storm Shields, Jump Packs) 3x5 Grey Hunters (Bolters and Chainswords) Rhino (2x Storm Bolters) Razorback (Twin Assault Cannon, Storm Bolter) I took the Wulfen Stone (on Captain Obregon) and the Armour of Russ (on Codicier Galvez). I also chose Storm Caller (to try and reduce damage on the way in, as my list is designed to do!) and Tempest’s Wrath (because it’s good!). For my Warlord Trait I decided to go for Saga of the Wolfkin. Beastslayer, my usual go-to, would be nigh useless as he only had one vehicle. Hunter could be useful, as it would speed me up some, but generally speaking I’ve not really had too much trouble with speed; Warrior Born is a bit meh, although it could be useful if my opponent chooses to take the Eye of the Unseen relic, which would curtail my characters significantly if positioned well. Majesty I don’t rate particularly: it generally only applies to a single buff ability, which isn’t that good, and those abilities are often fine for range. So Wolfkin for the damage dealing it was! My opponent’s traitorous alliance of Dark Angels and Imperial Guard: Battalion: Cadian Company Commander (Bolter, Chainsword) Primaris Psyker (Nightshroud, Psychic Maelstrom) Infantry Squad (Bolter Sgt, Heavy Bolter Team) 2x Infantry Squad (Heavy Bolter Team) 3x Heavy Weapon Squads (3x 3 Mortars – urgh!) Spearhead: Dark Angels Azrael (Warlord – Brilliant Strategist) 7 Devastators (Cherub, 3x Lascannons, 1x Heavy Bolter) 6 Devastators (4x Plasma Cannons) 10 Hellblasters (regular Plasma Incinerators) Vanguard: Dark Angels Ravenwing Talonmaster (Relic – Heavenfall Blade) 3 Aggressors (Boltstorm/Fragstorm) Apothecary Company Ancient (Storm Bolter) 3 Inceptors (Assault Bolters) So, an 11CP reasonably tame Soup list. The Dark Angels do have some teeth, with Azrael making a gunline pretty damn resilient and those Plasma Cannons/Incinerators being nasty (especially with Weapons of the Dark Age). The Guard provide some screening, but I’m hoping that my Grey Hunters can blow through the quickly. The Ancient/Apothecary will be troublesome if they can keep the Hellblasters/Devastators ticking over. Still, seems like a predominantly static list, so my speed and early-game resilience should hopefully carry me into his lines. Mission/Deployment: Mission 1: Seize Ground (6 Objectives in two facing chevrons) Deployment: Hammer and Anvil (lengthways flat) Secondary Objectives: Howling Griffons: Headhunter (He’s got numerous characters, and most of them are pretty flimsy as well as quite frontline so should be fairly available.) Recon (I think I’ll be taking the fight to them, and my list is generally pretty good at scoring Recon.) Marked For Death (There’s not really any other good choice [Old School I don’t think would work, as I’ll likely be rushing forward to close the gap, so my shooting will suffer] so I chose basically the whole DA Spearhead: Azrael, both Devastators, and the Hellblasters. They’re all key damage dealing/lynchpin units that need to be dealt with.) Dark Angels/Imperial Guard: Headhunter (Yuuuup.) Big Game Hunter (Yuuuuuuuup.) Ground Control (Interesting choice, considering my opponent has quite a static army, although if he can take out my mobility early it could turn out to be a good choice as he won’t need to go all that far to claim a fourth objective. We’ll see!) Important Deployment Notes: I won the initial roll off, so I chose my deployment zone. I actually think I kind of messed up here, as I gave my opponent the most bloody perfect castle, and I didn’t really capitalise on my own ruin. If I were to play this over again, I would switch sides. I deployed centrally, with my transports split to either side of the central ruin at the front of my deployment zone. I figured that I would need to get in his face ASAP, so I eschewed the option to hide my vehicles in case I lost the roll off. Characters deploy ready to jump over/through the ruins; Inceptors deep strike; Grey Hunters hide in the tanks. Guard form a screen as the Devastators castle up in the bestest castle ever! Hellblasters, Azrael, Apothecary, Ancient, Talonmaster and Aggressors all stack up on his left flank with a decent view across the low ruin (we were playing the very ruined craters with the small building parts as LOS blocking, but the crater parts not). A very blurry shot of the battlefield: I finish deploying first, as I usually do (although only just: 11 drops to his 13, so was always going to, but if he’d had one less he would have!) and I win the roll off: my opponent fails to Seize the Initiative. Time to ride. SW T1 Movement: Two units of Grey Hunters jump out of the Razorbacks to go sit on the back objectives. The transports all advance up ready to pop smoke, with the left Rhino making a move around the other central ruin to gun for the objective on the far left. Characters jump up behind the vehicles. I think I could have done this movement phase a little better: later on I realise a slight possible error and should have kept more Grey Hunters for my main right-flank thrust; and I could have left some space for the characters to Heroically Intervene through instead of leaving them entirely blocked by the vehicles (although to be fair, the FLY nerf is ing stupid…so there’s that…) I did specifically move the Rune Priest to juuust over 24” away from the Primaris Psyker to keep him from getting a lucky Deny, although this did mildly curtail my vehicles’ movement. I could have done a better job of this, I think, but oh well. Turn 1 Movement Psychic: Rune Priest successfully cast Storm Caller off the bat and popped Cloaked by the Storm for dessert. Nothing was in range/LOS for Smite/Tempest’s Wrath, however, so a fine if uninteresting Psychic Phase! Shooting: All of the transports pop smoke and Bjorn advanced, so nothing at all. I didn’t want to not use the Razorbacks’ smoke, as that could have given him some better shooting into them, and I felt that it would be better to have -2 on all of them to give him no good options. DA/IG T1 So after my pretty uneventful turn: Movement: His Guard screen shuffles up some; the Aggressors move up to escort the Primaris Psyker who intends to use Psychic Maelstrom on Wonderboy! Azrael shifts into the centre a little to give rerolls to the Plasma Devastators; and the Talonmaster moves to the centre to fend off any potential deep strike, as my opponent realised he hadn’t zoned out his backfield particularly well. Psychic: Psychic Maelstrom does go off and I fail to Deny. Ruh Roh. It ends up doing two Mortal Wounds to Obregon, which isn’t ideal but it could have been worse! I had been hoping that he would target a vehicle (due to the buffed up defences not protecting them from it) as then I would have been able to use Armour of Contempt to at least try to negate it, but alas. Shooting: Alright, let’s see how this goes. Aggressors open up on the Rhino, just because, and score a cheeky wound! Hellblasters (with Weapons of the Dark Age), Plasma Devastators (neither of whom overcharged!), and the Lascannon Devastators all open up on the leftmost Razorback…causing a mighty four wounds(!) Hoo boy. Those stacked defences really worked out well. Charge: My opponent decides to charge the Aggressors in on the undamaged Razorback. They do have Power Fists after all. He takes no damage in overwatch and makes the charge. Fight: With some decent hit/wound rolls he gets five unsaved wounds through, doing 8 damage and bringing all three vehicles into combat. In return they cause one wound and the Rhino edges around them slightly to give the Grey Hunters inside an extra inch or two when they disembark. DA/IG Turn One: Round One Score: SW: 2 – DA/IG: 1 Wow, low scoring! We both scored Hold One, with neither of us scoring any other Primaries; but I did pick up my first Recon to get a tiny lead. SW T2 Movement: Left flank, one unit of Grey Hunters jump out to assault the Guard infantry on that objective, the Rhino pushing around the ruin to join them. Right flank: both units of Grey Hunters jump out to assault the Guard infantry; Bjorn moves up; the –ed up Razorback stays in combat to keep the Aggressors from firing overwatch later, the other two transports fall back with the Rhino heading towards the Hellblasters and the Razorback hiding from the Devastators behind the ruin. Death Squad jumps up conservatively to kill off the Aggressors and maybe get stuck into the Guard. I also realised an error I made: I could have had my left backfield unit of Grey Hunters split in between the central/left objectives to give me the bonus objective, so they advanced this turn to close the distance to it. I had previously controlled it with the various characters but of course they moved away, which cost me a point. Psychic: Tempest’s Wrath goes off successfully/isn’t Denied and the Hellblasters get a -1. Smite kills off an Aggressor. Shooting: Various Bolters kill a few Guardsmen, along with the Primaris Psyker; Bjorn pops a couple of the Lascannon Devastators. Not a huge amount, but the first big charge is set up. Charge: Grey Hunters jump on the various Guard Infantry Squads; the left flank Rhino fails its charge, unfortunately; Bjorn musters up some old man speed to jump on to the central objective and massively overkill some poor squishy humans. Obregon and the RP jump on to the Aggressors; WGBLs all fail to reach the Guard to support the Grey Hunters, but they’re reasonably well screened. Fight: RP locks out the Aggressors. My opponent doesn’t interrupt, as he’s only got Guardsmen to fight and a limited pool of CP to draw upon, so Bjorn and the Grey Hunters kill all but about four Guardsmen, claiming the left flank objective and piling in to the Hellblasters on the right (they can still use Implacable to fall back and shoot, but now they’ll be forced to and won’t be able to charge afterwards) – they do, however, kill all but the Pack Leader of the unit that tied them up! Obregon pulps the Aggressors and consolidates forward into the ruin. Hero Pack Leader! DA/IG T2 So I’ve broken his front line, although I took a little bit more of a beating to my Grey Hunters than I would have preferred – as I said earlier, I kind of wish I had kept three units for my right flank instead of having two on each. Movement: Hellblasters fall back Implacably; Azrael shifts a little in the centre; the remaining Guardsmen fall back to their Commander. Inceptors drop down in front of the castle Shooting: Hellblasters just manage to blow away the Rhino (they caused exactly the nine wounds they needed to kill it); Talonmaster drops the screening unit of GH to one model; and then he and the remaining Pack Leader absorb a good amount of additional firepower (the Mortars) before they drop, keeping some of it away from the characters behind; Plasma Devastators use WotDA and try to bring Bjorn down, causing nine wounds, but he tanks them like a boss, passing four of his FNP saves. Hellfire Shells finishes off the crippled Razorback and he doesn’t use his Cherub just yet; the Lascannons pop the flanking Rhino, killing one inside and I avoid the explosion with a reroll. Inceptors open up, dropping the first of the two left flank GH units to just the Pack Leader. Overall feelings: Ouch! Charge: The Talonmaster is in HI range of Bjorn, so decides to charge him first, dodging the overwatch and staying away from the nearby WGBL’s HI range. Fight: Talonmaster fluffs, causing no damage to Bjorn before getting smashed out of the sky and stomped on furiously! Round Two Score: SW: 9 – DA/IG: 6 He scored three(!) on Big Game Hunter, Kill One, and Hold One. I scored Recon again, two Headhunter (Primaris Psyker and Talonmaster), Kill One/More (I killed four, thanks to the Talonmaster in his turn!), and Hold One/More for a good seven! Building up the lead slowly. SW T3 Ok, my right flank is pretty barren now, so I need to deal a good blow to his gunline. Movement: Death Squad jumps up with the Rune Priest sheltering in the ruined corner for a short range, out-of-LOS charged into the Hellblasters. Bjorn stomps up alongside them. The bigger unit on the left flank moves up to take control of the enemy’s central objective while the new Lone Wolf moved to control the left flank objective while being protected by the character keyword! The surviving Razorback moves up to hose down the Plasma Devastators. The Inceptors drop down above the central Grey Hunters. Psychic: I manage to cast Storm Caller, which might help my out-of-cover characters against the Mortars that will inevitably rain down on them. Tempest’s Wrath and Smite have no LOS, because ruins. Shooting: Razorback gets Keen Senses and kills a few Devastators; the Inceptors and Bjorn join in, wiping them out. The Grey Hunters kill off a couple of Lascannon Devastators too. Frag Grenades from the WGBLs/WL finish off the last few Guardsmen: I specifically ignored the Hellblasters, as I didn’t want to give him the opportunity to shoot back with the Standard. Charge: Rune Priest makes the charge on the Hellblasters but can’t quite tag Azrael too. One WGBL gets shot up by Azrael in overwatch and then fails his charge! The second reaches him, as does Bjorn; the third and Obregon go in on the Hellblasters. Death Squad – Attack! Fight: Hellblasters get Armour of Russ’d. Bjorn goes to splatter Azrael but, with the help of a reroll, he tanks all of them on his 4++! That does put him down to 1CP, so he can’t now interrupt with Azrael, but he does then tank another 3 of the WGBL’s 4 Thunder Hammer hits, GAH! WL and WGBL kill five of the Hellblasters, due again to Azrael’s bloody 4++ bubble! Grrrrrrrrrr. Instead of being wiped out, they’re still a big threat. I do keep them in combat, and he can’t afford Intractable anymore, so that’s something. Rune Priest piles in on Azrael, but fails to damage him. In return Azrael causes a few wounds to both the RP and the WGBL, but thankfully fails to kill either. Well, not quite as successfully as I was hoping! For those keeping track (or trying), that was ten out of sixteen successful 4++ saves! DA/IG T3 Movement: Everything falls back to give the Mortars and Lascannon Devastators the space they need to blow my characters away. Inceptors sweep up behind them too. The Apothecary heals Azrael for two wounds – urgh! Shooting: Hellfire Shells, for his last CP, on Bjorn fails to kill him, but then the Cherub picks up a further three – I managed to save two of those three and consider rerolling, but ultimately decide against it, as there are three Lascannons pointed at two of the other characters (and one at the Razorback), so a reroll there is more likely to work out. As it turns out, that was the right call, keeping the Rune Priest alive a little longer, although the Razorback takes four more wounds, dropping it to two left. The Mortars begin raining down and, when the smoke clears, the RP and one WGBL are down; the WL and one WGBL are down to one wound with the other on two. OUCH! Charge/Fight: His Inceptors had strayed a little too close to the Death Squad, so they charged in but failed to achieve anything and got pulped by Obregon, which lets him finally complete his Deed of the Wolfkin. Round Three Score: SW: 15 – DA/IG: 10 He scored three on Headhunter (Bjorn, RP and a WGBL) and Kill One. I scored Recon, Marked For Death (Plasma Devs), Kill One (we both killed two units), Hold One/More, and the bonus. SW T4 That was a painful turn, and I really wish I had had that third unit of Grey Hunters on the right flank to soak up the majority of the Mortars/Lascannons. Alas. Movement: The ragged remainders of the Death Squad jump up to try and finish off the Hellblaster block. Inceptors jump forward, intending to charge into the Mortars in the lower portion of the castle. Shooting: Razorback, Inceptors and Grey Hunters manage to bring down all of the remaining Lascannon Devs! The three Death Squaders rain Krak Grenades on Azrael, but he doesn’t care. Charge: The WGBL on one wound begins by charging Azrael and the Apothecary, managing to tank their hits on the way in. Obregon guns for Azrael and the Ancient; the last WGBL goes for Azrael alone. The WGBL on Azrael goes all in (five attacks, thanks to Obregon’s presence!) and the dastardly dress wearer’s luck finally runs out, getting smeared across the Hellblasters – he fails his Standard roll, just to add insult to injury (while he had good luck with Invulnerables, he made one out of six Standard ‘attack again’ rolls). Obregon smushes the Ancient and consolidates into the Hellblasters; the last WGBL kills the Apothecary and joins Obregon. The Hellblasters fail to kill off Obregon. And yes, I did forget to charge with the Inceptors! DA/IG T4 My opponent concedes, at this point, as he is quite far behind on the scores and has very little left – the Hellblasters and Mortars will likely be unable to kill off the backfield Grey Hunters before getting tied up/killed by the forward units. We theory out his turn as killing Obregon and the critically wounded WGBL, as the Mortars should have enough dice to do that. Final Score: SW: 25 – DA/IG: 13 He scored the last Headhunter (theorised!), Kill One, and Hold One (theorised – when the Hellblasters fall back to open up the Death Squad, they can claim the nearby objective). I scored two HH (Apothecary and Ancient), two MFD (Las Devs and Azrael), Hold One/More/Bonus, and Kill One/More, plus the final Recon for a whopping nine in one turn. Post-Game Thoughts: So, I feel like I definitely made a few mistakes in this game, predominantly in positioning/resource allocation: I should have had more Grey Hunters alongside the Death Squad, as that could have really helped keep them in better nick for the later turns. It was ultimately unnecessary, but it’s worth noting that that was a subpar play. I also feel like the back two units weren’t completely necessary – I could have had one unit strung out between two objectives instead and had a fourth unit up front. My first turn movement could have been done with better precision: I could have left a couple of channels between the transports and had my characters up closer to Intervene against the Aggressors, which would have given them more upfield movement and removed his unit – the RP could have been there too, as the threat of Psychic Maelstrom/Denial wasn’t particularly high, I was simply being too cautious; it could have allowed me to put up Tempest’s Wrath on one of his shooty units too. In my turn two, I left Bjorn very exposed. He could easily have gone down with a little worse luck (or slightly better luck on my opponent’s part). Again, the third unit of Grey Hunters on the right (or even just disembarking and moving in towards the middle) would have helped keep him safer, and maybe just not charging him in! I did waste a CP on the Lone Wolf Stratagem, which was ultimately pretty worthless on a barebones GHPL, but it was nice to actually use it! But the list functioned well again. The built in redundancy of the list was solid: Grey Hunters lasted the battle again, with 15 surviving to the very end! They were important for breaking the Guard screen, and in turn screening my characters even if most of them died in the process. I think I could have used them better in this battle, but they still performed admirably. Transports and Rune Priest were excellent in the first round, their combined resilience tanking a lot of potent anti-tank firepower – it actually really demoralised my opponent! I’m quite used to not doing much in the first round or two, and am used to having to claw back a lead from there, but this time they happily resisted death. Death Squad was still stomping things, although the 4++ bubble of Azrael’s is super annoying! I do think I could have utilised them better: I split them up a fair amount, and I could have simply dumped them all into the Hellblasters to completely remove them instead of divvying up their attacks; or alternatively gunning for the Devastators in the central castle and then working outwards from there. Regardless, they were still powerful pieces and took a lot of punishment to bring down – the main thing is that they’re still very vulnerable to masses of low AP fire: the Mortars were doing tons of work this game, so I greatly look forward to their (probably) price increase in CA (and I really bloody hope they get upped, as they’re stupidly cheap and stupidly effective for their minimal cost!) Thanks for reading folks, this was a bit of a messy battle! As always, any comments, criticisms and questions are welcome. Cheers, Tom. Link to comment Share on other sites More sharing options...
TiguriusX Posted November 14, 2018 Share Posted November 14, 2018 Excellent report I think you have a great list and love hearing how you put it to work against various opponents Link to comment Share on other sites More sharing options...
Kallas Posted November 21, 2018 Author Share Posted November 21, 2018 Hi folks, another battle report for you fine, chilly people. This one is my fourth game in my club’s league (I’ll be playing five total to finish playing everyone in my division), and my sixth game with my current list! This week I was facing down pure Imperial Knights, so it was going to be an odd fight, but one I felt I could manage. I apologise again for the crappy pictures (and that they’re not particularly cohesive), I think my phone camera is not so good! My list, for reference: Battalion: Captain ‘Wonderboy’ Obregon (Wolf Lord: Thunder Hammer, Storm Shield, Jump Pack, Warlord) Codicier Galvez (Rune Priest: Runic Sword, Jump Pack) Ancient Venegas (Bjorn the Fell-handed: Twin Lascannon) 3 Inceptors (Assault Bolters) 3x5 Grey Hunters (Bolters and Chainswords) Rhino (2x Storm Bolters) Razorback (Twin Assault Cannon, Storm Bolter) Battalion: 3x Lieutenants Cazalla, Quiros and Santillian (Wolf Guard Battle Leaders: Thunder Hammers, Storm Shields, Jump Packs) 3x5 Grey Hunters (Bolters and Chainswords) Rhino (2x Storm Bolters) Razorback (Twin Assault Cannon, Storm Bolter) Relics/Warlord Trait: I knew my opponent would be bringing a Valiant (as our lists are posted up before we fight, and we can only change when we lose a game), so I knew the Shieldbreaker Missiles could be an issue – so I took a bit of a different approach this time. Armour of Russ went on my Wolf Lord, as with 5W he had the best chance to survive an Oathbreaker-guided Shieldbreaker Missile attack, and the extra Invulnerable Save on the Rune Priest would mean little against the AP-4/no Invulns. I, of course, still took the Wulfen Stone, this time on one of my Battle Leaders – again, to somewhat spread out my threats, so that it’d be harder to prioritise which models to target (if he actually did use the stratagem). Warlord Trait was obvious: Beastslayer. With nothing but vehicles, it would be insane to take anything else! Imperial Knights: Super Heavy Detachment: House Griffith Valiant (1 Siegebreaker Cannon/Four Shieldbreaker Missiles, Relic – Traitor’s Pyre, Warlord – Ion Bulwark) Gallant (Heavy Stubber, Ironstorm Missile Pod, Relic – Armour of the Sainted Ion, Exalted Court - Landstrider) Paladin (Heavy Stubber, Stormspear Rocket Pod) 2x Armiger Warglaives (Heavy Stubbers) So, a compact list as you’d expect from Knights. The Valiant is obviously very dangerous with Traitor’s Pyre being basically instant death to pretty much everything, and the Shieldbreakers potentially ripping out a character without issue (although it would be three of his seven CPs). The Gallant is another big, dangerous threat, as his melee power can easily overwhelm any given Storm Shield and the d3D of the Knightly tap dance would quickly rip apart my characters. I figure that if I can isolate/destroy the Valiant quickly, then I should have a pretty good run of the field – the Valiant is the main shooting threat, and although the others all pose various threats none of them have the same mass shooting power/volume. Mission/Deployment: Mission 2: Cut to the Heart (one central objective, one placed in each of our own deployment zones) – Bonus: Control central and enemy objectives. Deployment 3: Search and Destroy (quarters) Secondary Objectives: Howling Griffons: Titanslayers – I’ll get three of four points for killing just the Gallant or Paladin, so it’s kind of a no brainer. Kingslayer (Valiant) – it’s a huge threat and needs to go down. It’ll give out the full four points quickly, too, which is nice if don’t manage to destroy it easily. Recon – a simple one, and one that my list should generally be capable of reasonably easily. Imperial Knights: Headhunter – this one is obvious, especially as my damage dealers are my characters and need to be in his face/under his feet! Butcher’s Bill – this one could be alright for me, although it depends on how easily he cracks my vehicles open. Behind Enemy Lines – an odd one, I thought. He is fast, especially the Warglaives, but it requires them to be wholly within my deployment zone (which is quite difficult, due to it being quarters) at the start of his turn. So going in, I feel like I can win this, but it very much depends on how he deploys his Knights, how he moves them up, and how the mission/terrain will restrict those movements. It’s not going to be easy, but it could rapidly go in favour of one of us, depending on how initial engagements unfold. Deployment Notes: I began the deployment, as I lost the initial roll – I begin with the Inceptors in deep strike. I put my vehicles mostly obscured behind the ruin in the centre of my deployment zone to keep them not too far back, but also a little more resilient to his shooting (although if he goes first, it’s probably bad either way) as well as hopefully drawing in his Valiant as much as possible – the Death Squad were concealed inside the forward ruin, ready to jump on any forward Knight (and if he wanted to use the Oathbreaker stratagem, he’d be able to shoot them anyway – this way they’re forward deployed but not vulnerable to any other shooting). His Knights deployed in a line, with the Valiant firmly front and centre. Paladin on my right; Gallant on my left; Armigers inserted between the Valiant and the Questoris. Deployment Overview: So with my opponent easily, and obviously, getting the +1 we roll off: he wins the roll off (I rolled a 1), and then I Seize successfully! Yes! SW T1: Ok, Seizing the Initiative is a big break for me! It lets me put up my buffs/debuffs and position properly. Movement: Rune Priest moves up to just within 24”, ready to target the Valiant with Tempest’s Wrath. Vehicles and Bjorn advance up, with the Rhinos getting some good rolls. Death Squad balances itself on a knife edge, almost the closest targets for the Valiant, but the ruin should force the Rhino to be closer. Psychic: Tempest’s Wrath goes off, debuffing the Valiant, and letting me trigger Cloaked by the Storm. Storm Caller fails, but it’s less important overall. Shooting: Just smoke! Lots of smoke. IK T1: Movement: Valiant moves forward, which I feel is good for me. One Armiger falls back to his deployment objective; the other Advances, with Landstrider up close – presumably ready to Full Tilt into my lines. Gallant follows, tucking itself in beside the Valiant. Paladin swings wide around the central ruin. Shooting: Between Smoke, Cloaked by the Storm and Tempest’s Wrath, his damage is minimal. The Valiant deals six damage to the front Rhino with Traitor’s Pyre, but is otherwise ineffectual; the Paladin/Gallant put four wounds on the other Rhino. Charge: The Armiger does indeed use Full Tilt and declares only against the injured Rhino, easily reaching it. Due to its large base, however, Obregon and the Wulfen Stone WGBL Intervene. Fight: Armour of Russ shuts down the Armiger, who gets hammered down. Unfortunately, I fail to trigger Beastslayer (I attacked with Obregon first, hoping his five attacks would kill it, but failed – should have done it the other way around, derp!) Round One Score: SW: 2 – IK: 1 Very low scoring first round. I scored Hold One and Kill More (thanks to the Armiger in his turn). He scored Hold One with his backfield Armiger. SW T2: Ok, so it’s a good start. He’s not busted open a vehicle yet, so Butcher’s Bill has yet to get off the ground, and I’m in a position to mob the Valiant with Hammers. Movement: Death Squad jump forward, with the Wulfen Stone able to jump across the ruin to be out of LOS of the Valiant when he charges. Most stuff shuffles a little, with the left Rhino advancing again to try and get Recon live. Psychic: Tempest’s Wrath goes up on the Valiant again (in case I don’t bring it down), and I also manage to get a Super Smite off, causing 6(!) wounds to it! Nice! Shooting: Bjorn shoots at the Gallant who Rotates Ion Shields (I regret this: I wish I’d targeted the Valiant, as if he’d Rotated it would have cost 3CP, further draining his limited CP), but deals not damage. Assault Cannons deal a couple of wounds to the Valiant. Charge: Alright, this is the big one! I will note at this point, my opponent and I are tilted to various degrees: my opponent because he lost an Armiger and 2CP for nothing; me because my opponent is being very salty (which is kind of understandable) but also because I feel a little slighted at my opponent questioning a lot of my stuff (Armour of Russ and 6” HI, which is kind of ok; but also the S9 of Lascannons?!) – it felt a little annoying, a bit grasping-at-straws behaviour. This will be slightly important: My Wulfen Stone WGBL, who is out of LOS of the Valiant, attempts his charge to lock it down. Due to the tilting, I didn’t properly measure and just accepted the rough measurement of needing to roll an 8 for the charge. I roll a 6 and 1, then reroll the 1…into another 1, failing. Grr. That’s extremely annoying, as now the Valiant will have its full overwatch available for my other two WGBLs and Wolf Lord. Second WGBL attempts, tanking everything without damage and only needs a 6 for his charge. He promptly rolls a 5. Grrrrrr. I think it may have actually only needed a 5, but again due to the tilting I didn’t take the time to measure properly. Third WGBL attempts: immediately gets roasted alive by Traitor’s Pyre. Obregon attempts: same, deader than Abaddon’s credibility as a good general. Well… ! IK T2: Movement: Valiant and Gallant come in further; Paladin continues around the ruin. Armiger moves off the backfield objective to try and burn down the Wulfen Stone WGBL. Shooting: Both Rhinos are killed between the Valiant, Paladin and Gallant, although their sacrifices keep the RP and WGBL inside the ruins alive. Charge: Gallant charges Bjorn and the disembarked Grey Hunters, but can’t physically fit to get into Bjorn (but does mean HI-ing into the Gallant is risky/suicidal). Valiant charges the RP, staying just far enough away from Bjorn to stop him from HI-ing in too. (Minor/actually probably major note: I helped my opponent position, as I’m trying to push the limits of the list, but this alone probably sealed this game against me. But at least I can say I wasn’t being a total arse!) Bjorn HI’s forward, towards the Valiant and not into melee with the Gallant – he won’t be attacking, but he’ll be in position next turn. The WGBL in the ruin (non-Wulfen Stone one) HIs on to the Valiant. Fight: Valiant tap dances all over the RP first; I don’t bother interrupting, so the Gallant does the same to the Grey Hunters. WGBL deals some damage to the Valiant. Round Two Score: SW: 7 – IK: 8 Scores are still close, but I’ve lost a lot of my damage output. I scored three points on Kingslayer (thanks to the RP’s Super Smite and some Hammering); as well as Hold One/More (thanks to the Bjorn and the WGBL’s HIs putting them within 3” of the central objective!) He scored Butcher’s Bill twice (once in his Charge Phase…); three on Headhunter; Kill One/More. SW T3: I’m not completely out of the game. I still have two WGBLs and Bjorn, who can bring down the Knights in the centre, and then hopefully utilise character protection to get them in on the remaining Paladin/Armiger. Movement: Bjorn stays still, one Razorback moves up to the centre; one of the disembarked squads pushes forward towards the central objective, another swings around to grab Recon. I drop the Inceptors down in that same quarter, ready to just pepper the Gallant. Shooting: Assault Cannons, Assault Bolters and Lascannons strip several wounds off the Gallant. Charge: Bjorn charges the Gallant and Valiant, but chooses to not go into melee with the Valiant (I was incorrectly trying to use Honour the Chapter later, to avoid Bjorn getting stomped, but more on that later…) Wulfen Stone WGBL charges the Valiant. Fight: Bjorn finishes off the Crusader with four failed saves (it had about 11 wounds left, at this point). My opponent uses the Valiant Last Stand Stratagem to have the Crusader try to tap dance on Bjorn, dealing four wounds but thankfully not finishing him off. I choose to not consolidate Bjorn into melee with the Valiant, which is a big mistake – more on that later! The two WGBLs drop the Valiant to 1 wound remaining, and it fails to do anything to them, due to hitting on 6s. IK T3: Movement: Paladin swings further round, ready to charge the Grey Hunter squad that has been sitting in a ruin on my back objective for the whole game. The Armiger moves up to go after Bjorn (my mistake for not putting him in melee, where the Thermal Spear wouldn’t be able to target him!). The Valiant, due to degradation, is unable to fall back, thanks to the Razorback and central Grey Hunters successfully blocking him in. Shooting: The Armiger kills Bjorn with the Thermal Spear – I considered using Only In Death, as it’s possible that I could have used it to have him Fight; my opponent was a dick here, which annoyed me greatly. I end up not using it. Paladin shoots up the central Grey Hunters. Charge: Armiger charges the Wulfen Stone WGBL; Paladin charges the backfield Grey Hunters. Fight: Paladin tap dances on the Hunters. Armiger kills the Wulfen Stone, who then uses Only In Death. I split my attacks (a mistake, again), with one on the Valiant to try and finish it, and three on the Armiger. I cause three damage to the Armiger and kill the Valiant. Naturally, the Valiant explodes. Naturally, this kills the last WGBL. Of –ing course it does. Round Three Score: SW: 14 – IK: 14 Scores are tied, but he’s got a full health Paladin and a damaged Armiger to my Razorback, about ten Grey Hunters and three Inceptors. The game is going to be his, for sure. I scored the last Kingslayer point; three on Titanslayer against the Gallant; Kill One and Hold One (on my turn). He scored the last Headhunter with Bjorn; another Butcher’s Bill; Kill One/More; and Hold One/More (at the end of the round I wasn’t on any objective, while he was on the central one). SW T4: This has gone horribly, because of a few important dice rolls going completely against me. Yay. Movement: Not much to do, Inceptors roll low so can’t reach his objective. Shooting: Literally nothing happens – the Razorback flubbed miserably, and the Inceptors went too far to be useful, as they were hoping to hit his objective next turn. IK T4: Movement: Armiger and Paladin move in to kill the Razorback and its passengers. Shooting: Razorback gets battered but manages to survive the storm of fire. A couple of small, scattered units of Grey Hunters aren’t so lucky. Charge/Fight: Razorback gets split open, with the Grey Hunters spilling out to steal the central objective away from the Armiger. Round Four Score: SW: 14 – IK: 19 I scored…sweet all. He scored Kill One/More; Hold One; Behind Enemy Lines; and his final Butcher’s Bill. SW T5: Inceptors jump on to his objective. That’s it. IK T5: Armiger and Paladin shoot up the Inceptors, killing two; then they proceed to kill off the last Grey Hunters on the central objective. The Inceptor Pack Leader flees, on a double six to have me tabled. Round Five Score: SW: 15 – IK: 23 I managed to score Hold One (I think I actually scored the Bonus, as I had a Grey Hunter on the middle one at the end of my turn, but I forgot). He scored the four Primaries. Post Game Thoughts: Siiiiiiiiiiigh. Dice can off. I don’t like blaming dice, but there are times when it’s important to note when they play a big part in a game – and in this game they certainly did. Failing my out-of-LOS charge was a big one. It wasn’t guaranteed, of course, but the reroll still failing was a huge element of this game. Failing the next charge, who had survived the overwatch, was also a huge kick in the teeth. Losing a WGBL and Wolf Lord to overwatch was basically the game done. From there it would only be a downward slide, and it was – although there were moments where I could have potentially pulled it back, if… His Knights hadn’t decided to explode all over my remaining heavy hitters (and killing them with it). 3d6 auto-hitting 7/-2/2 guns. Now, I definitely noticed myself making a few mistakes: Bjorn, in Round 3, should have jumped in to combat with the Valiant. This would have saved him from the Armiger’s Thermal Spear and meant that he had a good chance of surviving to kill off the Armiger (and maybe further down the line, the Paladin). No guarantee there, of course (he may have just died from the explosion, considering how the dice were going), but it could have been a significantly different game. After my first two failed charges and one death, I think I should have held off on the Wolf Lord’s charge. He almost certainly would have died to the Traitor’s Pyre in his turn, but it could have saved the Rhino and just been causal cascade to change the way the game played out. As it was, I was definitely tilted and I think that charge was ill-advised. When my Wulfen Stone WGBL died, I should have gone all-in on the Armiger. It’s not likely that it would have killed it alone, but he may have, and it wouldn’t have triggered the Valiant’s explosion roll yet. It may not have exploded later (because dice aren’t predetermined!) and the other WGBL would have surely killed it anyway. I feel like I should have moved up with the vehicles together: I didn’t get as much Recon as I needed to, and I could have (maybe) used the Razorbacks/Rhinos to absorb overwatch (although the Valiant’s bull array of guns is ridiculously good for killing chargers). Right, I need to get off of this self-pitying/being too angry train. Last bit then: I feel like I had a good grip on the game, and dice screwed me. That might be overstating it a little bit, but I definitely got screwed on an important turn. Ok, so thoughts on the list, as I’ve been considering various iterations for the future: I’m not sure how much to invest on the transports. Obviously a lot of their job is to absorb damage for the squishy, ObSec Grey Hunters inside, but sometimes the Rhinos don’t feel useful. In this game, the Rhinos weren’t really able to block overwatch, as they would easily die to a Paladin/Gallant in melee, and the Valiant (the main thing to shut down) would happily murder them in overwatch. The Inceptors are nice to have in the bag, and they do make a decent counter-deployment unit. But they’ve rarely done much that was valuable. Those 135pts would be invested into either another Wolf Lord or Razorback. I think the core of the list I solid, but I need more resilient threats. The characters are potent but they’re still, ultimately, very fragile. Bjorn is solid, but no Invulnerable makes him...well, vulnerable! I could potentially switch out the Razorbacks and Inceptors (for a third Rhino) and then bring in a Dreadnought(s), or possibly a Whirlwind Scorpius (plus Elite tax) for some additional threat from another vector. On the Scorpius thread: I’ve noticed a distinct inability to threaten indirect fire units, such as Imperial Guard Mortar Heavy Weapons Squads. They’re not always a big threat, but en masse they can be an issue through sheer weight of fire (as in my last game when they were peppering my characters). A Scorpius would be a good answer to them (6/-2-/2 would rip through two squads a turn) and be a useful supporting fire unit. Long Fangs and Vindicators are other units I’ve been considering for inclusion. A trio of Vindicators would double down on the armour column style of the list, bringing 33 T8 wounds, which can use Linebreaker Bombardment to get around (some) LOS blocking terrain as well as punish large clusters of enemies (such as my game vs Death Guard). They’re also able to fire while in melee, which is not to be sniffed at, as they could use LBB, charge in to block overwatch, and then still be able to use LBB in future. Further, targeting the Vindicators means the Rhinos and Grey Hunters suffer less attrition, meaning my objective control will be more resilient. Long Fangs are a solid unit, and they can really amp up my ranged firepower – even a unit of 4/5 Heavy Bolters would be a good unit for anti-horde work and give access to Hellfire Shells while not breaking the bank; and Lascannon Long Fangs are well known for their good anti-tank power, although they become expensive quickly. They’d also be able to be transported, so they’d fit in to the generally gameplan, provided I bring them some transports. Anyway, I’ve rambled on/bitched enough for one day. Any thoughts, comments and criticisms are welcome – I would very much like some feedback on what you think might make a good iteration for this list: do you think Vindicators (which has been discussed before, elsewhere) would fit? Any other units that I haven’t mentioned. Cheers, Tom. Link to comment Share on other sites More sharing options...
Rune Priest Jbickb Posted November 21, 2018 Share Posted November 21, 2018 My recent thoughts on rhinos is that they are a bit over coated for what you get. They are a nice box for troops but their damage output is non existent. I've been pretty razorback heavy as a result as they still protect a squad and impact the game elsewhere. Link to comment Share on other sites More sharing options...
TiguriusX Posted November 21, 2018 Share Posted November 21, 2018 Valiant is a tough nut to crack in melee and your list simply has few options available The LOS hidden charge was 100% the right move but dice failed. Nothing you can do. Total hindsight general here but the tricky way to get past the overwatch using your list would be setup a HI by fighting the other knights and drawing the valiant closer or even a fight again stratagem to consolidate in if you set it up with your first fight phase (given your salty opponent this would likely not go over well) Next best option was to ram your transports down his throat and hope he rolled poorly The best weapon against knights is terrain...specifically getting infantry in buildings or ruins a knight cant reach or shoot I wouldn't make major changes to your list due to a single bad match If you are thinking alternate ground transportation a LR crusader is possible but you lose the target saturation and transport capacity that make your list work Link to comment Share on other sites More sharing options...
Kallas Posted November 22, 2018 Author Share Posted November 22, 2018 My recent thoughts on rhinos is that they are a bit over coated for what you get. They are a nice box for troops but their damage output is non existent. I've been pretty razorback heavy as a result as they still protect a squad and impact the game elsewhere. I'm a little on the fence about the Rhinos. On the one hand, they're not too expensive and they are sturdy (considering their cost), which is good for protecting transported troops and for absorbing overwatch/body blocking in general. On the other hand, as you say, they don't generally do anything; although that's debatable as any fire directed at them is not aimed at more important things. I think Rhinos are good when they're included alongside other armoured targets, such as Razorbacks, Predators, Vindicators, etc - target saturation is important, and Rhinos are good for reaching that saturation point. They generally don't kill much, but they don't necessarily have to kill anything to be useful. Razorbacks are, however, simply great. I need to get some more Assault Cannon turrets, and maybe some Lascannon turrets too. Valiant is a tough nut to crack in melee and your list simply has few options available The LOS hidden charge was 100% the right move but dice failed. Nothing you can do. Total hindsight general here but the tricky way to get past the overwatch using your list would be setup a HI by fighting the other knights and drawing the valiant closer or even a fight again stratagem to consolidate in if you set it up with your first fight phase (given your salty opponent this would likely not go over well) Next best option was to ram your transports down his throat and hope he rolled poorly The best weapon against knights is terrain...specifically getting infantry in buildings or ruins a knight cant reach or shoot I wouldn't make major changes to your list due to a single bad match If you are thinking alternate ground transportation a LR crusader is possible but you lose the target saturation and transport capacity that make your list work Yeah, the Valiant is a significant ball ache to deal with. Failing the first two charges really bugged me, and it was at a point in the game where I was frustrated by my opponent's attitude which just made it worse. Losing the two characters afterwards was just a big mistake that I should have avoided. I'm not sure if setting up HI would have worked particularly, as the Valiant has some much firepower that, once the Smoke/CbtS has worn off, it'll start just blasting through my units quickly. Given the positioning I had moved in to to try for the no-LOS charge/follow up, I would have lost my Wolf Lord to the stupid Traitor's Pyre, and that would have been the Armour of Russ gone, at which point the Gallant and Valiant just start rolling up the middle. Additionally, I'd already pulled a HI on him early in the game vs his Armiger, so he more likely would have simply charged in anyway and been able to just tap dance over my guys. Pure Knights aren't necessarily broken, but they're :cuss -ing annoying to fight against - yay, all of my non-anti-tank firepower is completely worthless As for ramming transports down his throat: Traitor's Pyre, plus the massive array of other guns, is likely to just blow through them on overwatch - and in this game in particularly my up-front Rhino was down to only four wounds remaining, which would basically auto-die to the overwatch. Against a Castellan, Crusader or any other Knight, absolutely; but the Valiant is insane - hell, if that Harpoon hits in overwatch then the Rhino is all but guaranteed to die (basically if they fail the wound roll). Terrain, yeah. It really bugged me actually: at one point my opponent was actually questioning Infantry moving through ruins - no, twice. Once when I dropped a unit of Grey Hunters on my backfield objective, and then again when I was trying to charge the Valiant. I think I pulled my Codex and rulebook out half a dozen times (including to show him the Strength of a :cuss -ing Lascannon!) I think it has tilted me, out of game, losing to dice when I'm pretty sure I was a substantially better (mechanically speaking) player. Grrr, need to stop getting hung up... Anyway, yes, ruins are good - my opponent got to choose his deployment zone, which was unfortunate - I think I actually would have preferred to have the side he chose, since I could have used that central ruin and the one to the right (well, my opponent's right flank) for some anti-overwatch charges. +++ For list changes, I'm going to stick with the core principle of the list (ie, mechanised infantry) and I'm not going to change too much, I'm just looking for ideas on how to iterate - not on a complete redesign! I am slightly at a bottleneck, in that I'm currently waiting for some funds which should allow me to grab basically whatever units I want to expand with, but currently have a limited pool to draw from. I'd quite like to run a couple of small units of Wolf Guard, possibly with Hammers/Fists, possibly TDAWG, and possibly utilising Land Raider(s) of some form - but the bottleneck kicks in and I don't have many of those things! I'm also lacking in Razorback turrets, although I could use Predator Twin Lascannon turrets as Razorback Twin Lascannons. I'd really like to try my current list, but switch out the Inceptors and Bjorn for three Vindicators, as I feel like that has some really good potential. I think I'll ask around my club and see if I can scrounge up some to borrow! Link to comment Share on other sites More sharing options...
Rune Priest Jbickb Posted November 22, 2018 Share Posted November 22, 2018 @ Kallas I guess the point I was really trying to convey was not that rhinos are useless, as you say they are better being shot than the rest of your army. It was more if I'm going to pay for the chassis why not put a better gun on it. Even if it's just a 2x heavy bolter for 15 more points I see no reason not to pay it in exchange for the enhanced damage output and it's still a win if they shoot it over a pricier tank. Link to comment Share on other sites More sharing options...
Kallas Posted November 22, 2018 Author Share Posted November 22, 2018 @ Kallas I guess the point I was really trying to convey was not that rhinos are useless, as you say they are better being shot than the rest of your army. It was more if I'm going to pay for the chassis why not put a better gun on it. Even if it's just a 2x heavy bolter for 15 more points I see no reason not to pay it in exchange for the enhanced damage output and it's still a win if they shoot it over a pricier tank. Ah, I get you, and that is a pretty reasonable position. Honestly, if I had six Assault Cannon turrets, I'd try out six Twin AC Razorbacks! Link to comment Share on other sites More sharing options...
Rune Priest Jbickb Posted November 22, 2018 Share Posted November 22, 2018 Yeah I'm with you there, I only have 2 so I heavy bolter more often. My 6th has a lascannon glued on so I usually end up taking one las cannon. Link to comment Share on other sites More sharing options...
Kallas Posted December 3, 2018 Author Share Posted December 3, 2018 Ok, no new battle report just yet, but I have one lined up against Tau tomorrow. I'm going to try out a slightly modified list (since I've now played a good amount of games with current one!) Battalion Wolf Lord (Thunder Hammer, Jump Pack, Storm Shield; Warlord) Rune Priest (Runic Sword, Storm Bolter, Jump Pack, Psychic Hood) 3x 5 Grey Hunters (Bolters and Chainswords) 2x Razorback (Twin Assault Cannons) 2x Rhino (2x Storm Bolters) 3x Vindicator Battalion 3x Wolf Guard Battle Leader (Thunder Hammer, Storm Shield, Jump Pack) 3x 5 Grey Hunters (Bolters and Chainswords) 1741 (honestly can't really find much to spend the last 9pts on!) 13 CP (before Relics) It's fundamentally the same: a core Rhino rush with all of the infantry being transported. That part I know is solid, as it is resilient and can put the Grey Hunters on objectives as needed, or in the enemy's face if I need to chop down some chaff. The main difference, then, is dropping Bjorn and the 3 Bolter Inceptors to slot in 3 Vindicators. Bjorn will probably be missed, as he is a true melee monster, and the Inceptors are certainly a nice unit to have in the back pocket. So why the Vindicators then? Well, they amp up the resilient vehicle block by quite a lot. They add 33 T8 Wounds, and together they can put some serious hurt on clustered enemies with Linebreaker Bombardment, which I'm hoping will prove useful as it can be used after Advancing, using Smoke Launchers and even in melee! It should make them a dangerous group, even when crippled. They also benefit from the same Rune Priest buffs: 33 T8 Wounds at -2 to hit (when Smoking anyway) and with Sv2+ should be pretty damn resilient! That's the hope, anyway. If the Vindicators can draw fire while tanking hard, they should enable to core of the list (objective grabbing Grey Hunters and vehicle smashing characters) to do their job relatively unhindered. Thoughts? (PS; there should be a report up tomorrow night, possibly Wednesday morning - depends on how tired I am afterwards!) Link to comment Share on other sites More sharing options...
TiguriusX Posted December 3, 2018 Share Posted December 3, 2018 i expect epic vehicle names once the vindicators have been blooded good luck! Link to comment Share on other sites More sharing options...
Shas Oh Dear Posted December 3, 2018 Share Posted December 3, 2018 I'm very interested in how this works out as I've been eyeing up the triple vindicators myself. Link to comment Share on other sites More sharing options...
Kallas Posted December 3, 2018 Author Share Posted December 3, 2018 i expect epic vehicle names once the vindicators have been blooded good luck! Thanks. They're currently lined up to be proxied, so good names may have to wait until I get my own Link to comment Share on other sites More sharing options...
jpwyrm Posted December 4, 2018 Share Posted December 4, 2018 Good luck! I'm eager to read your report and see how the new list performed. My guess is that at least one vindicator should die in the first two turns but will draw the majority of your opponent's firepower. That in itself is good since it should leave the death squad and transport relatively unscathed. My only concern is that you no longer have any long range firepower to support your advance. This could be problematic if you have difficulty moving your tanks forward due to terrain or enemy shenanigans - Thunderfire cannon stratagem comes to mind. Link to comment Share on other sites More sharing options...
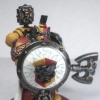

Recommended Posts
Archived
This topic is now archived and is closed to further replies.