Pacific81 Posted April 17, 2019 Share Posted April 17, 2019 That's absolutely fantastic work. Love the rusting work you have done on the armour, it's really effective and I think not over-done. I assume is that a sword he has nicked from someone? :) I really need to pick up Vengeful Spirit, I'm only a little way through the series, but am making a push this year to read all the main storyline books, I'll be going back to fill in the gaps from audio and novellas as and when. The Luna Wolves/Sons of Horus are probably my favourite legion that I've encountered in the novels, so I'm keen to follow their descent post-Isstvan. It's not a bad book, certainly very readable. I think personally ADB did a better job with the fall of the World Eaters in Betrayer - there was a bit more of cause/effect as to how they became the way they were, which McNeil always seems to have struggled a bit with the SoH. I'm still not at all sold on why Horus turned from the Emperor TBH, which then follows on to the rest of the Legion (and please, please don't say it's because 'a wizard did it' - or magic sword in this case! :) ) Vykes and Pearson73 2 Back to top Link to comment https://bolterandchainsword.com/topic/350511-wip-sons-of-horus-65th-company/page/9/#findComment-5298240 Share on other sites More sharing options...
Pearson73 Posted April 17, 2019 Share Posted April 17, 2019 The Pistol Masters sound an interesting lot, hopefully it won't be too long before I'm in place to read it. Top work on the new officer, I think Kantaar the Unbowed is a solid name too. Vykes 1 Back to top Link to comment https://bolterandchainsword.com/topic/350511-wip-sons-of-horus-65th-company/page/9/#findComment-5298242 Share on other sites More sharing options...
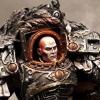
hushrong Posted April 17, 2019 Share Posted April 17, 2019 Oh my, the Unbowed is striking! Pose is great and the paint job sells it. And the more I read about stuff in Vengeful Spirit in this log the more I learn about cool stuff in the book. Now I’m left wondering if I even read the dang thing in the first place. Or if my memory is going. Vykes 1 Back to top Link to comment https://bolterandchainsword.com/topic/350511-wip-sons-of-horus-65th-company/page/9/#findComment-5298596 Share on other sites More sharing options...
Vykes Posted April 17, 2019 Author Share Posted April 17, 2019 Thanks a ton Pacific, I've tried to go for the rusty battle worn aesthetic (which would be opposite to my Blood Angels), I figured it would work. It's bizarre, but skimming cover art 'The Other' had Aximand and Marr on the cover and both have a lot more eagles than you'd ever expect Sons of Horus captains to have. Including the quillions of the culling blade... I was gonna cut it right out of that sword from the marine heroes box, but it weirdly fit. I still feel a little loathsome keeping the Imperial eagle at all :P Man, you aren't wrong on the book either. It's got some very questionable stuff in it, but it's full of great moments. But yeah, Betrayer and First Heretic still rank quite a bit higher in narrative quality for me, but Vengeful Spirit has a lot of very interesting little bits and pieces to chew that change the way one may think of stuff. Such as Loken reminiscing about shot cannons being part of his time with the scout auxillia, or sons of Horus breacher formations and Noctua saying, "We move or we die!", even Aximand's little conjecture about having 400 men in his assault team but as he only had 100-120 in bolt shot range vs. 300 ultramarines, thus he says 'we're outnumbered' and immediately shoulders his broadsword and thinks, "yep, doesn't matter. Just gotta kill them faster." And immediately being vaguely unhappy that Ultramarines are better soldiers than his Sons of Horus, though his Sons of Horus were better 'fighters'. Looking at the little bits is very cool.... then you get to remember that Horus got turned by a magic sword and a scary nightmare, and everything kinda makes you sigh again :P Pacific, you right done nailed it, mate! Aye Pearson! Thanks a ton, I guess I shall very much go with Kantaar the Unbowed. I think I'm down to needing just a few more consuls which is nice. Not sure what next, may have to mull it over (some of the new ones seem interesting). And aye, it's not a bad read if you don't count that weird bit about Mortarion in the Apothecarion which I felt was ridiculous. Thanks a ton Hushrong! I'll admit I've been champing at the bit to use that spare reiver head and man I feel it works on characters ridiculously well. I'll admit the model was almost just a mistake, a simple impulse buy for a space marine hero set and lo and behold, I got that and thought, "I have to make this into something!" Vengeful Spirit has a lot of those neat little parts but if it's just a 'drive to work' kind of thing or a lazy read, it's a bit by the numbers in places. Just one or two little facets, though, can really add a lot to the unspoken parts of 30K. LameBeard, Pearson73 and Pacific81 3 Back to top Link to comment https://bolterandchainsword.com/topic/350511-wip-sons-of-horus-65th-company/page/9/#findComment-5298683 Share on other sites More sharing options...
Vykes Posted June 9, 2019 Author Share Posted June 9, 2019 (edited) Well, I promised it a little while back and I figure 'why not'. How Vykes blandly and messily weathers vehicles and power armoured troopers. As a bit of a preamble, there's probably a much easier way to do this, but I'm kinda stuck with this and I'm used to it, so it works fairly well. Toy around and you'll find something that works for ya, too! if this is of any use, rock on, glad to hear! Step 1: the Gathering Storm There's not a lot to say here, the basics of this are pretty easy to get: -some water soluable oil paints (IMPORTANT FOR ME AS I'M LAZY AND IT TAKES VERY LITTLE TIME TO DRY.... comparatively), Raw umber and Ochre are my favourites for Sons of Horus. However, Ochre was more or less a Bob Ross style happy accident as it gives the green more of an olive tone and shows up on black pretty well. On other coloured power armour you might want to substitute other colours, such as greys or even mixing a few of your own. -weathering powder pigments. For this we went with terracotta earth (rusty red), a bit of european earth or slate (just something, I used a touch of both but it's minor), and carbon black (for exhaust) -brushes, a wide flat brush is fantastic for vehicles but works great in general, and some thinner easier brush you don't mind having been ruined applying powdered pigments. -some sponge for most of your work, here. -tweezers to avoid getting your fingers as messy as mine -water for, well, the "so-called-oil" -pigment fixer/matte varnish just to make sure it mattes down and doesn't come loose and gum up everything. Extra: While I haven't detailed it yet, I always go over this with a bright reflective metallic for chips. I'll toss in an image at the end, but yeah, Vallejo metal colour chrome is my go-to. Step 2: Subject Checklist Alright, so you got your weathering stuff and you got your water. Now you're missing something and... oh yeah, a model. Well today we're working on a Vindicator laser destroyer that I clipped and totally gouged and vaguely mangled (snipped a few parts off I shouldn't have at 2 AM... blast). But it'll work. And there's a power armoured mk. V vet sergeant that will be here just to show the whole method works for it, too. -Be sure that you have your decals/transfers sealed in! Gloss varnish is good but as long as you have everything stuck down you're good to go. Aaaah my lovely minty green, I love that colour for tanks, plants, and unicorns. Oh, and as a last bit of prep, that nice little bit of sponge you got? Tear it into a weird bread-like chunk so you can get ready for the next step. Y'know, just like this! ... why I felt I needed to take a picture, I don't know. Ask '8 AM on a rainy freezing June day' me Step 3: Do the Dab This one isn't hard, it's just making sure you get everything. That raw umber water soluble oil paint? Squeeze some of it out into a tiny little palette/plate/plastic/cardobard bit, and make sure you coat most of the sponge. Then roll it around like you were trying to make a drybrush out of it, you don't want any goopy lumps and try a test dab. You should get a nice little speckled pattern. Cover the vehicle in your random splotched, cover everything! Just, you know, don't lather it on in dollops. There's no huge technique here yet, but getting the edges and major surfaces is just kinda important (will tell why in a second or two). Extra pic is all: -Then do it all over again with Ochre, which you can apply almost immediately! Does it look kinda obscene and pretty horrible? Oooooh yeah. Get used to that. Extra Pic again: Step 4: "Wipe! Wipe! WIPE!" AKA the Adrian Monk Effect Alright, in this, it's kinda the quintessential 'it sounds like it's pointless but trust me'. That little bit of 'importance' in getting it a little random? Yeah, it's acting as surface impurities and imperfections on the hull. -dip a flat brush in water and then wipe most of the moisture off. Then drag the brush over the oil covered hulk, dragging in one principle direction. Top down, front to back. Wet and repeat this process until you've covered the whole tank (if you need to cheat and get the cracks, just make sure to go back over it in the same direction as before). This will create nice long irregular streaks and markings. Left half done, right half not! Extra pic yet again! And it works on power armour, too! Same thing, left half done, right not. You'll end up with something like this. Oh, and as oil dries pretty slow (like, not insanely) but you can reactivate it with water and go over tide marks and anything you don't like. I just decide I enjoy it a little. Step 5: Le Huile Deja vu! Alright, so once again, take your raw umber paint sponge, 'cause you'll need it. Do the same as before but make sure you only end up with a little speckling when you test rolling it. Now comes a bit more of the fun stuff. -take the umber sponge and dab it against the edges, focusing on points where damage or wear looks most interesting and convincing. We aren't replicating Tiger 007 in Normandy, it's visuals for me. Go for the edges, and make sure to add a bit on larger plates to convey the sense of metal pitting and flecking. Think of those pewter models and where they inevitably liked to drive you crazy for where they would fleck paint off. Because this serves to show some corrosion, and as a basis for where you'll be laying down some of your chrome chipping after the fact). It's also perfectly fine in speckling an area and dragging the sponge just a touch to add some directional 'scuffs'. After you get done you'll see something like the below bit... just let it dry, even for 1 hour is usually enough with water soluable oils. Step 6: Take a Powder Dry to the touch but still clammy and horrible feeling? Good, that's oil for you. It's a pain. Now, powder, that's also a pain but for different reasons. (NOTE: I know pigment fixers can help with adherence and such on this initial step, I'm just lazy and this works for me. Meh). -Take your glorious clammmy oily model and get your powders ready! Start with your darker earthtones, the rusty finish in particular is big for me and I use it a lot. Load up your brush, and powder it in with irregular spots. Make sure to stipple it and work the pigment into the crevices and corners, letting it actually work into the model. Take particular care to add these to recesses where dust and soot and grime would powder or water would form rust marks, so the lower sharper crevices including tracks and road wheels! -then, you can add slate or other earthtones overtop and 'smooth' out the harsh transitions. Your model is gonna still look gaudy, now it's just gonna look like someone dusted it with delicious delicious cinnamon. Extra picture once more Final point of note, black exhaust powder. Alright, I sometimes cheat a bit, I use black exhaust powder on the larger open vents for vehicles, but most of the time it's on the exhaust of infantry as it just settles nicer. Use your grungy brush to work it liberally into the vents, exhaust, etc, and get ready 'cause you're almost done. Step 7: The End is Nigh! varnish it.... seriously, that's it. Spray varnish works the best, start mid-stream like a bad medical check and swipe it very lightly over your model. It'll settle most of the powder it hits, then sweep it a few more times across and get into all the angles you need. You can do another layer after this is dry, or just blast it again. Inevitably it'll blow off excess lovely weathering powder so do it outside or with a mask, or something like usual with any sort of varnish that has parciles. It also serves to tone down the model and makes the vibrant weathering powder more subdued along with the oil. I use a really simple Liquitex matte varnish through my airbrush and it comes out sorta satin, but the usual gold standard dulcoat is as good as ever. I'll post up a quick thing about chipping tomorrow when there's light enough to use a camera with some half-decent effect. But in effect, congrats, now you know my dirty, filthy, not super impressive secrets. Oh well. Step 8: You Gonna Go Far Kid! *Hums the rest of the nightcore version to himself. So you wanna go the extra mile, ya wanna be the champ? Goin' for the gold Rocky! Okay so it's not that hard, for chipping just take a small brush and 'stipple' like you'd edge highlight just, y'know, you don't have to worry abou tit looking perfect. Or even good. Once again, remember those old pewter models and how they used to chip and you'll be good to go! just drag it where you already sponged on some of the heavier edges with the umber and it brings out a little extra 'pop'. But hoOOoold on thar Baba Looey! One might ask "What if we want to meld the new weathered model with a base? Won't they look different?" Or someone might ask that to someone else, most people mostly just ask me, "What are you doing loitering by the mall entrance?" But does the same technique work on bases? Yes, yes it does. ----- Other stuff, weeeeeell sorry it took a bit to get here: there's been a lot of activity sort of in the background for me for a bit but a lot of it is hard to really document. I got to wage a nice little 5K match against custodes (and got stomped after a particularly disastrous turn 1, killing 500 points and losing 4990 over the course of 5 turns including 80 tacticals and 20 breachers in 2 turns and the vast bulk in 1... dozens of custodes bikes are no joke). Anyway, a few more picture updates and maybe a bat-rep coming up soon too. All well and good! Edited June 11, 2019 by Vykes Varyn, sockwithaticket, Shard of Magnus and 12 others 15 Back to top Link to comment https://bolterandchainsword.com/topic/350511-wip-sons-of-horus-65th-company/page/9/#findComment-5328614 Share on other sites More sharing options...
Gederas Posted June 9, 2019 Share Posted June 9, 2019 Vykes, you need to post that in the Tutorials and How To's section. That is very helpful and easy to follow Link to comment https://bolterandchainsword.com/topic/350511-wip-sons-of-horus-65th-company/page/9/#findComment-5328734 Share on other sites More sharing options...
Pacific81 Posted June 9, 2019 Share Posted June 9, 2019 Absolutely fantastic tutorial! Agree that would be super useful for anyone trying to do something similar. GodEmperorOfMankind 1 Back to top Link to comment https://bolterandchainsword.com/topic/350511-wip-sons-of-horus-65th-company/page/9/#findComment-5328904 Share on other sites More sharing options...
Vykes Posted June 10, 2019 Author Share Posted June 10, 2019 (edited) Thanks dudes, guess I might give it a go and toss it in the tutorial forum. Didn't think it was anything particularly new or whatnot, but all good. Just it's more or less formatted for old-ish sorts like me who don't like video tutorials/bat-reps/etc. Edited June 10, 2019 by Vykes Elzender and GodEmperorOfMankind 2 Back to top Link to comment https://bolterandchainsword.com/topic/350511-wip-sons-of-horus-65th-company/page/9/#findComment-5329083 Share on other sites More sharing options...
StruManChu Posted June 10, 2019 Share Posted June 10, 2019 Followed the link from the AoD Traitors ETL threat. That there is an EXCELLENT tutorial my friend. Been wondering how to weather my own dudes and I'm probably going to ruthlessly steal your method. Water-soluble Oil Paints is not a thing I'd thought to consider, but that's brilliant. Thanks mate! Vykes 1 Back to top Link to comment https://bolterandchainsword.com/topic/350511-wip-sons-of-horus-65th-company/page/9/#findComment-5329262 Share on other sites More sharing options...
Vykes Posted June 11, 2019 Author Share Posted June 11, 2019 Hah, glad to hear StruManChu, my dude! Glad it's getting you thinking about it. So go ahead! No worries and just glad to hear it. The water-soluables stemmed from me being a lazy schmuck but their clean up and the way they pool and 'marble' with water dropped on them is something that has made them completely indispensible for me. Well, I decided to bite the bullet and put up a tutorial in the tutorial section: So here it is, new and improved (sorta, kinda): A Quick and Messy Method for Weathering Tanks and Armour But I also added just a little bit to the end of this one so, both are updated. Gederas 1 Back to top Link to comment https://bolterandchainsword.com/topic/350511-wip-sons-of-horus-65th-company/page/9/#findComment-5329538 Share on other sites More sharing options...
Varyn Posted June 28, 2019 Share Posted June 28, 2019 Great tutorial, well explained with fantastic results. Vykes 1 Back to top Link to comment https://bolterandchainsword.com/topic/350511-wip-sons-of-horus-65th-company/page/9/#findComment-5338869 Share on other sites More sharing options...
Vykes Posted July 5, 2019 Author Share Posted July 5, 2019 (edited) Thanks Varyn dude, glad it's of some use! Well ya lovely lot, there is something a little bit unique and special, we got a video bat-rep from BAD Tabletop Gaming, just a few of the local 30K crew, that the 65th got to take part in. So, Sons of Cthonia against the Scions of Macregge and Vykes makes an of himself as the first time on camera since highschool We'll also be getting some more bits and pieces all set up as there's a few new units that got completed in the meantime. Edited July 5, 2019 by Vykes Lord Blackwood and hushrong 2 Back to top Link to comment https://bolterandchainsword.com/topic/350511-wip-sons-of-horus-65th-company/page/9/#findComment-5342487 Share on other sites More sharing options...
noigrim Posted July 6, 2019 Share Posted July 6, 2019 (edited) Sound is desynced Edited July 6, 2019 by noigrim Link to comment https://bolterandchainsword.com/topic/350511-wip-sons-of-horus-65th-company/page/9/#findComment-5342794 Share on other sites More sharing options...
Vykes Posted July 6, 2019 Author Share Posted July 6, 2019 didn't notice it on my listen through and more than that, it ain't my problem. Link to comment https://bolterandchainsword.com/topic/350511-wip-sons-of-horus-65th-company/page/9/#findComment-5342942 Share on other sites More sharing options...
Pearson73 Posted July 6, 2019 Share Posted July 6, 2019 (edited) An engaging report; ace to see the 65th take the field, even though victory may have escaped their grasp. An interesting deployment method too; the immediate close quarters action made for an exciting game right from the beginning. Edited July 7, 2019 by Pearson73 Link to comment https://bolterandchainsword.com/topic/350511-wip-sons-of-horus-65th-company/page/9/#findComment-5342987 Share on other sites More sharing options...
Vykes Posted November 21, 2019 Author Share Posted November 21, 2019 (edited) Man, been a while since I last checked in. But it's not from being absent in 30K, it's being almost too busy (tournament, narrative events, some more filming, and 2 leagues that have kept me pretty tied up). But there is some content at least! About a month ago I managed to get a bat-rep filmed between two grand arch rivals in a civil war event right back to Istvaan III. Thus, we have this: 2.5K, Loyalist Luna Wolves led by Garviel Loken vs. Abaddon's Sons of Horus Again, Vykes is a bit of a jerk on camera because... he is, and speaks in third person. Anyway, there will be a bit of fluff and work (and some updated pictures) of the armies soon enough. Because the pre Heresy 65ths drop on Callas is coming along soon, and I'm just putting together a few more units as we speak. Don't worry, the Sons of Horus portion of the 65th haven't been neglected either. Edited November 21, 2019 by Vykes thewarriorhunter, LameBeard, Stix and 5 others 8 Back to top Link to comment https://bolterandchainsword.com/topic/350511-wip-sons-of-horus-65th-company/page/9/#findComment-5431841 Share on other sites More sharing options...
Son of Carnelian Posted November 21, 2019 Share Posted November 21, 2019 Great to see an update! Can't wait to watch the video when I get home! Vykes 1 Back to top Link to comment https://bolterandchainsword.com/topic/350511-wip-sons-of-horus-65th-company/page/9/#findComment-5431845 Share on other sites More sharing options...
Cadmus Tyro Posted November 21, 2019 Share Posted November 21, 2019 (edited) Looking awesome as usual, especially the Luna wolves, I’m very tempted to start a white legion! Such a great canvas to add weathering and tones to! Keep it up mate. Liking the landspeeders, I’ve been gathering bits to make some myself. Which bit did you use in place of the antenna on the left? I’ve been wracking my brains for something to replace it, and that bit looks great there! Cadmus Edited November 21, 2019 by Cadmus Tyro Vykes and Stix 2 Back to top Link to comment https://bolterandchainsword.com/topic/350511-wip-sons-of-horus-65th-company/page/9/#findComment-5431854 Share on other sites More sharing options...
Stix Posted November 21, 2019 Share Posted November 21, 2019 Oh, man, long time no see :D Nice BattRep, pleasure to watch. Congrats! Looking forward to see army updates both for LW and SoH. p.s. That blue osl is painted or is it real lighting? Some places it looks painted but then also there is same blue color on the table shadows. I can't tell! :D Vykes 1 Back to top Link to comment https://bolterandchainsword.com/topic/350511-wip-sons-of-horus-65th-company/page/9/#findComment-5431857 Share on other sites More sharing options...
Vykes Posted November 21, 2019 Author Share Posted November 21, 2019 Thanks a ton my dudes! Always glad to have some fun and talk with ya'll too. Well, Son of Carnelian, hope it ain't too bad (I hate listening to myself :P) Eh Cadmus Tyro, rockin! I'd love to see your take on a white legion. I'll admit they're finicky but man, they feel pretty good to have all done up. You nailed it, they're a fantastic canvas and white can also be toned so easily... easily enough that I have a few people pushing me to go for Death Guard and try some dark and dusty bases to see what it's like. Oh man, the antenna cover... I want to say that it's the little greeble 'headlamp' pieces from Storm Raven/Storm Eagles. They're right next to the assault ramps (I think one also may have come from a Valkyrie but it's hard to say. I know that they were clipped back just a touch. Definitely like to see some more standard speeders converted up for 30K Hah, tell me about it Stix! It's been a busy little bit (even moved in the meantime, how 'bout that for sucking up time?) hah, thanks! You've been hard at working making me jealous with them Iron Hands. Might have sold me on an Istvaan V army when my group gets around to it. Recording was always a lot of fun, the local lot at BAD in front and behind the camera are pretty awesome (and also work pretty hard for the 30K LVO organizing). I'm hoping I might even be able to do up a written bat rep of a Centurion game I had on the weekend. As for that lightning, it's all OSL. The white backing I was using is a little glossy and actually picked up the colour a touch :P I'd have to check the bottle at home in my garage but it's I think 'magic blue' from Vallejo then mixed with a bit of white. Frankly I think I need to line it a little but came out well. Couple more recent pictures of the 'Hecate' narrative touranment we had last week. I got put on 2 Centurion events and it was a blast. Fighting in the streets against some of the Rout, who had to hold back the traitors from over-running the Loyalist evacuation zone. The last push in the southern jungles to secure a derelict landing platform where agents of the warmaster were secreted planetside. Lord Blackwood, Stix, Son of Carnelian and 3 others 6 Back to top Link to comment https://bolterandchainsword.com/topic/350511-wip-sons-of-horus-65th-company/page/9/#findComment-5431865 Share on other sites More sharing options...
Cadmus Tyro Posted November 22, 2019 Share Posted November 22, 2019 Didn’t realise those speeders were so heavily converted, do you have any WIP shots or better yet, a brief tutorial. I think you’ve managed to capture the look of the metal mk2 speeder really well! Cadmus Vykes 1 Back to top Link to comment https://bolterandchainsword.com/topic/350511-wip-sons-of-horus-65th-company/page/9/#findComment-5432083 Share on other sites More sharing options...
Pearson73 Posted November 22, 2019 Share Posted November 22, 2019 Great to see you back posting! Really enjoyed that battle report, I felt your pain when the Scimitars opened fire for the first time; a real dismal display! Both the Sons and Luna Wolves look cracking on the field. Though the multi-legged Dreadnought doesn't look to me as if it belongs in the 30k setting, it's a well executed and painted piece. Are the legs of the new MKIV squad FW resin? I'm trying to finish off a squad but am finding the GW plastic legs rather lacklustre, where as those poses look good. Vykes 1 Back to top Link to comment https://bolterandchainsword.com/topic/350511-wip-sons-of-horus-65th-company/page/9/#findComment-5432173 Share on other sites More sharing options...
battle captain corpus Posted November 22, 2019 Share Posted November 22, 2019 Have to say Vykes you are a true credit to the Age of Darkness community and hobby in general. Well done! BCC Vykes 1 Back to top Link to comment https://bolterandchainsword.com/topic/350511-wip-sons-of-horus-65th-company/page/9/#findComment-5432188 Share on other sites More sharing options...
Vykes Posted November 22, 2019 Author Share Posted November 22, 2019 (edited) Thanks a ton mates, Cadmus it's kinda funny you mentioned because someone asked over on the Sons of Horus facebook page about them yesterday so I do have at least a short hand on how they were done. They are a little finicky but not exactly difficult. There is also a single WIP picture. As for the actual conversion, it's a lot of hull cutting just at the driver's legs and downward, then straight across to create the separate negative space in the cockpit (so essentially the front was entirely off). Then I trimmed out the seat and made that center section from the anti-grav flooring connect back to the seat back. There's empty space near the seat so I filled it just with the back exhausts of the Typhoon launchers. And I left off the front grav assembly.The back section was pretty simple: I razor-sawed the hull away the main body section flush with the rear door space and just patched it up, then added the round intakes from some spare Fire raptor/Storm Raven twin thrusters that were cut to size. That, and a main fin on the top was just one of the sides to the spoiler that was filed to a rounded profile.Then, y'know, replaced the driver torsos and heads par normal. Hah, thanks a ton Pearson, my dude! yeah, I'll try to get right back into the swing of things and work up something fun for everyone. Aye, the multi-legged dread is just a fun siege pattern I wanted to put together as I utterly loath the stumpy box-naught legs and figured if it's going through walls, it doesn't need to tip over and not have a way to get back up. So I went quadruped to see if it could be done. And yep, sorry to say those are Resin mk IV legs. Whenever a local 30K swap comes up I look into trying to nap up mk IV (and of course rabidly covet mk II and V). I totally get what you mean, I have 11 sets of plastic mk IV sitting on the sidelines and they'll have to be heavy weapon or special weapon teams as they're so remarkably static. -laughs- aaaah the first Scimitar roll. It hurt but I wasn't super surprised; where as Craig (real fun dude) has never actually seen my rolling in person, Andy (our cameraman) has . That said, thanks to that game and a few experiments after, the volkite scimitars have been fun and surprisingly effective. And thanks a ton Battle Captain Corpus, seriously, I appreciate it. I'm just glad that I can share something with everyone else here that might be a little fun. It's a fantastic community and I'm just happy to be a part of it! Edited November 22, 2019 by Vykes Chaoself, Son of Carnelian, Pearson73 and 2 others 5 Back to top Link to comment https://bolterandchainsword.com/topic/350511-wip-sons-of-horus-65th-company/page/9/#findComment-5432378 Share on other sites More sharing options...
Cadmus Tyro Posted November 23, 2019 Share Posted November 23, 2019 Thanks for the photos/run down. How do you find the load out in game? I’m contemplating the same anti-tank role, but the short range of the grav and melta makes me think they will only ever get one reasonable round of shooting in. The other option I’m contemplating is plasma cannon and heavy Bolter (same range as the PC and keeps the cost down). Skirt around the back field with the increased range, jink and reposition when needed (although you forego shooting the plasma). What do you reckon? Cadmus Vykes 1 Back to top Link to comment https://bolterandchainsword.com/topic/350511-wip-sons-of-horus-65th-company/page/9/#findComment-5433009 Share on other sites More sharing options...
Recommended Posts
Create an account or sign in to comment
You need to be a member in order to leave a comment
Create an account
Sign up for a new account in our community. It's easy!
Register a new accountSign in
Already have an account? Sign in here.
Sign In Now