Maxei Posted October 12, 2018 Share Posted October 12, 2018 Hello everyone, I recently bought a super cheap light box and I thought I should finally contribute something to this forum. I hope you like it Maxei Link to comment Share on other sites More sharing options...
Interrogator Stobz Posted October 12, 2018 Share Posted October 12, 2018 Very cool :tu: Link to comment Share on other sites More sharing options...
Bjorn Firewalker Posted October 13, 2018 Share Posted October 13, 2018 Impressive works. Link to comment Share on other sites More sharing options...
Maxei Posted October 15, 2018 Author Share Posted October 15, 2018 Very cool Thank You! Impressive works. Thanks! A couple weeks ago I finished my objective markers. For the "black stone" crystals I used pencils and the crashed turbine is made with a yakult bottle. I plan to add some smoke originiating from the back of the turbine in the future. The small crawler is made out of pice of a water filter, bits from the sicarian set and of course... skulls . I guess this guy is running around in the desert, placing signs for possible excavations sites of the crystals. hope you like it Max Link to comment Share on other sites More sharing options...
Magos Takatus Posted October 16, 2018 Share Posted October 16, 2018 I've been wanting to create some objective markers and I've seen some great ones recently. One guy made a pod using a chewing gun container and your Yakult bottle is very similar. Your turbine looks really detailed, however, and it's pretty inspiring. Your little scouting device is pretty cool too. Nice work! I'll have to see what I can cobble together. Link to comment Share on other sites More sharing options...
Bjorn Firewalker Posted October 16, 2018 Share Posted October 16, 2018 Again, impressive works. What's the skull-filled container? A reliquary containing the remains of martyrs to the Cult of Mars? Link to comment Share on other sites More sharing options...
Maxei Posted October 29, 2018 Author Share Posted October 29, 2018 I've been wanting to create some objective markers and I've seen some great ones recently. One guy made a pod using a chewing gun container and your Yakult bottle is very similar. Your turbine looks really detailed, however, and it's pretty inspiring. Your little scouting device is pretty cool too. Nice work! I'll have to see what I can cobble together. Thanks for the kind words. I am really interested what you come up with. I think personal objective markers are not only nice to look at but are sometimes telling a little story on their own.. (like really?! I have to defend that small crystal at all costs?! ) . My friends keep placing them in weird places like: a crashed jet engine burried deep in mud... on top of a steel container Again, impressive works. What's the skull-filled container? A reliquary containing the remains of martyrs to the Cult of Mars? Thanks! Looking at him you might get the idea of him running around collecting skulls . I planned to build some terrain with mining sites in the future and i guess the Mechanicus way to explore new sites is to send out a couple thousend sixleged servo skulls. This one guy propabably discovered already a few ones since he is packed with purity seals . I wanted to show you my latest finished terrain piece. I built this one mainly with cardboard and it went suprisingly well. The key to succes is being carefull with the edges when cutting and sealing the whole thing really good before starting to paint. For the mechanicus skulls I made molds with blue stuff from a few sector mechanicus terrain pieces. For the rust texture i used natron but I am not 100% happy with the results (especially the transitions )... I will try another technique next time What do you think? I am currently trying to make a custom terrax pattern termite assault drill. Most of the parts you see are plaster casts (plastalin) from the Mantic Veer-Myn Tunneller Set. I actually wanted to test the shape and size with the casted plaster parts and later replace them by resin. But the model did not turn out as heavy as expected and the quality is really good. So i will keep the plaster parts and clean them up later with green stuff. There is still alot to do but it is finally taking shape. Max Link to comment Share on other sites More sharing options...
Bjorn Firewalker Posted October 29, 2018 Share Posted October 29, 2018 What do you think? Impressive work. Is it a wrecked pre-Warp spaceship? It will work well as terrain, cover/concealment, and objective marker.The exposed cables/pipes on the hull should be behind cover- armored plates will do- as exposing them will make them snag on rocks the assault drill will pass by on its subterranean journey, which will make the cables/pipes tear/break, which will NOT be good for the drill. Link to comment Share on other sites More sharing options...
Pearson73 Posted October 30, 2018 Share Posted October 30, 2018 The rusted metal is really well done, the drill looks pretty cracking too. Link to comment Share on other sites More sharing options...
Maxei Posted November 5, 2018 Author Share Posted November 5, 2018 What do you think? Impressive work. Is it a wrecked pre-Warp spaceship? It will work well as terrain, cover/concealment, and objective marker.The exposed cables/pipes on the hull should be behind cover- armored plates will do- as exposing them will make them snag on rocks the assault drill will pass by on its subterranean journey, which will make the cables/pipes tear/break, which will NOT be good for the drill. Yes I thought about buliding a couple of those wrecked ship pieces and arranging them in a way that they look like one ancient crashed space ship. I have a few other terrain pieces to work at but I will definately do more of them in the future (you just can't have enough terrain ) Yeah you are right, I also thought about the exposed cables before ... I tried a few different things with plastic card and some sculpting but it just did not turn out very good in the end. I guess they have to be super armored metal tubes so they do not get damaged. They are also located a little more towards the center of the drill than the armor plates and therefore should not really exposed to the walls. However, I really appreciate your "technical" input The rusted metal is really well done, the drill looks pretty cracking too. Thank you very much! I honestly think it would have turned out better if I would have basecoated the ship wreck black instead of red. Even with three (diluted) layers of metallic I did not get a good coverage. Some details remain undone but I finished most of the painting on the assault drill. It is the first time I did a "freehand" and I also never worked with a masking fluid before. For the scratched effect which I wanted to achieve, the masking fluid is not the best choice I guess but I am still happy it worked out somehow. before scratching the paint off: afterwards: I will ask the mods to move this thread over to the WIP so I can post a few more pictures of unpainted stuff. thanks Max Link to comment Share on other sites More sharing options...
Bjorn Firewalker Posted November 5, 2018 Share Posted November 5, 2018 Excellent paint application and weathering effects on the assault drill. Yeah you are right, I also thought about the exposed cables before ... I tried a few different things with plastic card and some sculpting but it just did not turn out very good in the end.Unfortunate. Do you think burying the cables under green stuff will be more aesthetically pleasing? Link to comment Share on other sites More sharing options...
Spiny Norman Posted November 8, 2018 Share Posted November 8, 2018 I love the daemonhost model! Would be very interested to see what parts you used! Edit - just realised it's not a conversion, it's the Artel daemonhost if I'm not mistaken? Link to comment Share on other sites More sharing options...
Maxei Posted November 12, 2018 Author Share Posted November 12, 2018 I love the daemonhost model! Would be very interested to see what parts you used! Edit - just realised it's not a conversion, it's the Artel daemonhost if I'm not mistaken? Yes exactly, but I can highly recommend it. Link to comment Share on other sites More sharing options...
Maxei Posted November 30, 2018 Author Share Posted November 30, 2018 Hi I am currently working on some electro priests conversions. The base models are the Kairic Acolytes from the silver tower box set if anybody wonders. You can get them fairly cheap from ebay. The heads are from Anvil Industries (tactical masks or something). I would be happy if somebody could give me some tips regardin modeling of cloaks with greenstuff . I am also not shure about the small wire pieces I added to the chest of one of the guys (they represent the... "electric arcs"). Let me know what you think Max Link to comment Share on other sites More sharing options...
Pearson73 Posted December 1, 2018 Share Posted December 1, 2018 The priests look really good, the wire and greenstuff is well used to add the details too. Link to comment Share on other sites More sharing options...
Maxei Posted December 2, 2018 Author Share Posted December 2, 2018 The priests look really good, the wire and greenstuff is well used to add the details too. Thank you Pearson73! I finished three more of them. Here is a group shot: Originally I wanted to use the "robed cultist" legs from anvil industries for the electro priest conversion. However it turned out they were by far not bulky enough for the super beefy kairic acolytes torsos.. "You may say, it is impossible for a man to become like the Machine. And I would reply, that only the smallest mind strives to comprehend its limits." Electro Priest Iapethos Epiom, during deadlifiting 620 kg. but I found a use for them.. as you always need cheap techpriest enginseers . I did not give him a pistol in his right hand as it makes him look too busy I think. As I look at the pictures...he might need some cleaning Link to comment Share on other sites More sharing options...
Dosjetka Posted December 2, 2018 Share Posted December 2, 2018 This thread and by extension the work you've shared with us so far is very impressive. I especially like the objective markers and Electoo Priests. Can't wait for the next update! :tu: Link to comment Share on other sites More sharing options...
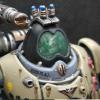
DaBoiKyknos Posted December 2, 2018 Share Posted December 2, 2018 Hello everyone, I recently bought a super cheap light box and I thought I should finally contribute something to this forum. I hope you like it (...) Cool models! What did you use for this possessed? Doesn´t seem to be an official model, is it? Link to comment Share on other sites More sharing options...
Maxei Posted December 2, 2018 Author Share Posted December 2, 2018 Hello everyone, I recently bought a super cheap light box and I thought I should finally contribute something to this forum. I hope you like it (...) Cool models! What did you use for this possessed? Doesn´t seem to be an official model, is it? Thanks! Right, its called "The Captive Unleashed" and is from Artel W . Really high quality! Link to comment Share on other sites More sharing options...
Maxei Posted December 3, 2018 Author Share Posted December 3, 2018 I am trying to customize my knight gallant and give him a little more of an Admech appearence. So far I modeled cogs on his shoulder pads (like the shoulder pads of the Magaera) and did some greenstuffing on his helmet. Link to comment Share on other sites More sharing options...
Bjorn Firewalker Posted December 4, 2018 Share Posted December 4, 2018 Your work on the Knight's head is most impressive. Link to comment Share on other sites More sharing options...
MithrilForge Posted December 5, 2018 Share Posted December 5, 2018 ah all this work is super cool. i really do love the wrecked ship panel...that would be awesome terrain for killteam lots of cover behind that panel Thanks for posting it ,great stuff indeed !! Cheers, Mithril Link to comment Share on other sites More sharing options...
Pearson73 Posted December 5, 2018 Share Posted December 5, 2018 The Knight head is looking great, really worth the extra effort. Link to comment Share on other sites More sharing options...
Maxei Posted January 7, 2019 Author Share Posted January 7, 2019 Hi, thanks everyone for the kind words . Here is a small update on the knight. I managed to get the basic color sheme and the base done and started with some weathering effects on the armor penals. I never worked with weathering powder before and it took me a couple tries to get it right.. or at least kind of right. What do you think of the weathering effects on the right shoulder pad? I guess rust effects on red armor are not a very easy thing... and I should also tidy them up a little more. However I think i will continue with this type of effect all over the red armor of the knight. Do you have good tips (links ect) for similar weathering effects? Some more shots of the knight. Still WIP of course, happy for your cc.. Also managed to finish up some more terrain. It feels this time its lacking a little contrast... but might also be the bright light. I should maybe give it another wash or something. thanks Max Link to comment Share on other sites More sharing options...
Pearson73 Posted January 7, 2019 Share Posted January 7, 2019 Looking good, especially the terrain with all the little bits and pieces scattered about. I agree that the terrain might need a bit more contrast and that the rust is a little difficult to see against the red of the Knight. Definitely on the right tracks though! Link to comment Share on other sites More sharing options...

Recommended Posts
Archived
This topic is now archived and is closed to further replies.