Eldrick Shadowblade Posted February 25, 2019 Author Share Posted February 25, 2019 Small update: Link to comment Share on other sites More sharing options...
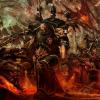
Eldrick Shadowblade Posted March 6, 2019 Author Share Posted March 6, 2019 So, I've been relatively quiet for the last month or so, but I just finished a good chunk of my Elite and HQ units. The idea behind the army is that is run by a Cabal of Seven Lords of Nurgle- Sorcerer's, Lords, and Demon Princes... I've fleshed a few of those characters out so far... I'll be adding more depth to the story as I go... Also, feel free to drop suggestions for Squad Names and Individual Models... I love community involvement! I also took the time to start learning how to use my light box a little better. I hope these photos capture the painting a little bit better. Feedback and comments really help me improve or keep doing good things. Lord Grimus LockJaw: Lord of the First Circle, Harbinger of Sorrow "We could hear the thunderous roar of the chain-axe before we could see him. The Heretic ambled over the crest of the hill striding past the mounds of corpses in the cratered wastes of no-man's-land. Its bloated belly wept blood and pus and the power pack on its back churned black smoke. O'Malley's Squadron opened fire with an entire line of lasguns and heavy-bolter emplacements. When the miasma of mud settled, the Archtraitor still remained. The impossible echos of his laughter rolled down on us in the trenches like a thunderbolt. I knew then, we were doomed." Barbanos: Lord of the Second Circle, Harbinger of S'luuurrrrp'ay "The last seven Eldar captives struggled against their bonds, but it was useless. Their Farseer's corpse laid in the piles of the dead, their defenses utterly destroyed. The one they called Barbanos in their guttural tongue carved crude sigils into the captives chest with a rusted dagger that by all rights should crumble to dust. "Count yourselves lucky" he muttered with the voice of a drowned man. "Normally, I'd trade you to my debased cousins, but you will open a conduit to a more kind master than Slaanesh..." Bjorn Firewalker 1 Back to top Link to comment Share on other sites More sharing options...
Eldrick Shadowblade Posted March 6, 2019 Author Share Posted March 6, 2019 Lord Flachulus The Reapers Bjorn Firewalker and Azekai 2 Back to top Link to comment Share on other sites More sharing options...
Bjorn Firewalker Posted March 6, 2019 Share Posted March 6, 2019 Your work honors the Plaguefather in the most impressive and disgusting ways. Eldrick Shadowblade 1 Back to top Link to comment Share on other sites More sharing options...
Eldrick Shadowblade Posted March 8, 2019 Author Share Posted March 8, 2019 @Bjorn Firewalker Thank you. May his putrescence guide your fever dreams... Here's what's next... a little preview... Link to comment Share on other sites More sharing options...
Eldrick Shadowblade Posted March 10, 2019 Author Share Posted March 10, 2019 Almost there.... I really like that new Hexwraith paint by GW. Looks pretty solid on a pure white . A few more touch ups and I'll be working on the base this week. C+C always welcome Sgt. Blank, firestorm40k and Pearson73 3 Back to top Link to comment Share on other sites More sharing options...
Pearson73 Posted March 10, 2019 Share Posted March 10, 2019 The Great Unclean One is coming on swimmingly! Eldrick Shadowblade 1 Back to top Link to comment Share on other sites More sharing options...
Bjorn Firewalker Posted March 10, 2019 Share Posted March 10, 2019 You're a skilled painter. Diseases and rotting skin is rarely done better than on your Great Unclean One. Eldrick Shadowblade 1 Back to top Link to comment Share on other sites More sharing options...
Eldrick Shadowblade Posted March 11, 2019 Author Share Posted March 11, 2019 @Pearson73 Thanks, brother! Almost done. A few more things to go! @Bjorn Firewalker Thanks! That's really nice of you to say. I have a pretty simple recipe if you're interested.4 paints and a decent drybrush. Let me know if you're interested. I have something wicked in my mind for the base. Way over the top since i think this will be more display than table top playable. Link to comment Share on other sites More sharing options...
Eldrick Shadowblade Posted March 12, 2019 Author Share Posted March 12, 2019 So, I'll be working on my base for the great Unclean one... I want to make it something like this: Thoughts? Link to comment Share on other sites More sharing options...
Eldrick Shadowblade Posted March 21, 2019 Author Share Posted March 21, 2019 I'm really happy how the great unclean one turned out! Feedback always appreciated. Let me know if you want recipes! The base didn't quite turn out how i hoped... it was decent... but in the future I'll need to set more time aside to do something ambitious. Here's my complete Greater Demon of Nurgle Slurrrrp'ee and three chaos spawn of nurgle AND THE SPAWN Subtle Discord, Bjorn Firewalker and Pearson73 3 Back to top Link to comment Share on other sites More sharing options...
Pearson73 Posted March 21, 2019 Share Posted March 21, 2019 Those Spawn and their bases look cracking, as does the finished Great Unclean One. I do feel the big guy's sword looks a little too clean, it would perhaps be more fitting if it were caked in old gore, rust, gunge, verdigris, etc. I would also have to say that the base isn't up to your normal level of creativeness. I think it's too one dimensional (thematially speaking), it's just a flat plateau, no extra details such as debris, Nurglings, spreading rot, etc and also none of the excellent green gloop you've incorperated onto so many of the bases. I do see the outline of the symbol in the topography of the base, but perhaps scoring the interior lines would make this intention more obvious, as well as adding details? If scoring were to be too inaccurate, perhaps the lines could be marked with skulls/flames/candles as if a dark ritual has taken place, maybe even the cause of the daemon to appear? Eldrick Shadowblade 1 Back to top Link to comment Share on other sites More sharing options...
Bjorn Firewalker Posted March 21, 2019 Share Posted March 21, 2019 Excellent (if sickening to even look at) work on Nurgle's children and grandchildren. Eldrick Shadowblade 1 Back to top Link to comment Share on other sites More sharing options...
Eldrick Shadowblade Posted March 22, 2019 Author Share Posted March 22, 2019 @Pearson73 Thanks for all the great comments! I agree on the sword... gonna go back and nurgly them up a bit! The Base was a big disappointment... I found a base made for pottery that's slightly bigger than the standard one and am probably going to go to work on that one. The original concept had brazers, columns, and ooze dripping underneath the finished model.... I think that I'll revisit this one eventually to punch it up to standards! @ Bjorn Firewalker: Thanks for your continued support. May the grandfather bless you with cankers and sores! Pearson73 1 Back to top Link to comment Share on other sites More sharing options...
Pearson73 Posted March 23, 2019 Share Posted March 23, 2019 I was hoping I didn't come across too critical, glad you agreed. With the base, it still looks like the start of one of your character bases. Having seen what you did with Typhus, I know you can make this one something special too. Link to comment Share on other sites More sharing options...
Eldrick Shadowblade Posted March 24, 2019 Author Share Posted March 24, 2019 I was hoping I didn't come across too critical, glad you agreed. With the base, it still looks like the start of one of your character bases. Having seen what you did with Typhus, I know you can make this one something special too. Not at all! Its my first time playing with insulation board as basing material... I've got some practice to do. I've been doodling up a little something in my scratch pad. I think I might devote an entire post to my base making process if enough people are interested. Pearson73 1 Back to top Link to comment Share on other sites More sharing options...
Pearson73 Posted March 25, 2019 Share Posted March 25, 2019 I would definitely be interested in having a more in depth look at your basing techniques and ideas. Eldrick Shadowblade 1 Back to top Link to comment Share on other sites More sharing options...
Eldrick Shadowblade Posted March 26, 2019 Author Share Posted March 26, 2019 BASING BONANZA PART I: Here are some tips for how i go about basing my minis in general. It is important to note, I don't actively play anymore, so i dont really care about base size or height (dis)advantages. I just kind of go what I think looks cool. So if you are playing feel free to scale my craziness back. So, I'll start to put together my basing tutorial here. I'll have a few different versions, but the materials are all fairly simple. All the materials are fairly standard: hobby knife, cutters, cork board, a few different sizes of beads, assorted bitz (depending on your warzone theme) and tacky glue. Here is the next part of the base tutorial: 1. Use a pen to trace the shape of the base on some Cork Board. 2. Cut out the shape of the base with an X-Acto knife, or you can roughly break it out in the desired shape. 3. I break the full circle in half with a slightly larger bottom half and slightly smaller top half. Use tacky glue to glue to base and to each piece of cork board like this: 4. To add depth and variation, try to stagger your pieces of cork to give an illusion of height. 5.To add strength to the tacky glue, i also add in my hobby glue (Zap-a-Gap) into the mixture. This makes a very solid and permanent bond to the base and the cork board. 6. Here is where you can any number of things to vary your bases. The story I am trying to convey with my Death Guard Army is invading the trench lines of a defending Imperial Army. It should be noted that I have no intention of actually playing another game of 40k again. These bases represent my efforts to put a cool looking army in a display case. You might want to just cut out some steps for competitive play. Let your goals override anything I lay out here. I consulted many different sources to see what I could try to recreate. I used Pintrest and Google Images heavily for this effort. There are literally thousands of photos you can use to capture for inspiration. If anyone wants to check out my boards and pins feel free. https://www.pinterest.com/proflee77/ 7. I choose a Trench theme and this is what the army will begin to explore throughout the various models. 8. I laid out the trench boards in a two-to-one pattern similar to this: You don't need to go through the trouble as many trenches are probably hastily assembled and don't always have the luxury of meticulous designers. 9. For larger bases, I try to add some sand bags and skulls to increase the feeling of a warzone being overrun. BASING PART 2 Toxic Bases: A few friends have asked about my toxic bases as well. Follow the same techniques as the previous tutorial, but instead of laying out boards for trenches, leave some blank space on the surface of the base to create your toxic goop. Here's the method I used to produce these bases. I'll show you my methods and something I discovered recently which makes the process A LOT easier! First, here are some additional materials, I may not have done a great time covering in the first version of the tutorial: You can find these beads in any number of craft stores or even a Walmart (I know... I know... I hate supporting them, too.) Alternatively, you could roll up a bunch of different sizes of greenstuff and cut them in half, but this could be time consuming.... and boring. Again, Tacky Glue will be your friend here. You can't overdo it with the glue and it will fill the tiny holes in the bead to make the illusion of proper bubbling radioactive goo (or even lava if there are some Khorne / Blood Angels among your ranks.) For the larger beads, you can use a hand saw to cut them in half, or some wire cutters and chop them from the middle. we'll be using a lot of tacky glue so a perfect cut isn't necessary. I also have young daughters, so i discovered the "BEDAZZLING SECTION" of the local craft store recently... you can imagine my horror.... that is until i came across these gems! Ready to go half-globes that i could glue right to the base! They save a ton of time, and once you prime and paint, no one will ever no they are designed for a young girl's purse! I generally lay the cork board down and make sure the figure will have a place to stand before planning out the boils. Other than that, just be creative where you place the bubbles and make sure to mix up the sizes to get the roiling surface your desire: Here is a shot of 20 or so finished bases for poxwalkers I made a while ago. You can also get creative using zombie / imperial guard bits and barrels: Some Nurgling Bases using this technique: Krakendoomcool, DuskRaider and Darnok 3 Back to top Link to comment Share on other sites More sharing options...
Eldrick Shadowblade Posted May 13, 2019 Author Share Posted May 13, 2019 THE TEARS OF MORTARION Here is the latest squad of The Brotherhood of the 7th Circle PLUGOTH BUBARRION Markus_ 1 Back to top Link to comment Share on other sites More sharing options...
Eldrick Shadowblade Posted July 4, 2019 Author Share Posted July 4, 2019 So, I've been slothful like a good worshiper of the Grandfather, but I have not been Idle. The ETL is roaring into gear! Here is my first vow. Warning: Image intensive post incoming! The Rhino is probably my favorite of the batch! Krakendoomcool and Bjorn Firewalker 2 Back to top Link to comment Share on other sites More sharing options...
Markus_ Posted July 6, 2019 Share Posted July 6, 2019 Great looking army!Thanks for the trench tutorial. :tu: Eldrick Shadowblade 1 Back to top Link to comment Share on other sites More sharing options...
Bjorn Firewalker Posted July 6, 2019 Share Posted July 6, 2019 Excellent works. I especially like the Death Guard Rhino. Eldrick Shadowblade 1 Back to top Link to comment Share on other sites More sharing options...
Eldrick Shadowblade Posted July 7, 2019 Author Share Posted July 7, 2019 @Markus Thanks man! Lots more to come! @Bjorn Thank you! I really like how the rhino turned out too. Might need to take a photography class. I don't think my pictures do it justice, but thank you for all your support! Link to comment Share on other sites More sharing options...
Eldrick Shadowblade Posted July 21, 2019 Author Share Posted July 21, 2019 Small ETL Update, some nurglings and plague zombies. Better pictures to follow. Also, I feel like it's time to tackle Mortarion. He's next up on the docket! And some Chaos Spawn for good measure! Sgt. Blank, Isengrin and Krakendoomcool 3 Back to top Link to comment Share on other sites More sharing options...
Krakendoomcool Posted July 23, 2019 Share Posted July 23, 2019 Your bases are fantastic! I saw them last year in the ETL and was blown away. I’ve been doing my Nurgle bases like this (similar) ever since. The trench bases are very characterful for Death Guard too. Eldrick Shadowblade 1 Back to top Link to comment Share on other sites More sharing options...

Recommended Posts
Create an account or sign in to comment
You need to be a member in order to leave a comment
Create an account
Sign up for a new account in our community. It's easy!
Register a new accountSign in
Already have an account? Sign in here.
Sign In Now