splayedpaintbrush Posted May 28, 2019 Share Posted May 28, 2019 (edited) Yet another Legio ‘Work In Progress’ post, although the post title is a little misleading I suppose but it might make a good home brew Titan Legio name – another might have been Legio Procastinator. I joined in the Tale of the Heresy and failed. I’m hoping to redeem myself by finishing what I aimed to achieve there and get some Titans painted, and then continue onwards. Whatever I achieve will get dumped in here, and written about on my hobby blog. Here is the list I pledged for TotH, along with a brief status of their current state: Legio Solaria Warlord [no name yet] Present condition: its got paint on, playable with blutac. Reaver [no name yet] Present condition, has the most paint on, playable with blutac. Warhound 1 [no name yet] & Warhound 2 [no name yet] Present condition, has some paint, playable with lots of blutac. Here is the rest of my Adeptus Titanicus project: Questoris Knight (x3) Banner of House Drakus. Present condition, nearly painted, playable with a little blutac. The inspiration for the paint scheme was the mobile game Freeblade. Ceratstus Knight (x2) Banner of House Mamaragon First one just needs matt varnish. Problem is I feel the need to repaint the Questoris Knights now. Terrain and Misc items 4Ground terrain is ace! No painting required lol. However the scenery that came in the GM box is not built yet, too much choice involved ;) Templates I decided to paint these up, and went for a brass colour. Intended to fill in the centre of the templates with some colour. I want to carry on and add further colour to these, maybe even solaria inspired mottled green – but we’ll see. Edited May 28, 2019 by splayedpaintbrush Mendi Warrior and 1ncarnadine 2 Back to top Link to comment Share on other sites More sharing options...
Fajita Fan Posted May 28, 2019 Share Posted May 28, 2019 What colors did you use on your off white? I really like that finish. Link to comment Share on other sites More sharing options...
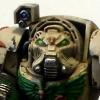
splayedpaintbrush Posted May 28, 2019 Author Share Posted May 28, 2019 What colors did you use on your off white? I really like that finish.I'm desperately trying to remember. I'm not at home so can't go look what paints are on my hobby table either (not that that would be much help - desk too messy, lots of paint on it). I think it's the following: Over black undercoat. 1, airbrush medium grey colour (I'm using a VMA colour I can't remember name of - it might simply just be "grey"). A few thin coats a bit like zenithal undercoat. 2, airbrush either an off white grey, or just white (really think it's white though). Again thin coats in a zenithal manner. 3, using normal brush now, thinned white highlights, almost glaze like. The larger flat/less detailed panels, like the lower leg armour, I tried stippling this white on to give a mottled appearance. 4, normal brush again, thinned nuln oil to put the shading back in. When I paint the next one from scratch I'll make some notes. Mendi Warrior 1 Back to top Link to comment Share on other sites More sharing options...
Fajita Fan Posted May 28, 2019 Share Posted May 28, 2019 Ah the airbrush. Link to comment Share on other sites More sharing options...
splayedpaintbrush Posted May 29, 2019 Author Share Posted May 29, 2019 If you're any good at blending then the airbrush is not required. It is just faster. I'm not that proficient with the airbrush, but it has certainly sped up my painting. Although I'm probably less good at blending these days. But as I don't get much time to paint nowadays it's not a big problem anyway. Link to comment Share on other sites More sharing options...
Mandragola Posted May 29, 2019 Share Posted May 29, 2019 Good start. Solaria is a tricky scheme to pull off. I look forward to seeing them progress. A suggestion, based on my own experience, is to pick something and finish it. Like you, I started out with a bunch of WIP models on my desk, loads of armour plates scattered around and so on. One day in the future everything will be finished but until then everything is a mess. And you’ve got no test model of a finished thing to see the results of all your hard work. So grab one of your titans and get it done to the final standard you’re aiming for. It’ll make you happier than spending that time getting all your other guys 10% closer to the end. And we do this for fun. It could also be that you’re nothing like me, and you’re happy with the batch approach. If so, keep up the good work! splayedpaintbrush 1 Back to top Link to comment Share on other sites More sharing options...
Mendi Warrior Posted May 29, 2019 Share Posted May 29, 2019 NIce stuff! Looking forward to seeing them progress too. Link to comment Share on other sites More sharing options...
splayedpaintbrush Posted May 29, 2019 Author Share Posted May 29, 2019 A suggestion, based on my own experience, is to pick something and finish it. Like you, I started out with a bunch of WIP models on my desk, loads of armour plates scattered around and so on. One day in the future everything will be finished but until then everything is a mess. And you’ve got no test model of a finished thing to see the results of all your hard work. So grab one of your titans and get it done to the final standard you’re aiming for. It’ll make you happier than spending that time getting all your other guys 10% closer to the end. And we do this for fun. It could also be that you’re nothing like me, and you’re happy with the batch approach. If so, keep up the good work! Probably very good advice that I should follow! Reaver is by far the closest to finished, I should get that one done. Link to comment Share on other sites More sharing options...
splayedpaintbrush Posted June 2, 2019 Author Share Posted June 2, 2019 Did I say Reaver first?? I mean't Cerastus (Cerastuses? Cerastii?) first obviously ;) Pics of finished Cerastus Knight Lancers... Sigh, it's funny isn't it, it is only after taking the photos of "finished" models that you notice little (and not so little) things that you want to go back and touch up/change. Spazmolytic, 1ncarnadine, Mendi Warrior and 5 others 8 Back to top Link to comment Share on other sites More sharing options...
Fajita Fan Posted June 3, 2019 Share Posted June 3, 2019 I notice mold lines and little pieces of vents I didn't clean up when taking photos. Those look great! Link to comment Share on other sites More sharing options...
Rabenga Posted June 3, 2019 Share Posted June 3, 2019 Looking good Lewis! Link to comment Share on other sites More sharing options...
Mendi Warrior Posted June 3, 2019 Share Posted June 3, 2019 They look great! Love all of them, the "naval camo" and the glowing shields in particular. Taking pictures is a good way to notice the little things we forget when actually cleaning mould lines, putting components together or painting stuff. splayedpaintbrush 1 Back to top Link to comment Share on other sites More sharing options...
Fajita Fan Posted June 3, 2019 Share Posted June 3, 2019 I like the really thinned white streaking and the weathering, I need to mimic that on mine. splayedpaintbrush 1 Back to top Link to comment Share on other sites More sharing options...
Mandragola Posted June 3, 2019 Share Posted June 3, 2019 Those are fantastic. I’ve painted a mamaragon knight too as a test mini, so it’s grear to see another take on them. Your weathering is excellent. splayedpaintbrush 1 Back to top Link to comment Share on other sites More sharing options...
splayedpaintbrush Posted June 3, 2019 Author Share Posted June 3, 2019 I notice mold lines and little pieces of vents I didn't clean up when taking photos. Those look great! I think I spend a huge amount of modelling time just getting rid of mould lines (more time than I should at any rate). Over the years I have developed a loathing for them and I’m always disappointed when I find one I’ve missed on my models. To me they stand out on a painted model and can easily spoil and otherwise excellent paint job. Looking good Lewis! Lewis? Sorry you've got me mixed up with some one else, I’m called Dave but thanks anyway They look great! Love all of them, the "naval camo" and the glowing shields in particular. Taking pictures is a good way to notice the little things we forget when actually cleaning mould lines, putting components together or painting stuff. I like the right hand model’s ion shield glow, the left hand not so much, but I hadn’t noticed the difference till seeing the photo – weird!! I might go back and tone down the left hand model’s white to match that of the right hand model’s shield. There is a couple of other tubes and things I’ve spotted – not sure if it’s worth going back to do those now though. The ‘dazzle camo’ was fun on these two, I imagine it’s going to get gradually more boring to paint on future models, and probably more challenging to create different patterns. I’d like to get a Household done in this scheme but I’m guessing that’s a lot of Knights to camo up. The weathering is a bit experimental, the rust orange is my first real attempt at using weathering powders - in this case Secret Weapon's Rust Orange pigment - and i'm not sure really of the best way to use it. The above was a combination of applying it dry, applying it with a little bit of water, and even some orange wash (old school Citadel Orange in a tall hex pot with blue lid - for those of us painting back in the '90s). I've actually had some pigments for years, and i think i attempted to use them on some Warmachine minis but really cant remember what i did there either - or what i painted for that matter. I also used some orange colouring pencils to make the streaky orange effect. I've used pencils to weather X-Wing models before, but first time in use on another game system. The streaky white was a deliberate attempt to keep the brush strokes in the same direction when applying the white highlights, at least on the carapace. The lower leg and groin armour plates had the white more stippled on really. Link to comment Share on other sites More sharing options...
Fajita Fan Posted June 3, 2019 Share Posted June 3, 2019 I cleaned off and primed a bunch of Xwing models to repaint and never actually did it. If you posted repaints on the Xwing forums chances are I’ve seen them. Link to comment Share on other sites More sharing options...
blackbabyjesus Posted June 3, 2019 Share Posted June 3, 2019 These look awesome, I especially like the basing! Where did the little crates and barrels come from? splayedpaintbrush 1 Back to top Link to comment Share on other sites More sharing options...
splayedpaintbrush Posted June 4, 2019 Author Share Posted June 4, 2019 These look awesome, I especially like the basing! Where did the little crates and barrels come from? Vangard Miniatures https://vanguardminiatures.co.uk/product-category/scatter-items-and-components-section/ Link to comment Share on other sites More sharing options...
blackbabyjesus Posted June 4, 2019 Share Posted June 4, 2019 These look awesome, I especially like the basing! Where did the little crates and barrels come from?Vangard Miniatures https://vanguardminiatures.co.uk/product-category/scatter-items-and-components-section/ That's amazing, thanks! Link to comment Share on other sites More sharing options...
Mendi Warrior Posted June 5, 2019 Share Posted June 5, 2019 I notice mold lines and little pieces of vents I didn't clean up when taking photos. Those look great! I think I spend a huge amount of modelling time just getting rid of mould lines (more time than I should at any rate). Over the years I have developed a loathing for them and I’m always disappointed when I find one I’ve missed on my models. To me they stand out on a painted model and can easily spoil and otherwise excellent paint job. They look great! Love all of them, the "naval camo" and the glowing shields in particular. Taking pictures is a good way to notice the little things we forget when actually cleaning mould lines, putting components together or painting stuff. I like the right hand model’s ion shield glow, the left hand not so much, but I hadn’t noticed the difference till seeing the photo – weird!! I might go back and tone down the left hand model’s white to match that of the right hand model’s shield. There is a couple of other tubes and things I’ve spotted – not sure if it’s worth going back to do those now though. Pretty much the same feeling about mould lines, I also spend a lot of time removing them (I particularly hate old kits where they are more prevalent … WHFB skeletons for instance). I was less caring about removing them when I was younger and foolish (although I might still be foolish ). Agreeing on the ion shields, I thought it might be due to lighting. It could be worth going back to the little things you are not happy with, either I do it immediately or I make a note and do it the next time I open the same paints. Link to comment Share on other sites More sharing options...
malika666 Posted June 6, 2019 Share Posted June 6, 2019 (edited) Cool to see the crates and barrels Ive designed in use! :) Edited June 6, 2019 by malika666 blackbabyjesus 1 Back to top Link to comment Share on other sites More sharing options...
Rabenga Posted June 6, 2019 Share Posted June 6, 2019 Cool to see the crates and barrels Ive designed in use! :) Are you THE vanguard? Ore one of the vanguard's? When are we going to get some better baneblade proxies? Sorry about off topic... Link to comment Share on other sites More sharing options...
malika666 Posted June 6, 2019 Share Posted June 6, 2019 Cool to see the crates and barrels Ive designed in use! Are you THE vanguard? Ore one of the vanguard's? When are we going to get some better baneblade proxies? Sorry about off topic... I design miniatures for Vanguard Miniatures. I don't own the company or anything like that. For that you'd need to contact John Fielding (on various forums known as Moredakka). As for a Baneblade proxy, I did start working on a super heavy tank called the Legate, basically the big brother of the Tribune which many players tend to use as a Macharius proxy. Sadly enough some real life obligations and design block kinda prevented me from finishing it. Reyner 1 Back to top Link to comment Share on other sites More sharing options...
Rabenga Posted June 7, 2019 Share Posted June 7, 2019 NOOOOO! I want it! What obligations? I will clean your bathroom, walk your dog, make you dinner and clean up the kitchen afterwards...I need that tank! Link to comment Share on other sites More sharing options...
malika666 Posted June 7, 2019 Share Posted June 7, 2019 How about rebuilding my house from the ground up and doing my fulltime job? Link to comment Share on other sites More sharing options...


Recommended Posts
Create an account or sign in to comment
You need to be a member in order to leave a comment
Create an account
Sign up for a new account in our community. It's easy!
Register a new accountSign in
Already have an account? Sign in here.
Sign In Now