Mandragola Posted August 1, 2019 Share Posted August 1, 2019 (edited) In my arrogance, I thought I’d start a dedicated tactica for Adeptus Titanicus. I’ve played quite a few games now and I think I broadly know my way around the game. Since this thread was started it's become quite successful I think, with some good insights from this community. Maybe at some point I'll add some sort of index to this post so those can be found. For now it's kind of a stream of consciousness, so good luck. The idea of this thread is to discuss how to go from something like this, where there are two opposing battlegroups: To something like this, where only your engines remain and there is lots of mess where the enemy ones used to be: These are my thoughts on how to do that. Play your mission – and your opponent’s. The missions in AT are quite varied. Some are more difficult to achieve than others. Many have secondary conditions that apply to either player. You win or lose depending on whether you achieve your objectives and whether your opponent does theirs. Think about how many VPs are available and how to get them. Work on a plan to get more of them than your opponent does. If you don’t need your titans alive but you win by succeeding at retrieval, then rush the centre and do everything necessary to protect your runner. If you need to give up on your primary objective to keep your titans alive, so your opponent fails at engage and destroy, then do that. And generally try to avoid “Glory and Honour” – because nobody can kill a warlord titan that they can’t see on turn one (and you can bet your target will be behind a hill with a blind barrage on it). I’ve no idea what FW were thinking with that one. I guess it’s doable if your opponent only has warhounds and there’s no cover. Otherwise, avoid. Over time, I’ve found that reaver titans are really useful for achieving missions. They aren’t as entertaining as warhounds or as brutal as warlords, but they are reasonably fast and durable, which is what’s needed when you have to have a titan survive a journey across the battlefield. Orders in the right order Orders are always a risk. Sometimes you’ll fail an order and be in trouble. On the whole you should try to rely on them as little as possible, and always roll for the ones you really need before going for the “nice to have” ones. In general, it’s very important to succeed on a charge order or repairs. If your melee titan can’t charge, or your hot titan blows up in the damage control phase, you’ll look silly. Full stride can be very important too, if the mission or your position demands it. On the other hand first fire and split fire are nice, but usually it’s not a disaster not to get one of those off. Keep that reactor cool Hot titans are dead titans. They can’t boost their void shields (which may collapse anyway with an orange reactor), they take hits to their bodies and their servitors are too busy trying to cool them down to repair hits. So every draining weapon you stick on your titan makes it slower, less agile and easier to kill. Think: does it really make much difference to get shieldbane with that turbo laser, when you’re more likely to gain heat by doing so than you are to drop an extra shield? Similarly, think about whether you actually need to fire your plasma gun on maximal fire to beat the target’s armour, and if you can afford to roll a couple of 1s and gain heat. Plus of course whenever you push your reactor there's a chance your titan's machine spirit will intervene and do something mad. This actually isn't too bad if you're boosting your shields, because that still happens and the machine spirit might actually do something useful, but it's rubbish if you're trying to move or shoot. Teach your titans to dance You must choreograph your titans’ moves as well as possible. Titans aren’t very fast, can only move within their front 90 degree arc and have big footprints on the board. It’s extremely easy for them to get in each other’s way and block your progress, which will cost you precious time and make your shooting less accurate. So to avoid this, plan ahead. Don’t stand a titan behind another if you want to activate it first. Try not to walk in front of a titan that’s about to fire. Look for obstacles like bottlenecks between two buildings and work out how you’re going to get through them – or avoid them entirely if you can. Sometimes a channel will be formed between two terrain features so that only one titan can travel up it at a time. This is a very dangerous feature because titans at the back of the queue are effectively out of the game, while those at the front are forced to advance as fast as they can. Only go up these if you really have to, and go as fast as you can. Do activations good. It’s usually an advantage to have more activations than your opponent, because it lets you move units after all of theirs have gone. You can arc dodge and focus fire on a single target. Sometimes though you’ll have units that want to activate first, not last. A unit with charge or first fire orders might well want to hit something before it gets a chance to move away, for example. And of course you might want to activate one of your own titans to avoid exactly this. In the damage control phase activations only really matter when something might overheat and explode. Generally speaking, if your titan might go bang you should activate it last if it’s near your own titans, so they get a chance to repair first, or go first if it’s near the enemy, so they don’t get a chance to. If it’s near your own titans that are undamaged then you should activate it first, so the other titans can activate and repair any damage they take. Pick your targets carefully. Annihilate them wantonly. I generally try to prioritise whichever enemy unit is the biggest threat to my mission. This isn’t necessarily the most dangerous titan. It might be the one I think has vital cargo, or the fastest one if I’m trying to hold the line. The idea is to figure out which enemy unit is most likely to prevent you from winning, then remove it. Ideally, your target should then die in a single combat phase. The bigger titans can repair themselves quite well if you give them a chance, so try not to. If you can’t actually bring much fire down on your priority target, for example because it’s hidden by terrain, then you should probably go for something else rather than half-killing two targets. If it’s carrying a rescued crew and about to run off the board then just do what you can. Melee titans and knights are often high priority targets. They are certainly very dangerous. There’s a theory that they force your opponent’s hand by making them focus on the target you want. The downside to this is that going nearer to the enemy inevitably makes you take more damage, as weapons tend to be more accurate up close. So charging a reaver with a fist down the centre will tend to force your opponent’s attention, but also hand them an easy kill. I think that’s only worth it if it’s covering for a retrieval or vital cargo mission – otherwise I’d much prefer to make all my titans hard to kill. So you want to kill a god? Titans die when they take four crits to a single location. To do this you generally need to drop their shields (or walk inside them), hit them a few times very hard to break the structure of a location, and then follow that up with several more hits in the same place to cause the crits. So it’s a three-step process and different weapons are good for different steps. Let’s go through them. Step one To break shields, you need a lot of hits at S4 or better. The stand-out weapons are therefore apocalypse missile launchers, Vulcan mega bolters and gatling guns. These guns force the maximum number of saves. Shieldbane weapons are an option for breaking shields, but often not a good one. After all, the enemy titan can repair a shield almost as easily as yours can cool down the point of heat you get for shieldbane, and you also risk your titan going nuts when you push its reactor. I ran some calculations. If there are no hit modifiers a warlord titan’s apocalypse missile launchers drop an average 1.48 shields against a target with its shields in the 3+ zone that pushes its reactor to reroll 1s. With turbo lasers and shieldbane it drops 1.67, again with no negative mods to hit (within 16”). That’s the best you can get out of shieldbane. In any other scenario you’re better off with a multi-shot gun like a Vulcan or gatling blaster, rather than a laser using shieldbane. Notice that the defender has to push their reactor against each individual attack. This means that it's a bit harder to defend against two missile launchers on two reavers than it is against the same two missile launchers on a warlord. The reverse is true of shieldbane - the warlord can make 6 dice of turbo lasers have shieldbane for one point of heat, while a warhound only gets to do it for two shots. And of course the warlord is far more able to manage that heat than the warhound is. Alternatively, just walk inside the enemy’s shields. That’s easier said than done of course, but it can still be a viable option. You might decide that you’ll leave one enemy titan alone, focusing on other targets, until your warhounds get nice and close. Then have them run in drop it without shields becoming an issue. Step two This one’s pretty simple. Hit the target very hard with something. A bellicosa volcano cannon, sunfury plasma annihilator (on maximal, preferably), plasma blastgun, melta cannon or volcano cannon are the best options here. Melee weapons work well too. It probably doesn’t matter where you hit, so don’t do targeted shots at this stage. Sometimes you’ll annoyingly hit a weapon, but the chances of doing that are lower than the chance of missing altogether when using targeted shots. You can target wherever you like with melee weapons of course, and on the whole I’d recommend the body in that case. You’re likely to cause a reactor leak and/or drop the target’s shields, which will make it a lot easier for other titan’s to finish the job. If there’s significant structural damage already, say because the enemy titan’s reactor overheated, proceed to step three straight away. Step Three Now that there are no shields and there’s a big hole in it somewhere, you need to hit that location some more to cause crits. A weakness of blast weapons is that they can’t do this. On the other hand, multi-shot weapons get a lot of attempts to hit and often have a chance to gain +1 to hit for range, which will seriously increase the number of hits you land. This means that things like Vulcan mega bolters are surprisingly good at killing titans, while volcano cannons aren’t. If there’s +3 to the damage roll from structural damage and all you need is a direct hit to cause a crit, spraying bolts into the wound can work very well. But a second hole appearing in another location won’t make the enemy titan any more dead. You could get lucky and roll the right thing with your location dice of course. Mid-strength weapons Lasers and flamers are in an odd place. They don’t have the number of shots to be great in stage one, the strength to be great in stage two or the accuracy to be great in stage three. The “Glass half empty” way to look at them would be to say they are bad guns that don’t work in any situation. Or you could be more positive and say that they’ll always be able to do something useful in any of the three stages. The macro-gatling cannon is different because it has enough shots and accuracy to be great in stages one or three, and useable in stage two against lighter targets. Killing knights Essentially, knights are always in stage two. They don’t have void shields to remove but neither do you ever get positive modifiers on your armour rolls against them for structural damage or hitting them in the back. The combination of their ion shields and armour makes low-strength dakka guns very ineffective against knights. On the other hand, high-strength blast weapons can take off whole banners in one go, ignoring ion shields and killing whole knights with single crits. Of course, if you go up against a knight army you may as well just shoot at them with everything, in spite of the fact that your dakka guns aren’t particularly useful. But they are a balancing factor that prevents you from just using Vulcan mega bolters on all your hardpoints. Choosing your battlegroup. The good news is that you can take kind of anything you want in AT and have decent games. AT isn’t won and lost at list creation. There are still some things to consider though. Some legios tend to be better for some classes of titans than others. For example Defensor want guns with a long range that will be in range to fire twice on turn one, and a reactor strong enough to survive doing so – which probably means they want reavers and warlords more than they want warhounds. But the mortis stratagem to take a free move before the game starts is awesome for warhounds. Vulpa has rules to make melee reavers seriously scary, and Astorum warlords are very tough. That doesn’t mean you should only field those titans for those legios of course, but it’s good to play to your strengths. You’ll also want a good balance of guns across your list, and probably on each individual titan. Personally, I never like to field a titan with the same gun on both arms. I’d much prefer to have a gun for stage one and three, paired with one for stage two. So I find melta and gatling a good reaver set up, plasma and Vulcan great on warhounds and on warlords I like plasma and gatling. Those are by no means the only good set ups of course, but they are great all-rounders. Melee weapons should probably be paired with something that can do targeted shots at wherever the fist has landed. Gatling weapons, lasers and other melee weapons are good here. A melta on a reaver is probably good enough to take with a melee weapon, just because it’s so powerful relative to anything else. Some titans are also more “high maintenance” than others. For example, a melee titan is going to want full stride or charge orders most of the time, but a shooty reaver can generally get by without orders at all. If too many of your titans need orders too much of the time then you’ll inevitably fail sometimes and your titans won’t do what you need them to. The same applies to activations. A warhound might really want to move last and fire first, so it can avoid enemy fire arcs and then hit hard before retribution comes for it. But not all your units can do that, so it’s advisable to have a few things that are happy to move earlier and fire later. That's more than enough from me Any comments, disagreements or lessons that you can add to this would be very welcome. Edited May 14, 2021 by Mandragola Dosjetka, Xenith, apologist and 17 others 20 Back to top Link to comment Share on other sites More sharing options...
Fajita Fan Posted August 2, 2019 Share Posted August 2, 2019 I don't know why the general thread needed to be closed, it was never meant to be a "resource" thread but a general catch-all for "what do you think of this list?" or "check out this converted arm" or "how should I convert this weapon that has no model?" or "how many dice did you get in your pack?" which I personally find much easier to read than 100 separate topics clogging up this section. This a niche game with a niche fanbase and I liked having one thread to chat about the game. I guess I can do a separate topic for every single idea I have. This is the best post I've read on this whole forum, really good stuff here. Think about how many VPs are available and how to get them. Work on a plan to get more of them than your opponent does. If you don’t need your titans alive but you win by succeeding at retrieval, then rush the centre and do everything necessary to protect your runner. If you need to give up on your primary objective to keep your titans alive, so your opponent fails at engage and destroy, then do that. I'm so bad at this it's not funny as I'm easily the most distractable wargamer ever. Want to get me off my game? Send me an injured tank and I'll pump everything into it just to enjoy blowing it up. So to avoid this, plan ahead. Don’t stand a titan behind another if you want to activate it first I'm famous for this. In Bloodbowl my friends don't need to block my running backs, I'm quite capable of doing that myself. This means that things like Vulcan mega bolters are surprisingly good at killing titans, while volcano cannons aren’t. If there’s +3 to the damage roll from structural damage and all you need is a direct hit to cause a crit, spraying bolts into the wound can work very well. But a second hole appearing in another location won’t make the enemy titan any more dead. You could get lucky and roll the right thing with your location dice of course. You mentioned this earlier and I took notice. I've learned the lucky crit from spamming dice also works in Battletech with SRM launchers, it's appropriate it works in AT as well. On the idea of high strength weapons do you wish the melta cannon wasn't a blast weapon? It makes me wish Reavers got a plasma weapon somewhere between the Warhound and Warlord's, maybe 2 shots that could be targeted. I love the idea of melee Reavers but wish they had a targeted higher strength gun. Vulpa has rules to make melee reavers seriously scary *goes to re-read the Vulpa rules* Really good stuff! Sandlemad 1 Back to top Link to comment Share on other sites More sharing options...
Reyner Posted August 2, 2019 Share Posted August 2, 2019 That is a great post, if I ever get a second Warlord I am very tempted to try a Myrmidom Battlegroup with my Defensor. I've played Axiom and Venator so far but really enjoy Warlords. Link to comment Share on other sites More sharing options...
apologist Posted August 2, 2019 Share Posted August 2, 2019 Great rundown, I found myself nodding in agreement at much of it, particularly this point: You’ll also want a good balance of guns across your list, and probably on each individual titan If you're playing narratively and in a campaign (and if not, try it at once!), then there's the additional consideration of crew experience. Having additional re-rolls can make a big difference to the effectiveness of single-shot weapons and those with draining. For example, a volcano-cannon armed Reaver with an experienced crew will be considerably more effective than with a green crew, as the re-rolls make its weapon more accurate (as you can re-roll the to hit die). This advantage is minimised by taking multi-shot weapons, so all other things being equal, it's best to prioritise multi-shot weapons to less experienced crews. An experienced crew is also better at handling heat build-up, as you can reroll the reactor die to ameliorate bad rolls. This makes a difference to the effective rate of fire, agility and resilience (through pushing the reactor in the various phases). These benefits increase with the more experience your crew has. For these reasons, there's an argument for using your more experienced crews in dedicated long-range support Titans. They'll survive longer, hit harder and be better able to support the rest of the battlegroup. They'll also likely become increasingly high priority targets for the enemy. This sounds bad, but keeping them as long-range support means that they're both inherently safer (as they've got space to move into and are at longer range), and may draw fire from your less experienced front-line Titans. Xenith 1 Back to top Link to comment Share on other sites More sharing options...
Gillyfish Posted August 2, 2019 Share Posted August 2, 2019 Terrific post Mandragola. I have yet to play a game (still in the assembly phase, although I did some spray undercoating last night - yippee!), so not much I can add as yet, but what you have said chimes with the games I have seen. Link to comment Share on other sites More sharing options...
Mandragola Posted August 2, 2019 Author Share Posted August 2, 2019 I don't know why the general thread needed to be closed, it was never meant to be a "resource" thread but a general catch-all for "what do you think of this list?" or "check out this converted arm" or "how should I convert this weapon that has no model?" or "how many dice did you get in your pack?" which I personally find much easier to read than 100 separate topics clogging up this section. This a niche game with a niche fanbase and I liked having one thread to chat about the game. I guess I can do a separate topic for every single idea I have. This is the best post I've read on this whole forum, really good stuff here. Nice of you to say so. I don't really know why the old thread needed closing either, but it was kind of a "general chat" space so maybe they like things to be more focused. I think it could be useful to have tactics stuff all in one place. This means that things like Vulcan mega bolters are surprisingly good at killing titans, while volcano cannons aren’t. If there’s +3 to the damage roll from structural damage and all you need is a direct hit to cause a crit, spraying bolts into the wound can work very well. But a second hole appearing in another location won’t make the enemy titan any more dead. You could get lucky and roll the right thing with your location dice of course. You mentioned this earlier and I took notice. I've learned the lucky crit from spamming dice also works in Battletech with SRM launchers, it's appropriate it works in AT as well. On the idea of high strength weapons do you wish the melta cannon wasn't a blast weapon? It makes me wish Reavers got a plasma weapon somewhere between the Warhound and Warlord's, maybe 2 shots that could be targeted. I love the idea of melee Reavers but wish they had a targeted higher strength gun. I know what you mean. I think the plasma blastgun is probably more powerful than any arm weapon a reaver can take. I've tried out a laser blaster on a reaver's other arm in a Ferrox maniple, which gets 3 shots at S9 in melee, targeted on a 4+. Other people just go for two melee weapons and I can see the logic in that. I think the melta is about right as is - taking blast away would make it able to target but would do only one hit, which overall would be a nerf. Gatling blasters are another good option for a melee reaver because they can quite easily hit at short range and their low strength isn't a problem if you hit a badly damaged location - such as where you've been punching. Cheap, too. In general I feel like the rules writers haven't seen the significance of the blast rule. A plasma blastgun can do the same number of hits as a sunfury, but with only two rolls to hit meaning it'll tend to generate half as much heat. If I was going to make a balancing change I think I'd remove the blast rule from blastguns. It doesn't really make sense that the little plasma gun gets a blast but the really big one doesn't. And that's before you start talking about Acastus knights. Anyway the rules are what they are. For now, give your warhounds plasma guns - but magnetise them! That is a great post, if I ever get a second Warlord I am very tempted to try a Myrmidom Battlegroup with my Defensor. I've played Axiom and Venator so far but really enjoy Warlords. Thanks. I think a defensor warlord with missiles, a quake cannon and some other thing (probably a bellicosa for range) would work really well. To be honest, some other defensor bonuses do work well for warhounds. In particular they are pretty good at getting orders off, which helps mitigate their worse command value. Great rundown, I found myself nodding in agreement at much of it, particularly this point: You’ll also want a good balance of guns across your list, and probably on each individual titan If you're playing narratively and in a campaign (and if not, try it at once!), then there's the additional consideration of crew experience. Having additional re-rolls can make a big difference to the effectiveness of single-shot weapons and those with draining. For example, a volcano-cannon armed Reaver with an experienced crew will be considerably more effective than with a green crew, as the re-rolls make its weapon more accurate (as you can re-roll the to hit die). This advantage is minimised by taking multi-shot weapons, so all other things being equal, it's best to prioritise multi-shot weapons to less experienced crews. An experienced crew is also better at handling heat build-up, as you can reroll the reactor die to ameliorate bad rolls. This makes a difference to the effective rate of fire, agility and resilience (through pushing the reactor in the various phases). These benefits increase with the more experience your crew has. For these reasons, there's an argument for using your more experienced crews in dedicated long-range support Titans. They'll survive longer, hit harder and be better able to support the rest of the battlegroup. They'll also likely become increasingly high priority targets for the enemy. This sounds bad, but keeping them as long-range support means that they're both inherently safer (as they've got space to move into and are at longer range), and may draw fire from your less experienced front-line Titans. Glad my experiences match up with yours. The campaign stuff is really interesting. I haven't used the campaign rules yet myself (or even read them properly). But yes, if you've got a single reroll then it's going to be very useful with single-shot weapons. You could actually argue that it's most efficient with guns that have quite a lot of shots, like say a sunfury plasma annihilator, because you're likely to get to get to use it every turn. Unfortunately rerolls don't prevent you gaining heat if your first roll was a 1. Link to comment Share on other sites More sharing options...
Sincollector Posted August 2, 2019 Share Posted August 2, 2019 This is a fantastic thread. Wondering about your thoughts on deployment. I’ve noticed that a spread gunline with some use of cover seems most popular. I’m guessing this is the result of the varied missions. I haven’t seen a lot of refused flank. I occasionally see forces divided into a couple groups based on battlefield role/speed. Link to comment Share on other sites More sharing options...
Mandragola Posted August 2, 2019 Author Share Posted August 2, 2019 Good question on deployment. I probably should have covered that. I haven't mastered it, but I've picked up a few things. There's a pretty good case for spreading your titans out, which is that they are less likely to get in each other's way or to kill each other, if one explodes. I started out talking about the mission you're trying to do, and prevent your opponent from doing. Deploying in the right way is essential for this. You need to give each of your units a role within your plan, and then put them in the right place to do it. Here's a photo after deployment of the game I showed earlier. I've drawn on it, terribly badly. Ok so the first thing to say is that I'm playing as Astorum trying to do retrieval and my opponent with Mortis wants to do Glory and Honour (as if the traitorous scum know what those words mean, lol). We had the deployment map where you have to note down which quadrant all your guys are going to be in, 6" on the board. I think I deployed a bit better than my opponent here. I'll talk through why I put my models where I did. I've looked at the battlefield and had a think about the terrain. We were playing the rocky hills as impassable, which combined with all the buildings means that movement is going to be quite limited. There's lots of stuff in the way, and this is also a 2500 point game on a 4x4 table, so it's busy. The lines of green dots show where titans will be able to move in long straight lines, and have clear lines of sight. You can probably make out the little yellow head in the middle of the board, which I'm tasked with retrieving. My opponent has kindly put it just on my side of the board, which he didn't need to. Pro tip: always put the head as far from the guys fetching it as you can! I need to fetch it. My plan is for reaver 1 to run up the centre of the board as fast as it can. He'll go on full stride and use whatever cover he can while threatening things with his power fist. Meanwhile reaver 2 is going to follow, grab the head and run for home while nobody is looking at him. I activate these guys quite late in my first movement phase so I don't show my opponent what I'm up to. Reave 1 full strides onto the objective, pretending he's there to grab it, but he can't actually pick it up till next turn. Meanwhile reaver 2 has gone to where he'll be able to move 11" (with the Astorum War March ability) on turn 2's movement phase, turn round, pick up the crew and then full stride back towards my lines. Warlord 3 is the target that my opponent wants to assassinate. He's not actually my Princeps Seniores but the gatlings on his roof make him my most expensive titan. I deployed him on the right because there's a damn great hill there for him to hide behind. As it turned out, the enemy shooty stuff is on the other side of the board anyway, so he was able to position himself to fire along the far corridor along the side of the board, happily gunning down Cerastus knights and things. Warlord 4 is my fire support guy. I've sat him at the end of the central corridor on the basis that stuff is likely to happen in that area. In fact this guy didn't have to move all game and stayed happily first firing for six turns. Warlord 5 is my seniores. He's tough because he's got no draining weapons. I know I've got to contest the middle of the board, so he was actually my first drop. It's nice to have some units like this that can be put down and just get on with things. The warhounds 6 are going to use the rock on the left to advance in cover and try to outflank the enemy shooty things. I think my opponent has made one or two mistakes in his deployment, which are things to watch out for. First, his reaver 1 is armed with two volcano annons (which is sketchy in itself if you ask me) so it wants to stand still and shoot things. But it's stood in front of his warlord 2, which is armed with two Sunfury plasma annihilators and turbo lasers, and wants the reaver to get the **** out of the way. There's no need for this as there's acres of space around the other warlord. Second, he has too much stuff around that crudely-drawn 3, with too few channels to move through. Back there you've got a CC reaver, two warhounds and two banners of two lancers. Here they are after turn one's movement phase. After getting around those obstacles they haven't been able to advance all that far. The warhounds are backed up behind the knights with no targets and still way out of range. Unfortunately the knights failed a full stride order too. But that's something that quite often happens and it's not good to rely on. A bigger problem they have is this: I've managed to move the warlord they're trying to assassinate 8" diagonally forward, on the edge of what his fire arc allows, to where he's just in range of the lead knight banner. This has also moved him out of the missile arc of the far enemy warlord. So now the poor little guys are facing a sunfury and a load of dakka across open ground. My warlord can sit back now on first fire orders with the hill on his left protecting him against the enemy big guns, while knights and warhounds run at him one at a time. Happy days. I think those knight lancers would have been a lot better off contesting the centre, given that my opponent knew the mission I had. To be fair there's not a lot of terrain there to hide behind, and my bellicosa/mortis warlord might have made pretty short work of them. But I felt like there wasn't enough stuff trying to stop my retrieval mission and probably the wrong stuff was sent to kill my warlord. In general, melee units have an easier time if the enemy comes towards them, which my target warlord had no reason to do. Hopefully that is a bit helpful and doesn't just come across as me bragging.. Link to comment Share on other sites More sharing options...
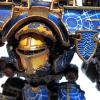
Fajita Fan Posted August 2, 2019 Share Posted August 2, 2019 (edited) I can't get over how good Astorum looks on the battlefield. Titans were made for their colors! Warlord 4 is my fire support guy. I've sat him at the end of the central corridor on the basis that stuff is likely to happen in that area. In fact this guy didn't have to move all game and stayed happily first firing for six turns. This is kinda my plan with my loyalist Warlord, simply sit there firing while the Reavers tackle most of the work. https://youtu.be/7TuPell1Y0c I still want to find someone who embraces the Venator maniple and finds its ability useful, the all-Reaver maniple who move full speed out of arc looks amazing on paper. Edited August 2, 2019 by Fajita Fan Link to comment Share on other sites More sharing options...
Sincollector Posted August 3, 2019 Share Posted August 3, 2019 Thanks, Mandragola, for such a thorough answer. Some great points. It looks like your opponent thought mainly of cover, losing both movement options and firing lanes. Then he made poor target selections compounding the issues. Also, I appreciate your feint with your first Reaver. Another great little tactical gem. Link to comment Share on other sites More sharing options...
Gillyfish Posted August 4, 2019 Share Posted August 4, 2019 Agreed, that's a very astute analysis of the deployment of you and your opponent. Lots of buildings can equal lots of cover, but also lots to move around. Having seen a few online battle reports, knights, when they get the charge, appear to be deadly, so do you think it's worth holding back units of your own to seep your backfield and protect the bigger titans from them? I remember reading that a Warhound with double inferno is actually extremely good at knight killing. I'm a little sceptical myself, but is the concept of holding something back worth consideration? Link to comment Share on other sites More sharing options...
Mandragola Posted August 4, 2019 Author Share Posted August 4, 2019 (edited) Thanks, Mandragola, for such a thorough answer. Some great points. It looks like your opponent thought mainly of cover, losing both movement options and firing lanes. Then he made poor target selections compounding the issues. Also, I appreciate your feint with your first Reaver. Another great little tactical gem. In my opponent's defence, the issue with the reaver in front of the warlord was caused by the deployment map, where we had to write down what quarter of the board each unit was in before set up. If I remember right, when it came to put the warlord down the only place it would fit in that quadrant, due to the buildings and the size of its base, was behind the reaver. So he didn't really choose to put it in that position - he was forced to by his earlier choices. This is something to watch for with alternating activations, during deployment and at other times. If you just deploy or activate each unit at a time, looking at what's best for that unit, you'll often find that other units lose out because their best option has been bagsied by somebody else. In this case the smaller reaver could probably have fitted in places the warlord didn't, but it was already down by that point. Agreed, that's a very astute analysis of the deployment of you and your opponent. Lots of buildings can equal lots of cover, but also lots to move around. Having seen a few online battle reports, knights, when they get the charge, appear to be deadly, so do you think it's worth holding back units of your own to seep your backfield and protect the bigger titans from them? I remember reading that a Warhound with double inferno is actually extremely good at knight killing. I'm a little sceptical myself, but is the concept of holding something back worth consideration? I'm not at all sure about this to be honest. The idea of leaving some units back to try and ambush things rings a few alarm bells for me. The biggest issue is that while those units aren't doing anything, you're effectively playing with a handicap, as part of your army isn't participating. The way I like to think of it is that, if a unit is hiding or full striding for a turn, then it has to earn back the damage output it would have accomplished when it gets close to the enemy. If I'm going to include a unit that wants to do that in my army then I have to be persuaded that I wouldn't be better off with a unit that could shoot stuff from turn 1. It could still work though. The question is: by hiding, will you let your opponent just shoot your other stuff dead and win the game without triggering your ambush? However, the game isn't just about killing engines - it's also about the mission. Sometimes a mission like vital cargo or (you having) hold the line will force an enemy to advance. If they've got retrieval you know exactly where they're going. In that situation I can definitely see a case for lining up some units to pounce on things. I'm not convinced about the flamer vs knights. The first and biggest problem with it is that it requires you to go close to the knights to kill them. That's what the knight player wants you to do. The second is that S7 isn't all that great against knights. They'll get ion saves on at least a 5+ if you're looking at a full banner, and while you get a direct hit on a 2+ you actually need a 6 to get a devastating hit. Imagine you're firing at a banner of three questoris knights. Let's be generous and imagine you hit all three with both flamer templates. You get 10 hits. The knights have a 5+ save so now you have 6.67 hits. You need a 2+ to get a direct hit and a 6 causes 2 damage. This actually means each hit averages 1 damage (0 on a 1, 2 on a 6, 1 on any other result) so you should expect to do 6.67 damage. The outcome of all that is that you could hit a banner with your two flamers and probably end up killing one knight and damaging a second one - killing it if you're lucky. That's nowhere near good enough given the risk you're taking and the opportunity cost of equipping a titan to hunt knights. Shooting at knights is counter-intuitive. As people who've played a lot of games we're trained to think that you need to shoot big things with high-strength guns and spray dakka at little things. Titanicus is absolutely not like that. Spraying dakka at big things is very effective at breaking their shields and finishing off structurally-compromised titans. It's surprisingly bad against knights. Look at the ion shield table for a questoris knight. Against strength 1-6 a banner of 3 gets a 4+ save. A banner of 2 Cerastus gets the same, but of course lancers will be saving on a 3+, or a 2+ if there are 3 or more of them. So if you shoot a vulcan mega bolter at a knight only half your bullets or less will get past the shield, and then they'll need a 5+ to do even a single point of damage. You cause less than one point of damage on average per VMB - even worse than the flamer. On the other hand if you hit them with a plasma blastgun on maximal fire their ion shields won't work at all. You can shoot them (somewhat inaccurately) from 24" instead of ~8" with the flamer. A competent opponent won't let you get more than 2 hits per blast but even so you average 2 hits per gun at long range and a bit better up close. These hits do 1 damage on a 2+, 2 damage on a 3+ and kill a knight outright on a 6. On average, each plasma blastgun does 3.67 damage at 24" - slightly better than the flamer - and 4.89 at 8". Remeber to apply results from the lowest to the highest, so a devastating hit and a crit will kill two whole knights. This does assume no cover, and the flamer does ignore that. I've been kind to the flamer in assuming 5 hits though, and only 2 for the plasma. So a double-plasma warhound is way better at killing knights than a double-flamer one. It's expensive though, and a bit prone to getting hot. More realistic in my view is to go for plasma and VMB, so you have a combination of good weapons against any target. These guns reward you for getting close by becoming more accurate, but they don't force you to. If you can get inside a titan's shields and hit it with the plasma and then the VMB targeting the same location, that engine is in real danger of death. Things do get improved if you can get any bonuses to damage the knights. Even +1 to damage them will raise the damage significantly, or double the chance of a plasma gun getting a crit. It's tricky to get these bonuses though - firing a whole squadron at a banner of knights is probably a waste. I really like the ferrox maniple because it gives you an actual +1 to strength instead, so it also weakens ion saves, but I think you need to get within 3" of a questoris knight for it to work. I guess I ought to mention lasers on hounds. S8 means ion saves aren't great against them and they can score a devastating hit on a 5+. Each turbo laser one ends up averaging 1.3 damage against a banner of 3 questoris, so a double-laser titan would have to get pretty lucky to drop a questoris knight. It can do this from nice and far away without worrying about heat or anything like that. A squadron of two, firing with the bonus to damage still only does 6 damage on average, which is about what a single flamer or plasma titan was doing on its own. So lasers don't seem to be the answer - low risk = low reward. There are even bigger guns of course. I don't particularly like bellicosa volcano cannons (they miss lots and I've seen too many warlords overheat) but they are an absolute terror for knights. I've seen a batrep where somebody killed a banner of questoris by mistake with a scattering shot. Meltas off reavers are another good option for this. Edited November 25, 2019 by Mandragola Sandlemad 1 Back to top Link to comment Share on other sites More sharing options...
Fajita Fan Posted August 4, 2019 Share Posted August 4, 2019 The first few batreps had people taking out banners of knights with single volcano shots (albeit they also had knights doing dozens of attacks and killing Warlords in a single charge) so I still feel the need to include one in each list. Link to comment Share on other sites More sharing options...
Sincollector Posted August 4, 2019 Share Posted August 4, 2019 Fajita Fan, those first batreps had each charging Knight doing an extra attack for every 3" moved. With a potential 4 extra attacks per Knight they were hitting crazy hard. After the FAQ, it's down to 4 potential extra attacks for the whole unit. Knights can still hit pretty hard in melee though with their maneuverability easily getting to side and rear armor. Link to comment Share on other sites More sharing options...
Fajita Fan Posted August 4, 2019 Share Posted August 4, 2019 I know, and the first time I saw that I said, "Something ain't right here..." Link to comment Share on other sites More sharing options...
Mandragola Posted August 5, 2019 Author Share Posted August 5, 2019 So many mistakes in those early batreps, many around bellicosas. I saw one where they weren’t using the draining rule, so they thought they were the obvious best weapon (which I guess they would be). In at least two they hadn’t realised you got two hits when the centre of the blast was over a model, so the two warlords could hardly hurt each other. It’s one of the things that made the game’s launch less successful I think. The rules are not particularly clear so it’s not really (or not entirely) the fault of the youtubers. And they were playing games with a warlord and 3 questoris on each side, which is a bad set up for games (the questoris evaporate, the titans overheat before killing each other). That’s entirely GW’s fault for how they designed the GME. Anyone who watched one of those batreps was watching AT far from its best. Anyway the main thing those games did teach us is that bellicosas are good at killing knights. That continues to be true, and it’s what they are best at really. I find that a sunfury is a better gun for getting rid of titans. Link to comment Share on other sites More sharing options...
Mandragola Posted November 4, 2019 Author Share Posted November 4, 2019 Since I'm just back from Blood and Glory, I thought I'd relate a bit about what happened there in case it's of use. Wasn't sure if this should go in my plog or here, but since it's about games played this seems like the place. I played four games. These were matched play against Rhu James with his awesome-looking knights and Rob Crouchley with some traitorous Legio Fortidas titans, followed by a scenario game against my fellow Warlord Alex with his Suturvora. On Sunday we did a big six player game, which was lots of fun. I took a few pics. Here's the list I took: Maniple 1 – Legio Astorum – Regia Battleline Maniple Warlord Titan 385 - Belicosa Volcano Cannon 55, Sunfury Plasma Annihilator 45, Apocalypse Missile Launchers 15 - 500 Warlord Titan 385 - Macro-Gatling Blaster 30, Arioch Power Claw 25, Vulcan Mega Bolter Array 20 - 460 Warhound Titan 180 - Plasma Blastgun 30, Vulcan Mega-Bolter 10 - 220 Warhound titan 180 - Vulcan Mega-Bolter 10, Plasma Blastgun 30 – 220 Reinforcements - Legio Astorum Lucius Pretorian (Reaver Titan) 290 – Melta Cannon 35, Gatling Blaster 15, Apocalypse Missile Launcher 10 – 350 These are Rhu's knights, and they're stunning. That's two lances. One features a unit of 6 wardens with gatlings (with his high scion), 3 double battle cannon guys and 3 of the flamer Cerastus. The other has 4 lancers, three with double meltas and three with melta and ccw. Also 3 Acastus knights taken as free blades for activations. We were playing with modified rules for Acastus knights, written by Rob. Main guns had range 24 and 2 shots, but still blast S8. Missiles had 20" range and 4 shots, without rapid. So basically halved most of the numbers - and they were still pretty good For missions I ended up with Glory and Honour while Rhu had Valiant Defence I think. The idea was that he had to kill my titans and he didn't lose many points if his own knights died in the explosions. Unfortunately for Rhu, he had some bad rolls for his orders. He failed his second roll for full stride on turn 1 and his first roll on turn 2, so his knights came towards me sort of piecemeal. This meant I had time to shoot up his guys as they came forward and I did, to pretty horrific effect. And on turn 3 when he was about to finally charge in I played vox blackout, like an extremely mean man, meaning he couldn't do any orders. I also got to thump some knights with my melee warlord, which felt like a spectacularly unfair contest. Punching down is never cool. In the end all the knights died and no titans did. I did learn some stuff though. Firstly, Glory and Honour isn't as bad as I had once thought. I didn't kill the relevant unit till turn 3, partly because they hid on turn 1 after failing their order, but I did still get 10 points for doing that, plus 6 more for holding 2 quarters. This is a mission where you can probably count on getting some points, so it's not a bad pick if your other option looks impossible - like for example having to do retrieval against a knight army. And forcing your opponent to hide their biggest unit is no bad thing either. Second, knights are hugely reliant on orders. We discussed later what Rhu might do differently in future and he said maybe he'd take a command bunker. I think that's a great call because failing a turn one order is so crippling for knights. And third, you can't ever hold back. When he failed that first turn order Rhu hid the lance that failed its test, but that did him no favours. I was still able to fire all my guns into the other lance, so I did just as much damage to his army as if I'd been able to see the hidden guys. Much better to send them forwards, accept that somebody will die, but at least have the remaining guys in a threatening position. Game 2 was against Rob Crouchley and his melee-focused maniple. He'd taken a sort of Traitor Fortidas maniple, with a warlord taken instead of one of the reavers. That meant a warlord with effective 3+ WS, which is seriously scary. Both of us had Glory and Honour. Here's his battlegroup. This is a seriously worrying melee threat. In terms of tactics, it was therefore a similar game to the one against Rhu - except that the titans felt far more scary. We had a sort of early skirmish in which my warhounds took out 3 Cerastus knights and did quite a bit of damage to some hounds (for the loss of one of my hounds, killed by a deadly accurate set of lasers fired up close), while everyone else tried to soften the incoming warlord and Reaver. Then things got up close and nasty. Rob had the Bloodthirst stratagem and won priority with a lot of charges lined up, but I countered with vox blackout and the long retreat. This let me get most of my titans out of the way that turn and get rid of his warlord, getting me my mission success on turn 3. Unfortunately Rob was then able charge his reaver into my warlord on turn 4 and kill it, after his last remaining knight ran in behind to stop me retreating - though the knight did then die when my warlord (with a bellicose) suffered a S12 magazine explosion. Ultimately I'd done enough damage as Rob ran at me to mean that I was able to finish off the remaining titans, particularly thanks to a charge in by my own melee warlord, which completely wrecked the reaver. Rob's use of the bloodthirst stratagem on a Ferrox maniple was inspired. The big bonuses to hit meant he could do targeted shots in melee on a 2+ even with guns, and at +1 strength because of the maniple. However, countering with Vox blackout meant that the steamroller that would have hit me if he'd got charges off never quite happened. My melee warlord really helped again. The ability to counter-punch meant Rob couldn't just charge at me carelessly, since he could lose stuff to my response. This guy in the end accounted for a warhound, the warlord (a short-ranged targeted shot at a very damaged body) and the reaver. Not at all bad. Also, by this point I'd definitely lost count of how many knights I'd killed with plasma blastguns. It was a lot of them. Game three against Alex's Suturvora was On the Edge of the Void. I was attacking and Alex was in the middle. The scenario is really weird because standing near the centre is incredibly dangerous (all incoming shots become blast, which effectively doubles the effect of things like missiles against shields). So Alex had to set up within 12" of the middle but not within 6", and then I got to set up everything. Here's a shot during the first movement phase. Alex put his warlords on the outside facing the centre. He thought I wouldn't be able to set up behind him (I could deploy anywhere outside of 12" of him) but actually I could, so I was more or less straight behind him, with his warhounds quite far away. He pushed his reactors a lot to turn, which meant he was already quite hot before he even started firing bellicosas at me. Nothing died on turn 1, though I beat up a warlord a bit in exchange for taking quite a lot of hits on my warhounds. Alex had a choice at the start of turn 2 of whether or not to set off a big solar flare that would blind me, giving me -2 to hit for the rest of the game and meaning there were only 2 turns left (3 in total). It also changed my victory conditions from wanting to rush the middle to wanting to stand around the edges - which is kind of where I was already because it was only turn 2. But his positioning was so bad that lighting the flare looked like the best option. Ultimately that meant the game ended really fast, without very much dying, but with a lot of VPs for me. I had 2 warlords and Lucy the reaver stood within range to get points on turn 2, and my whole army made it back on turn 3. My damaged warhounds fled, one behind everything and the other under the void shields of a warlord, so I didn't lose anything. I also only killed a single warhound, after it sacrificed itself by running in my melee guy's way. This actually took a while to achieve because I really struggled to hit the thing at -2 to hit. It resulted in a slightly weird 68:0 win to me, with me scoring all my points basically for just standing near the edge of the board - which warlords are good at. Interestingly, Rob played the same scenario defending with his ferocious melee force against other Rob's force of a Lucius maniple and a warlord, and took them to pieces. Since the attackers needed to get to the centre to score points, Rob didn't have to activate the flare for ages. The attackers were pinned to the board edges and got smashed up very badly, giving Rob a 40:0 win. These three games have given me a lot more respect for melee titans. My warlord had made it into Melee in all three, and we'd also seen melee reavers do a lot of damage. Melee titans, and also knights, project a threat bubble where enemy titans don't want to be, and that's awkward for them if they have to go there to get an objective. Sundays six-player game was nuts but loads of fun. We decided we'd do it by each rolling up an objective, but rerolling engage and destroy. This gave the traitors two sets of retrieval and one retrieval for the loyalists, one of us on each side had hold the line and I had vital cargo. I gave the cargo to Lucy. Here's what the board looked like. On the loyalist side you Rob Hoyle and me playing Astorum and Rhu with his knights - who have clearly learned the error of their ways and returned to the Emperor's light. Facing us are Rob Crouchley's melee nutters, Alex's bellicose-heavy Suturvora and Darren Winter's homebrew Venator maniple (with lancer support). Rob H has posted a load more pictures of the game in the AT Facebook group if you're interested. I won't try to describe everything that happened, but basically there were three main areas of conflict. In the centre Rob Crouchley was pushigg for a retrieval mission, while other Rob H was doing the same with his Lucius hounds. On the left my Seniores' warlord and Lucy with some knight support faced off against one of Alex's warlords and his hounds, lending some fire support to the centre. And on the right my melee warlord faced the Venator, Alex's melee reaver and other warlord, plus seven traitor lancers. Here's the central face off My attempts to run Lucy across the board got off to a really bad start when she failed a machine spirit roll on her first move, deciding to do a repair roll before a shot had been fired. That is perhaps a bit too cautious! This actually sort of played in my favour though, because it meant she was ignored out on the left flank and Alex's titans attacked the centre. I managed to get full stride off on turns 2 and 3 which, combined with a double war march on turn 2, got her across the board. Alex's hounds and warlord turned after her on turn 3 when they saw what she was up to but they couldn't keep up with the full stride, and her shields held. Mission accomplished. Elsewhere there was rather a lot more carnage. Rob's push for the centre saw him grab the head he was retrieving on turn 2 with a reaver. The loyalists shot at this reaver an awful lot and, through the randomness of dice rolling, managed to immobilse it and wound its princeps (and start its reactor leaking - it was not in a good state). We realised that we didn't need to kill the thing to succeed, just leave it there in the middle of the board unable to move to retreat, which was a bit naughty of us. And Rob lost a lot of titans in that area because of being quite bunched up, so they hurt each other a lot when they exploded. It was quite funny seeing all these chain reactionsd going off, leaving the immobilised reaver miraculously still alive. At one point it had crits in every location and a warhound's reactor went bang, but it only lost its missile launcher, and when Rob's warlord fell over it missed the reaver by an inch, but smashed a warhound up very badly. In the end I think only that immobilised reaver survived. The two titan crews it was carrying can look forward to great careers as servitors in the Legio Astorum - rerolls included. Before (start of combat phase, turn 3)... After (end of combat phase, turn 3) Here's the Reaver's terminal. Believe it or not this isn't even how it finished - this titan managed to live through another turn. Meanwhile Rob H made a textbook retrieval of the downed Astorum crew. A Warhound grabbed the head, performed 3 turns to face back, and ran off 12" to where it was in decent amounts of cover. It managed to survive a round of shooting from one of Alex's double-bellicosa warlords (minus one of its Vulcan mega-bolters) and made it off the field. The right hand side was a bit less conclusive all round. The venator maniple never made much of a push for the head they were supposed to be fetching, perhaps deterred by my melee warlord standing near it. A ridiculous plasma blastgun shot from Rob H killed 5 enemy lancers (two that it was actually firing at and 3 from another lance that it shot by accident). One of Rhu's flamer knights managed to saw the head off the Venator's reaver with its chainfist, silencing it. On turn 3 I had my warlord on charge orders facing Alex's reaver, also on charge orders. Both of us were hoping the other side would run out of activations first and in the end we did. I decided to take the charge from Alex as we had priority, so if I survived I could probably take him out in reply. This was because Alex was going to charge some of Rhu's knights if I didn't get in the way, and that didn't seem very heroic to me (I could have just stood back and let this happen and shot the reaver a bit, but that would have been boring). In the end he pummelled my titan's body but didn't get any crits through, then knocked me back out of melee with concussive, so the fight stopped there. Note, lots of still-living titans on this side. So it finished a loyalist victory. We got our cargo across and brought our missing crew home without losing too many titans (though quite a lot of knights did die!). The traitors paid very heavily. I didn't lose any of my titans but actually I don't remember getting any kills either. Rob H got most of the kills with his Lucius warhounds firing into Rob C's advance, backed up by my warlord and an Acastus or two. Alex's Sutorvora got away largely unscathed too. Anyway that's quite enough for now. I had a great weekend. Came home with four wins and the trophy for best painted - though the vote was very close between me and Rhu (who I voted for) with his amazing knights. Iron Hands Fanatic, Sandlemad and TheDreadfulSagittary 3 Back to top Link to comment Share on other sites More sharing options...
Fajita Fan Posted November 4, 2019 Share Posted November 4, 2019 Okay, I'm at work on my phone so I need to read all this over later. I love this so much, that's just awesome. That's two lances. One features a unit of 6 wardens with gatlings (with his high scion), 3 double battle cannon guys and 3 of the flamer Cerastus. The other has 4 lancers, three with double meltas and three with melta and ccw. Also 3 Acastus knights taken as free blades for activations. We were playing with modified rules for Acastus knights, written by Rob. Main guns had range 24 and 2 shots, but still blast S8. Missiles had 20" range and 4 shots, without rapid. So basically halved most of the numbers - and they were still pretty good So this stuck out at me, how did the Acastus far as freeblades without orders? Was the activation spam worth it? Everyone pretty much agrees that Acastus knights are, at best, undercosted but I worry that nerfing Acastus knights in a household list really limits the top end of what a knight household can do. I look forward to getting plenty of household vs titan games in this winter to get some experience but my Theoryhammer makes me think Acastus should be nerfed in general titan lists but get some kind of order buff (or something) for household lists. Or maybe the household list needs to be revamped... Link to comment Share on other sites More sharing options...
Mandragola Posted November 4, 2019 Author Share Posted November 4, 2019 The Acastus did ok. There’s nothing to stop freeblades getting orders - at least in theory. Rhu of course didn’t get to do many in our game but he did fine in the six-player battle and the Acastus knights were still a real asset, even nerfed as they were. I thought the revised rules for them were pretty much perfect. I don’t know if the household list really works. The knight list at blood and glory got two losses and two wins I think, which is decent. That said, even if the list was weak overall, putting in a broken unit (the Acastus) would be a strange way to fix it. Surely it would be better to improve the weak stuff. Link to comment Share on other sites More sharing options...
Fajita Fan Posted November 5, 2019 Share Posted November 5, 2019 Actually the Acastus command stat is okay, better than the Questoris so they're not at too much of a disadvantage being on their own. They can't do Coordinated Strike so maybe their guns don't benefit from Coordinated Strike as much as some of the others? Link to comment Share on other sites More sharing options...
Mandragola Posted November 5, 2019 Author Share Posted November 5, 2019 (edited) Oh I see what you mean now - by being freeblades they can’t do coordinated strike. But you wouldn’t do coordinates strike on them even if you could. The BS improvement in first/split fire is way better and they have enough strength. And If you had a banner of multiple knights it would always be better to just have more shots rather than slightly increase their strength. S8 is enough.Rhu's knight army had a unit of 6 avenger Gatling guys. They could do 8 S9 shots but the effect wasn’t really all that amazing in any of the games I saw. Edited November 5, 2019 by Mandragola Link to comment Share on other sites More sharing options...
Gore Crow Posted November 6, 2019 Share Posted November 6, 2019 Nice write up and pictures. Glad to hear melee about melee titans at work. Good luck at Legio Walks, will be eagerly anticipating your recap of that too. ;) Link to comment Share on other sites More sharing options...
Dragonlover Posted November 6, 2019 Share Posted November 6, 2019 I'm looking for advice on what rules to use on my homebrew Legio that will fit my general playstyle, which is midrange to aggressive. I can't play a static gunline to save my life. If it helps, I'm looking at using at least one Venator maniple, and I currently have two Warlords, two Reavers and four Warhounds with most currently usable loadouts available. I also have the WD custom Legio rules. I've tried looking through the various Legio rules but it just kinda becomes white noise after a few and I never get anywhere. Dragonlover Link to comment Share on other sites More sharing options...
Sandlemad Posted November 6, 2019 Share Posted November 6, 2019 Fantastic writeup, sounds like a good time. Mandragola 1 Back to top Link to comment Share on other sites More sharing options...
Mandragola Posted November 6, 2019 Author Share Posted November 6, 2019 I'm looking for advice on what rules to use on my homebrew Legio that will fit my general playstyle, which is midrange to aggressive. I can't play a static gunline to save my life. If it helps, I'm looking at using at least one Venator maniple, and I currently have two Warlords, two Reavers and four Warhounds with most currently usable loadouts available. I also have the WD custom Legio rules. I've tried looking through the various Legio rules but it just kinda becomes white noise after a few and I never get anywhere. Dragonlover That’s an interesting question, particularly with the mix of titans that you’ve got. There aren’t usually warlords in a Venator maniple, but you can add them if you want. To do that, the best option is to be a splinter of Legio Fortidas. Doing that would lock you into being a traitor legio. This allows you to replace the reaver in a Venator maniple with a warlord and, (unlike other abilities letting you switch titans in maniples) to still benefit from the reaver’s opportunistic strike rule from the venator maniple. Or of course you could just run your Venator maniples with reavers. Noting much wrong with that. And you could just play Fortidas rather than using some of their rules if you wanted, and then you could be a loyalist. I’m not too sure what other traits you’d want. Elite magos is great for Warhounds as it helps keep them alive and limit overheats. I guess you could go nuts with something like Fury of the Fallen for a warhound – particularly a damaged one. It might in theory remove shields from two titans, or maybe it could strip them, and then fire on the target’s armour while the warlord joins in. The Gunnery and Motive mastery traits could be handy to help you get orders off, with the warhounds’ non-awesome command stat. I hope this is helpful. I haven’t used the DIY Legio rules myself. I’m not really a fan of how they let you make a better version of one of the existing Legios in this way. But then none of the Legios are really balanced so maybe it isn’t important. Dragonlover 1 Back to top Link to comment Share on other sites More sharing options...


Recommended Posts
Create an account or sign in to comment
You need to be a member in order to leave a comment
Create an account
Sign up for a new account in our community. It's easy!
Register a new accountSign in
Already have an account? Sign in here.
Sign In Now